22
This is a collaborative post. All opinions are my own.
To DIY or to hire out? It's a question that every homeowner runs into, and the answer is often not clear. Many homeowners start down the path of DIY home improvement for one major reason: money. Hiring skilled contractors and specialists is expensive, as anyone who has gotten a quote for a house project quickly realizes. You may be great at shopping sales and finding deals on Craigslist, but there's not much you can do to reduce the cost of labor. And labor is often more than half the cost of a project. Sometimes, it's unavoidable. We just replaced our water heater and it wasn't something we wanted to risk doing ourselves. But sometimes, being willing to invest a bit of time in improving your DIY skills can pay off big time. And hey, you might enjoy the work and it could turn into an extra source of income down the road. You'll never know what your niche may be until you take a chance on trying something.
Why DIY?
When you run into a problem you need to fix or an improvement you'd like to make, it’s easy to reach for the phone and dial the first builder or repair specialist that you find. This is usually the simplest way to get something done, but tackling it on your own may be a better option. There's the money-saving aspect, of course. But there are other benefits too. You'll gain some valuable expertise, you'll be able to carry out your exact vision without risk of miscommunication, you can work on your own schedule instead of waiting for a contractor to be available, you'll be motivated to do a high quality job as opposed to an outsider who might rush to earn a payday, and you'll have the satisfaction of seeing your own hard work come to fruition. And the money you save isn't just a one-time thing. For instance, if you master tiling in one room, then every time you have a tile project, you won't have to outsource the labor. That can save you money again and again, which you can use for better quality materials and tools, or simply keep in the bank. That said, there are certain projects that may NOT be worth attempting yourself. If a project would require expensive tools that you won't have a continuing use for, if messing up could be disastrous or dangerous, if you're simply not interested in learning this particular skill, if DIY would take way longer than hiring a professional, or if doing the work would be a stress on your marriage...those are all good reasons to suck it up and pay the cost of hiring a professional. No matter what, I think it's worth getting quotes, looking up tutorials for how to do it yourself, then weighing the two options. To DIY or to hire? The "right" answer will be different for every project, and every person.
Do Your Research
If you’re a complete novice when it comes to DIY house projects, do some research online and find a format of instruction that works for your learning style. Step-by-step guides and how-to videos can be found in abundance on the internet. If you have questions, visit some forums to get extra advice that's specific to your project, and connect other DIY enthusiasts.
Utilize Local Expertise
When you head out to buy materials, take the opportunity to ask employees in the store if you have any questions regarding your project. You can usually ask for advice for anything from laying tiles and flooring to building your own shed from scratch, so just head to the right section and get chatting!
Attend a Workshop
A good way to really build your skills is to look for workshops near you. Ranging from woodwork to upholstery, to plumbing and painting, these are a great way to learn the basics with the help of a vetted industry expert. They can also be a great place to meet other like minded individuals. Even very niche workshops are available, and they're a great way for kinetic learners to get the opportunity to practice in a guided environment.
Get Professionally Qualified
If your passion and confidence grew after attending a few workshops and you want to get more serious, you might consider getting a professional qualification. Not only could this lead to future employment or a lucrative side hustle, but it will give you some recognition for all your hard work and dedication. Many colleges provide courses in practical fields, which will allow you to learn more and be tested and scored. And if your life is too busy to attend physical classes, you can still gain an associate of arts online.
Open Your Own Business
If you're ready to take your passion and skills beyond your own home, consider opening a business and earning some profit from your hard work. It takes a lot of hard work and dedication to run your own company, but it can also be extremely rewarding and fulfilling to be your own boss. Consider a few key questions: who are your current competitors? What rate are you looking to earn? Would you like to work independently or employ other staff? and so forth. Making a plan will be key to your success.
Pass it On
If you've reached some level of mastery, think about how you can pass that knowledge on to other budding DIY enthusiasts. Maybe you'll run your own workshop, or teach a course at your local college. Maybe you'll hire an employee who is excited to learn from you. Or you can do a skill swap with an expert in another field. For example, a painter might offer to paint the home of a web designer, in exchange for the creation of a professional website.
DIY is something you can take as far as you want. You can simply use it to save some money on your own house projects, or you can turn it into a career if you so choose. You'll never know unless you start.

21
I can't believe it's already the end of May, which means I only have one more month to get everything ready for our phase one kitchen remodel! We're keeping a lot of our existing kitchen, but it's still the biggest project we've ever tackled, and it's alll new territory. We've never knocked down a wall, built a kitchen island, or done any work to a kitchen at all. So we're nervous and a little bit overwhelmed! Did I mention we only have one month to get it all done? We're starting the last weekend of June and our goal is to have everything done by the end of July. Aaaahh!!! In the meantime, we've been getting all our ducks in a row, and we finally have a plan that we both feel good about! The last time I wrote about this, I was trying to decide what to do with our oak cabinets. Keep them, paint them, or tear them out and start fresh? Ideally I would have loved to start fresh, but I knew that would trigger needing new counters, which would add several thousands of dollars. Painting turned out to be quite expensive and we didn't want to DIY. So we decided to keep the oak. Our goal for this phase one update is to get the wall torn down and the open layout we want, while spending as little money as possible. That means the lower cabinets are staying as-is, with a little bit of rearranging. We both felt good about that, but we could NOT figure out how to rearrange the upper cabinets. Long story short, no matter what there would've been some weird gaps and it would've looked janky. At first, I thought open shelves were the obvious solution, but Ben really did not want them. Sooo, our plan is...
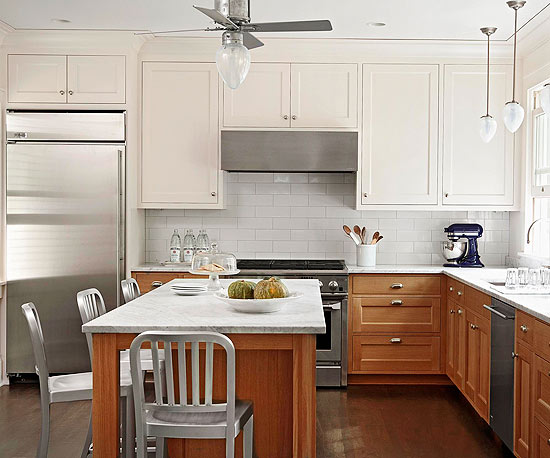
Inspiration photo via Better Homes & Gardens
A two-tone kitchen! We'll have oak lower cabinets and white upper cabinets. But instead of painting the uppers like I originally thought, we are getting NEW white upper cabinets that will match the island and the pantry cabinets. That way, we can order exactly what we need to make it fits just right without any weird gaps. I think it's going to be great! Eventually, we will update the lower cabinets to the same white cabinets so the whole kitchen will match. In the meantime...it's not going to be as pretty as the photo above. We won't have a backsplash, and we'll still be rocking our laminate counters. But it'll look okay (or oak-ay haha) and it'll allow us to get the layout we want without going over budget. It's a perfect short-term solution.
...and by short-term, I mean a few years. I had one person suggest to me that we take out a loan or a line of credit so we can get the whole kitchen done now, rather than stretching it out into two phases. Trust me, I'm tempted by that. I can even see the reason in it--doing everything in one fell swoop ensures that all the cabinets match perfectly. There's a risk that if we wait, the ones we choose will be discontinued or will change slightly. But we are very determined to only pay cash for home improvements, even if it means we can't do everything we want to, when we want to. So this phase one kitchen won't be my DREAM kitchen (yet). It won't be all over Pinterest. You might not be very impressed by the before & afters. But it WILL be on budget. At least, I hope so!!
20
This is a collaborative post. All opinions are my own.
Do you ever look around your home and wish you could start decorating all over again? Maybe you once loved the shabby chic antique style, but your taste has changed. Or maybe you have a lot of sentimental pieces you've accumulated, but you know they just don't "go" together. Or maybe you went all in with the Scandinavian look and painted your walls and furniture white, but you find you're missing color. Many homeowners fall out of love with their interior style and don’t know how to move on. It's hard enough to find things that you like to begin with, but it's extra painful to get rid of something you once loved and spent good money on. It's also expensive to try and change the entire look of your house. But to make changes to your home's interior style, you don't have to start completely from scratch. A few important changes can make a big difference.
1. Take stock of what you already have
Most home decor styles have some overlap, and your tastes probably haven't done a complete 180. So look around and see what items you own that still fit with the new vibe you're trying to create. Quality wood furniture, neutral vases, beautiful mirrors, and green plants are pretty universal in my opinion. Don't forget that it's ok to mix and match styles too. Just because you're trying to inject more of a modern look into your home, doesn't mean that a traditional chandelier, an antique credenza, or some Beautiful Unique Candles made out of crystal can't still look great. You're not trying to be a museum and accurately replicate a period style. You're trying to decorate a home, with a mix of items that speak to you. So be honest with yourself and ask if YOU still love each individual item. If you do, you can make it work. Your particular style will be the "glue" that ties everything together.
2. Make a grand change
Small items will only make small, subtle changes. If you really want to go all in with a new style, you'll have to make a grand change: something immediately noticeable that takes up a good amount of space in your home. It's nerve-wracking to make a big change like this, but you'll never get the effect you're seeking with tiny little items. So be brave! A new rug, new curtains, new furniture, new bedding, or a new wall color will all make a significant difference in the look of a room. But grand changes often come with grand prices, so consider if there are ways you can DIY to get the cost down, such as painting the walls yourself instead of hiring it out, or even creating your own curtains. Making a grand change to your color scheme and style will immediately get your home feeling fresh and new.
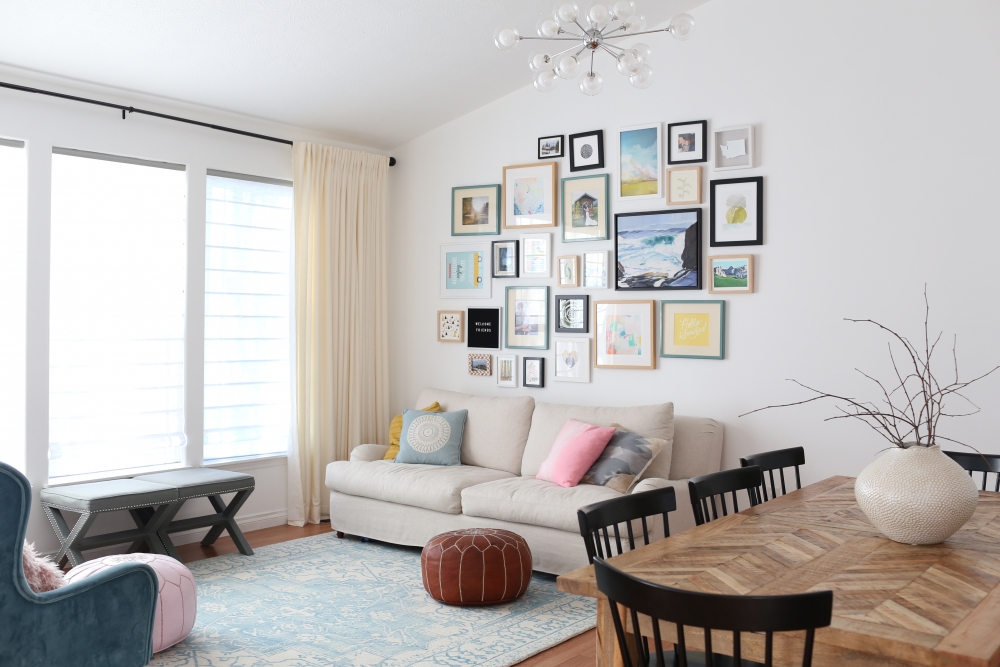
3. Art, pillows, and textiles
One of the best ways to make a difference in your home's interior style is with art, pillows, and textiles. Your possibilities are pretty much endless when it comes to color and pattern, and these can make a big difference in how your home feels overall. If your home is kind of boring traditional and you'd like to inject some edge into it, switch out generic art for something a little quirky and different. If you're home is full of bright colors and you want to tone it down, find some monochrome interior pieces that you love. Or if you have a bunch of floral farmhouse style pillows and you want more of a midcentury modern look, switch them out for graphic patterns and solid colors. In the bathroom, it can be kind of defeating if you've already completed an expensive remodel only to find that it's not quite your style a few years later. Luckily, there may be no need to change the permanent fixtures like the tile and vanity. New towels, a new shower curtain, and a patterned bathroom mat completely change the look without breaking your monthly budget.
If your interior design style has changed and you no longer love the look of your home, know that you’re not in that boat alone. Many homeowners don’t like the decor and wall colors that they once picked out, but don’t know how to begin again. You can force yourself to keep living with choices you made a long time ago, or you can find ways to work with what you have and inject your new style into your home. I think it's important to love where you live (after all, you spend so much of time there!), so I believe it's worth making updates as your style changes, even if it does cost more than keeping things as they already are. How do you feel about it?
10
This is a collaborative post. All opinions are my own.
Back when we were renters, we owned very few tools. Like really, I think all we had was a drill, a hammer, and a hand saw. After becoming homeowners, as we've needed new tools for projects to improve our home, we've added a few more tools to the arsenal. I'll be the first to admit, we are not expert DIYers by any means. We really like dreaming of ideas, but actually doing the work is not something either of us truly enjoys. We're willing to get our hands dirty, and we'll sometimes tackle projects ourselves to save money, but we don't get that much personal satisfaction from it. The funny thing is, I used to create lots of DIY tutorials and I truly loved doing that, but they were mostly for very simple decor ideas. Power tools are intimidating to me, if for no other reason than that they're expensive. I'm always hesitant to drop hundreds of dollars on tools for a specific project...especially when we're trying to keep the budget low. But trying to be cheap isn't usually a good thing when it comes to DIY home projects, as we've realized from experience. Trying to be "creative" and use what we have, leads to frustration and results that don't look as professional as they would've if we'd only been willing to spend the money for the right tool. I know that there are a number of tools like this, that definitely would pay off over time and make our projects easier, more efficient, and more high-quality. So I've been wanting to cultivate a collection of DIY-related tools and equipment, which would serve as a baseline. It would be our inventory to draw from time and time again, making future projects smoother, less expensive, and more convenient.
Basic essentials
- Paint brushes. Investing in high-quality brushes is a must for any DIY collection. It’s well worth reading through this guide to buying paint brushes and then investing in a few brushes that you can turn to time and again for various tasks.
- Roller handles and heads. Similar to above, a plentiful supply of different sized rollers handles and heads will always be a useful inclusion in any DIY collection.
- Painter's tape. Painter's masking tape is both a great way of protecting surfaces and ensuring a clean finish. It’s worth spending a little more to guarantee reliable quality.
- Duct tape. We all know how useful duct tape is on a variety of different projects.
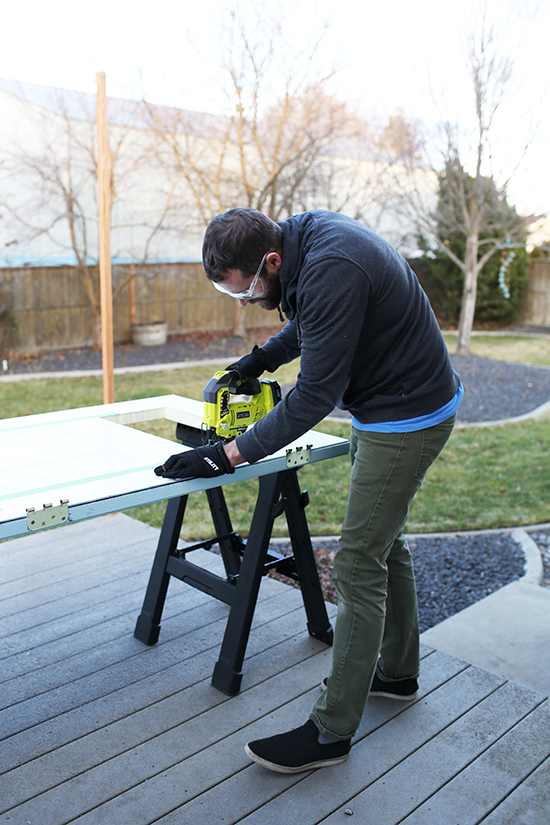
Power tools
- A sander. This is the next one on my list. Sanding can be done by hand, but it’s a time-consuming process that produces variable results - so investing in a powered sander is usually the best choice for any committed DIYer. It’s also important to remember to keep a stock of replacement heads for the sander you choose, too; you can usually find generic versions that are a little more affordable than brand-name products while working just as well.
- A jigsaw. There are numerous types of saws available, but jigsaws are a decent all-rounder with a relatively low purchase price. It’s usually best to choose cordless units if you can, as these offer extra maneuverability.
- A nail gun (and air compressor). Nail guns can significantly improve speed of construction, making them a perfect choice for anyone interested in moderate-to-complex DIY tasks. In addition to purchasing the nail gun itself, you will most likely need to buy an air compressor to power the unit; this air compressor overview is a great place to start in this regard, and should allow you to find the right unit for your chosen nail gun.
- An electric screwdriver. Projects can be greatly slowed down if you are pausing to manually screw, or unscrew, components; switch to an electric screwdriver to avoid these lengthy delays and thus complete projects in the shortest possible time.
Cleaning equipment
- A sweeping brush. Countless DIY tasks will produce dust and debris, so investing in a stiff, reliable sweeping brush is a choice no DIYer will ever regret. Look for poles that allow you to replace the brush head.
- Trash bags. DIY projects tend to generate a lot of trash, so a supply of strong trash bags is a must. Try to keep these bags separate from your general-use trash bags too, so you can always be sure you’ll have at least one roll available when needed.
- A mop. When you’ve been decorating a room, the chances are that you’ll need to thoroughly clean the floor afterward, so a high-quality mop - that you don’t use for general chores - is definitely beneficial. You’ll also need to look for cleaning fluid, or consider making your own floor cleaner using this recipe.
- White spirit. Also known as mineral turpentine, this liquid can allow you to clean paint brushes and preserve them for future use, so keep a few bottles in a cool, dry area to be used as required.
Safety equipment
- Safety goggles. Safety goggles are essential for the majority of DIY projects, but many pairs are outright uncomfortable to wear, or continually fall down when in use. Take the time to find a pair that stay in place, are well-made, and feel comfortable even during extended periods of use.
- A hard hat. Hard hats are most commonly seen on construction sites, but if you undertake a project where there is any risk of items or debris falling from above - repairing a ceiling, for example - then the extra protection a hard hat can offer is definitely worth having.
- Heavy duty gloves. There are numerous different types of safety gloves available, and purchasing a decent pair of each type can greatly bolster your DIY collection. Ideally, your gloves should offer protection without completely drowning your hands and making it difficult to work; it’s worth order a few different sizes, try them on, and then send back the ones that are too large.
- Wound cleaner and bandages. Cuts and grazes are relatively common during DIY projects, so always having wound cleaner on hand can help to prevent infection and adhesive bandages to dress the wound is always a good choice.
Building a collection for the first time is a bit of an upfront expense, but I believe it'll be hugely beneficial. It will pay off down the road in saving money and time, ensuring that you will always have the essential core items required to complete a variety of DIY tasks on hand. Of course, disposable items such as painter's tape, cleaning fluids, paintbrushes, and so on, will still need to be replenished when they are used...but still, I think it's a worthwhile exercise!
- Search
- Archives
