30
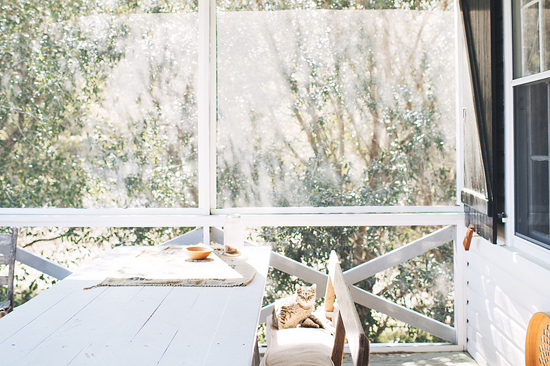
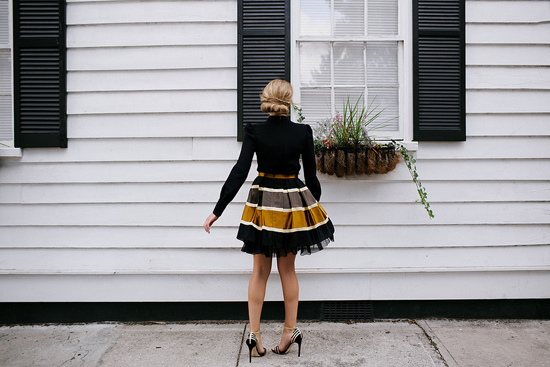
How was your August?? Mine was lovely. It was full of sun and relaxing times with friends and family...nothing major, but lots of fun little moments. Here are some snippets caught by my iPhone. I've been trying not to spend too much time on my phone when I'm out with friends or spending time with Ben (did you see this video I posted on Facebook?). I think it's fun to share snapshots on Instagram and I love seeing what people are up to...but it's kind of sad if people aren't really living in the moment because they're so busy documenting it, you know what I mean? So I'm trying to find the right balance. Speaking of the right balance and spending time with the ones you love, I'm SO excited for a three day weekend! I'm planning to take Monday off from the blog so I can really relax and hang out with Ben. We've both been working really hard, so it's going to be so nice to have an extra day to sleep in and spend time together.
But back to my August Instagrams:

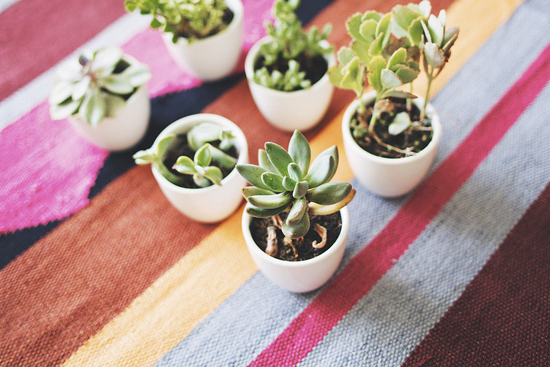
Loved this idea (spotted at a local home & garden store): make a hanging planter from a metal cake pan and some mesh // Blueberry picking in Snohomish, Washington // Working on a project for my gallery wall // We love getting donuts on Saturdays; old fashioneds are my fave. Our local Edmonds bakery makes the best, seriously. We had them at our wedding! // My first time to Hobby Lobby (it just came to Seattle within the last year, I think). I loved it! And I got a rose from Ben // A taco date. Cheap and delicious food at it's finest.
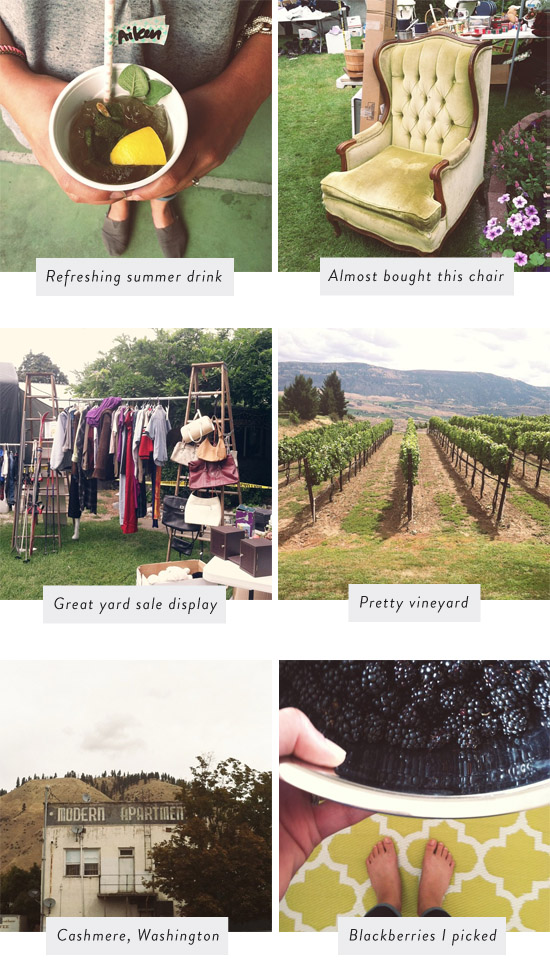
A refreshing summer drink made by my friend Renae // A darling chair I almost bought at a garage sale // A great set-up at that same garage sale. Don't you think it's smart to put a pipe between two ladders? Not just for a yard sale, but even in your bedroom as an exposed closet--am I crazy? I think it would be cute! // A pretty vineyard in Wenatchee. There's something about rows of fruit that is just so photogenic! // We went to the Aplets & Cotlets factory in Cashmere, WA. I thought this building right next to it was so ironic: the "modern" apartments. // Blackberries grow in abundance in this area around August and September...so I picked a few last weekend. I'm hoping to get a lot more before they're out of season!
How about you? Any fun plans for the long weekend? I'll see you here Tuesday! And in the meantime, if you'd like to follow me on Instagram, I'm @athomeinlove.

26
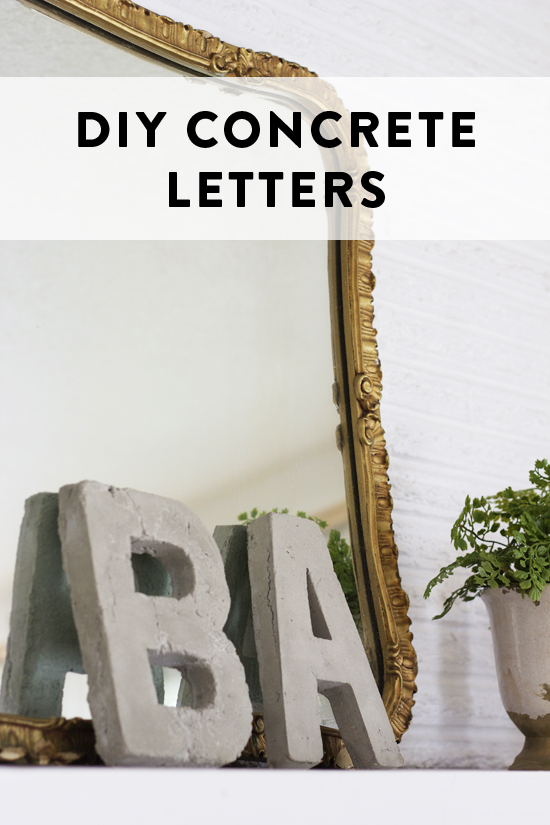
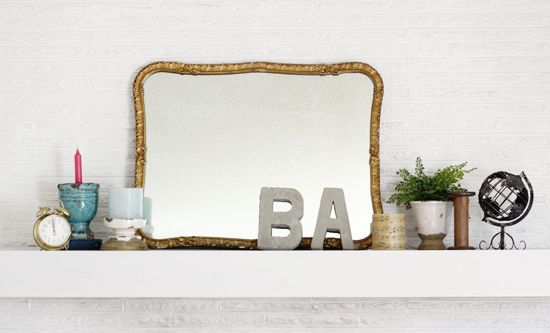
While I was working on the concrete magnets that I shared last week, I also busted out a few other concrete projects. One of them was these DIY concrete letters! I've had the B and A letters that I used as molds for a long time--you can get them at most craft stores for about $3. We had ours on the mantel for awhile, but I was never really in love with the way they looked. So when I came across this tutorial, using those same cardboard letters to make concrete versions, I knew that would be the perfect way to upgrade them!
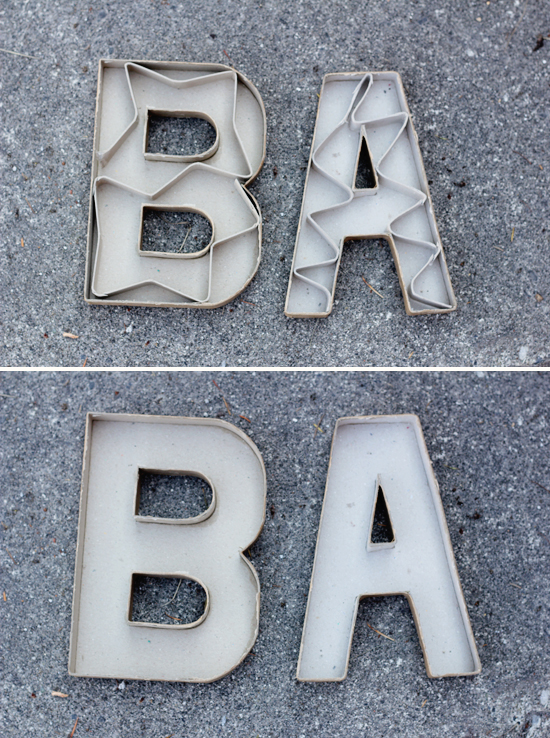
The instructions are really so simple. Use a box cutter to remove the bottom of each letter. If it's symmetrical, then it doesn't matter, but if you have an F or something, you'll want to be sure that you're removing the side you don't want to face out. There will be an accordion folded strip of cardboard inside--take that out.
Mix the cement according to the directions on the package, then scoop it into your letters. We put some tinfoil underneath them, because this part is a bit messy. Pick your letter up and gently drop it a couple times or shake it around to make sure the cement reaches every corner.
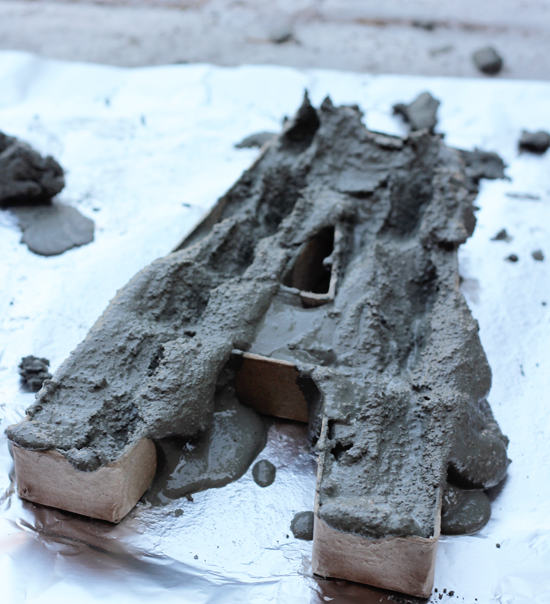
Smooth out the cement and wipe away any areas with cement spilling over the sides. Now, wait for the cement to fully dry and harden (following the directions on the package). Be patient! When it's fully set, peel away the cardboard mold and discard it.
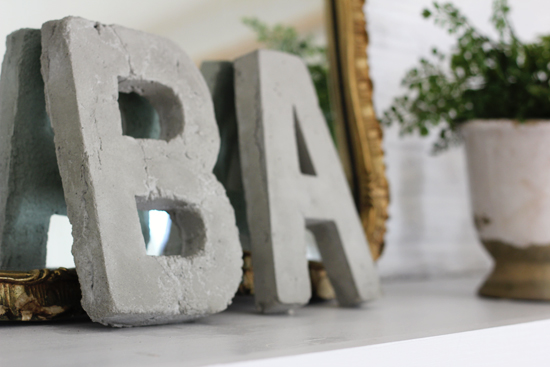
That's it! Isn't that easy? I love how these turned out. The B is a little rough because we had already made all the magnets and the A, so the cement was already starting to set up a little by the time we got to it. The funny thing is, I actually really like how it looks messy and rustic! So if you want a rougher look, mix your cement to be a little thicker. If you prefer a smoother finish, make it a little more runny and use it right away.
Craft stores also sell cardboard numbers, if you'd prefer (table numbers for your wedding, perhaps?). My sister-in-law Ellen made some using this same method--see her tutorial here.
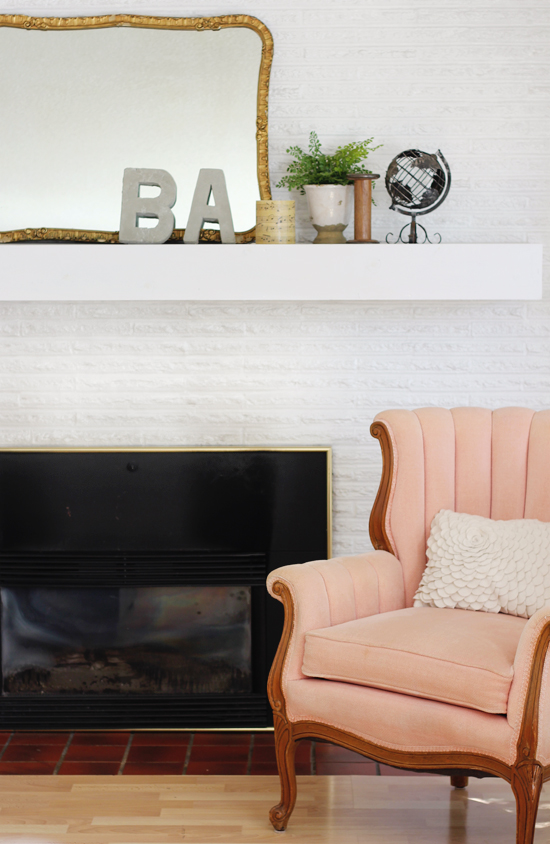
What do you think of my concrete letters? They remind me of the zinc letters that Anthropologie sells, but a little more unique and a lot less expensive!
By the way, if you've ever wondered what the difference between cement and concrete is, I found out for you (because I was curious too): Cement is the powdery substance that comes in the bag. When you mix it with water and aggregate and let it set, it hardens into concrete. So there you go!
Have you tried a cement/concrete project yet? It's really such an easy material to work with, not to mention inexpensive. You should try it!
23
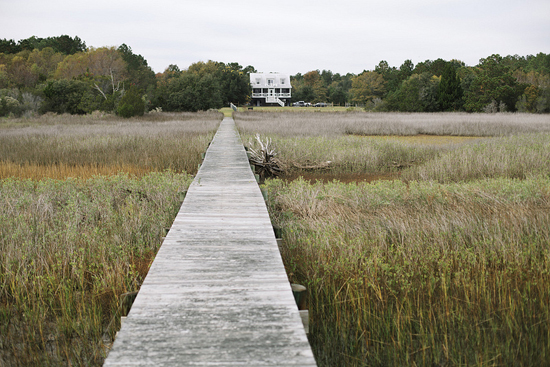
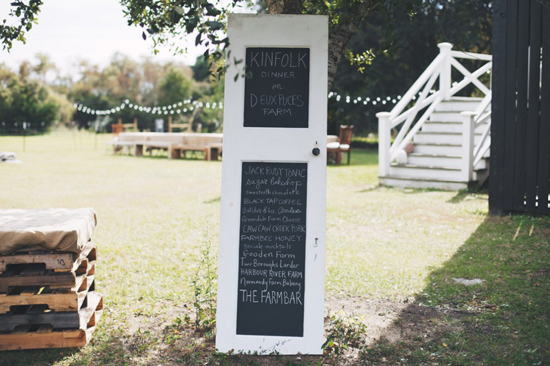
Since we're in the middle of planning our trip to the South, I thought it would be appropriate to highlight an inspiring creative from the city I'm most excited to see--Charleston! Olivia Rae James is a super talented photographer who does work for Kinfolk, Matchbook Magazine, and The Glitter Guide, to name a few. Her images take me to a dream land where I live in a white farmhouse with black shutters and enjoy an endless summer full of outdoor dinner parties, delicious homemade food, and perfect weather. Too much to ask?


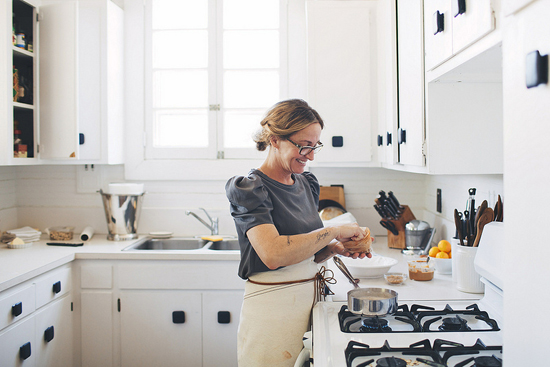
I love this kitchen! The white cabinets with the square black knobs are fantastic.
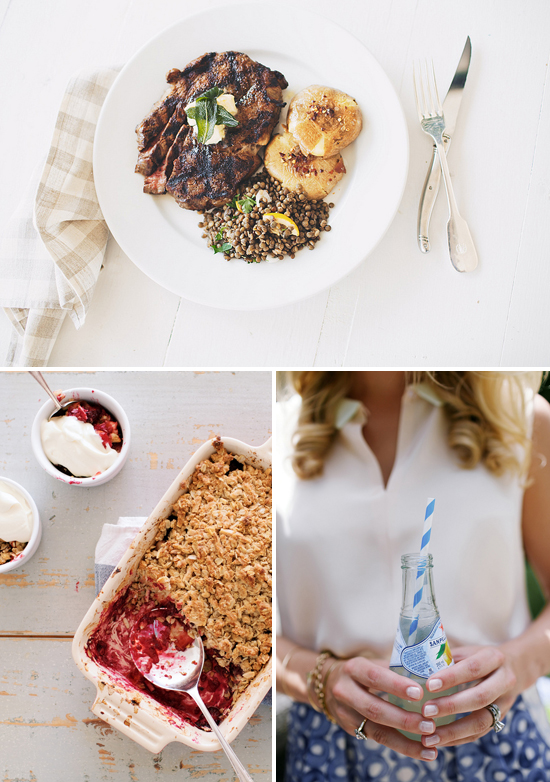
I think the best meals are often the simplest: grilled steak and potatoes, with berry cobbler for dessert. So perfectly summery and delicious!

One day, I definitely want to have a big piece of property where I can string up globe lights and host family style dinner parties on long tables. I mean really, how dreamy is this?
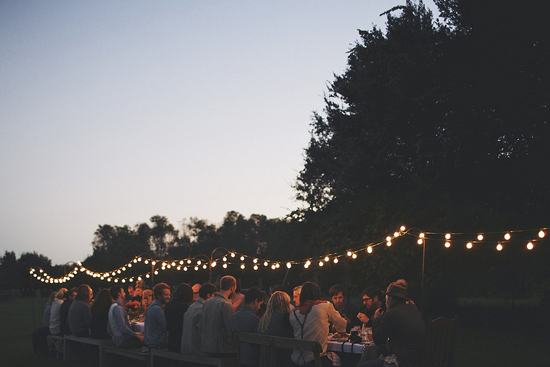
Aren't these images charming? I think Olivia captures things with a simplicity and honesty that is really appealing and ultimately, even more beautiful than something staged. I'm sure many of these photos were styled, but they don't look forced. They feel like they could be someone's real life (albeit quite a charmed one): warm, casual, relaxed, and full of love.
Do you have a favorite out of these photos?
See more of Olivia's swoon-worthy work here.
22
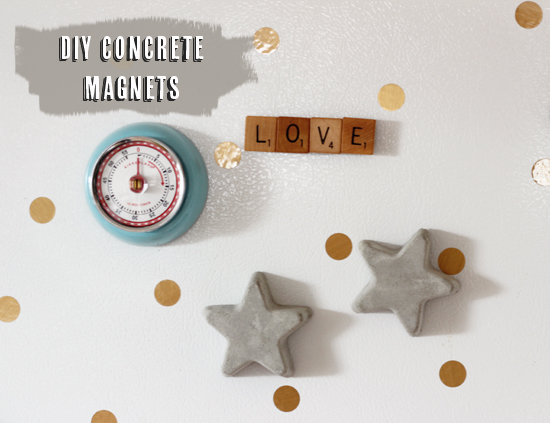
Thank you all for your suggestions on my post yesterday, and those of you who left comments on Instagram. I'm getting so excited for our Southern road trip! Please keep leaving me suggestions if you think of them--I read every comment you all write. Today, I wanted to share a DIY project that I recently did: concrete magnets! This is a very easy project that has so much potential. Silicone ice cube trays and molds come in tons of fun shapes, so you could do hearts or letters, or whatever you like! I think they'd make great gifts--put a few in a box with a note that says: "you're a star!" or "you make me starry-eyed."
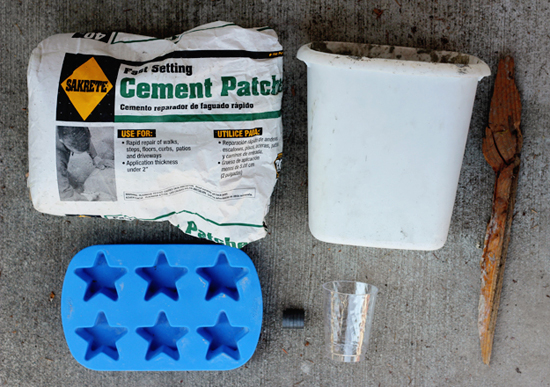
The supplies: a silicone ice cube tray, magnets, concrete mix, a bucket or container to mix the concrete in, a stick for stirring, and a cup to scoop the concrete with.
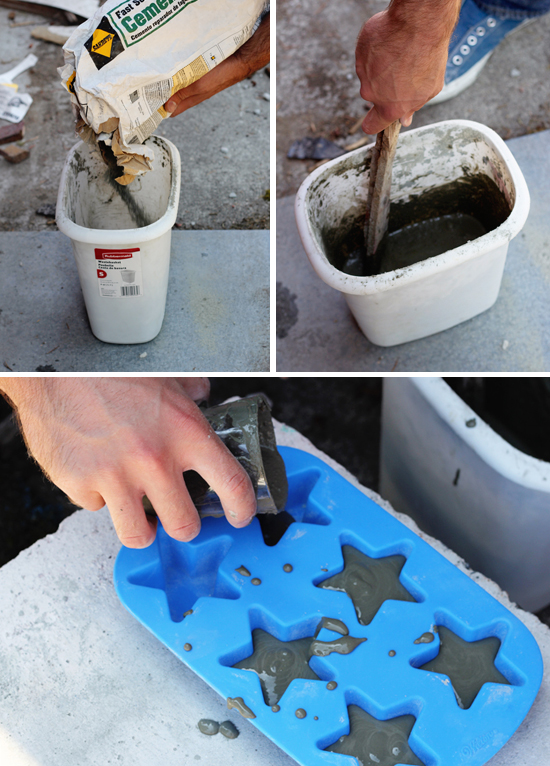
Mix the cement according to the directions on the package. Start by putting a couple inches of water in the bottom of your bucket, then pour in the cement mix til it reaches the consistency of pancake batter. Scoop the cement out and fill each compartment of the silicone mold about half full (or however thick you want your finished magnets to be). Pick up the mold and set it down again a couple times to make sure the cement has reached every corner.
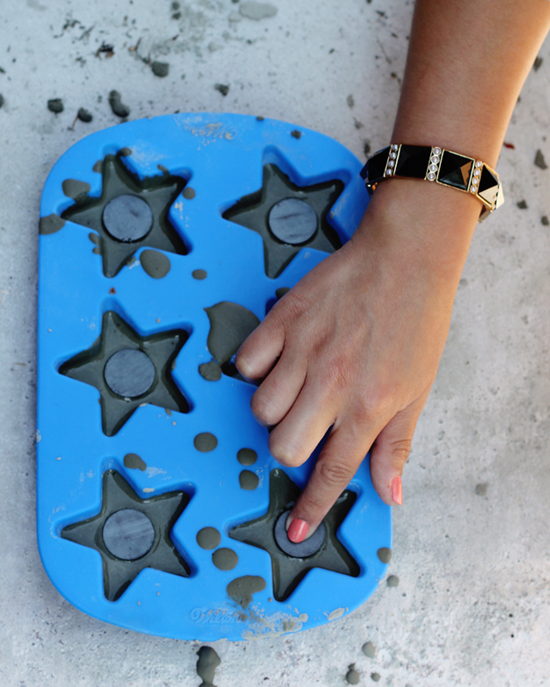
When the concrete has just started to set but is still pliable, push in the magnets, leaving just the very top of them poking out. Wait for the concrete to fully set, following the directions on the package. Or if you’re impatient (like me!), wait at least 8 hours.
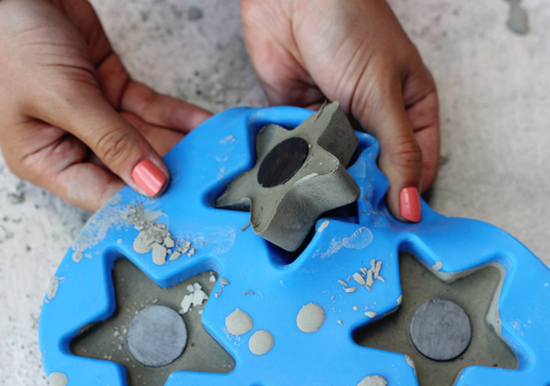
Pop the hardened magnets out of the silicone mold. They should come out really easily. You can sand the bottom edges to smooth them out a little if you’d like.
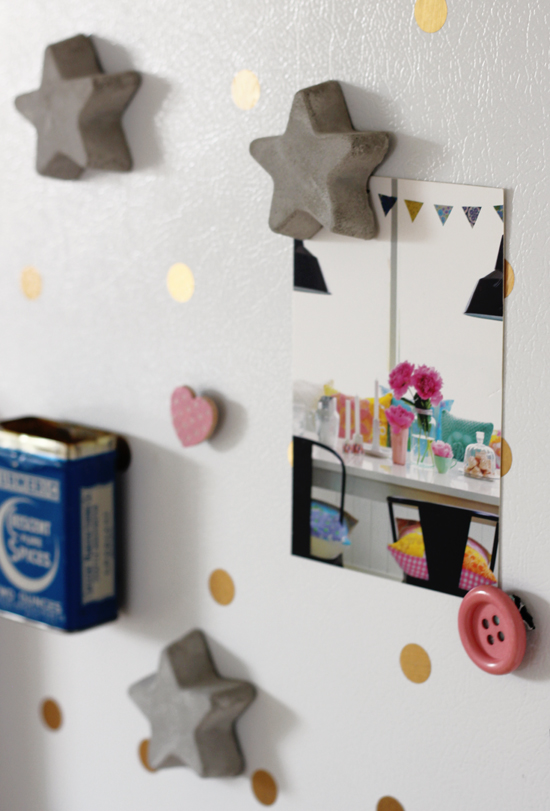
And that’s it! Stick them on your fridge, admire your handiwork, and dream of all the projects you could do with concrete + silicone molds.
P.S. I created this project for Buzzfeed. Check out their post here, with 22 inspiring concrete projects!
- Search
- Archives
