28
Hi all! I'm Gloria from Little White Whale, and I'm so excited to be guest blogging for Aileen while she's on her epic road trip!
Fall has always been my favorite season since I was a kid (although that might have had more to do with the fact that my birthday is in September), and that love has only grown over the years. It's such a calm period between the whirlwind of summer and the madness of the holidays, and there's nothing I love more than taking a walk through the brisk air with colorful leaves crunching underfoot. Here's my dream wishlist for celebrating autumn to the very fullest:
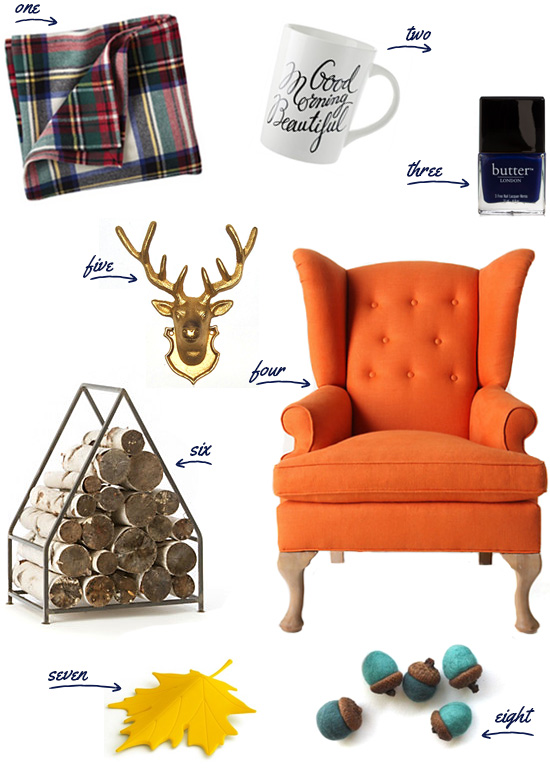
1. Snuggling under this classic plaid blanket on chilly nights.
2. Drinking endless amounts of hot chocolate and warm tea in this fabulous mug.
3. Looking seasonally chic in navy hued nails.
4. Obsessing over all things orange, like this stately wingback chair (swoon).
5. Hanging jewelry off the antlers of this gilded deer wall hanging.
6. Sitting by a crackling fire with this super chic log holder to keep the fun going.
7. Admiring the breathtaking fall foliage...indoors, with this whimsical leaf doorstop!
8. Filling up a bowl with adorable felted acorns for a simple fall centerpiece.

25
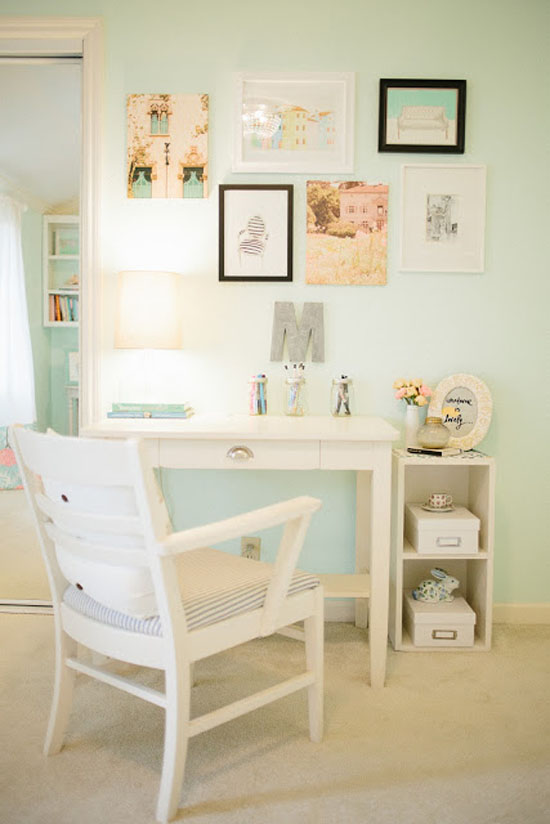
Last summer I redid my bedroom in a light mint/seafoam color, with accents of white, peach and hot pink. It's fresh, feminine, and has a touch of shabby chic; just my style. I was on a tight budget, so I did a few things to keep my wallet in check.
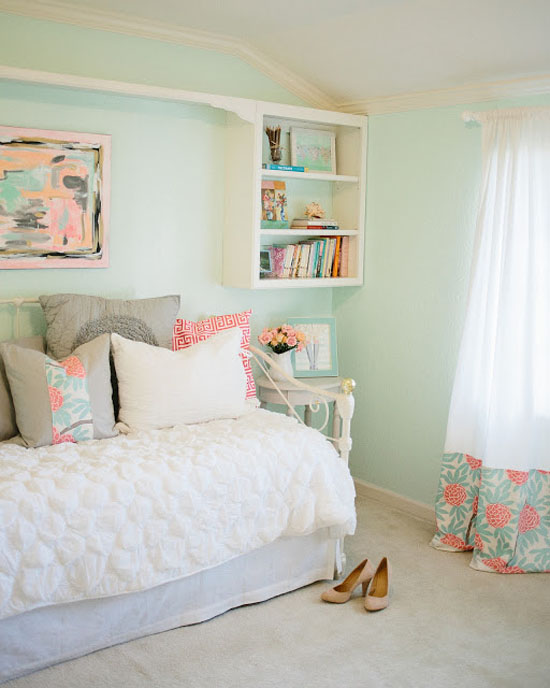
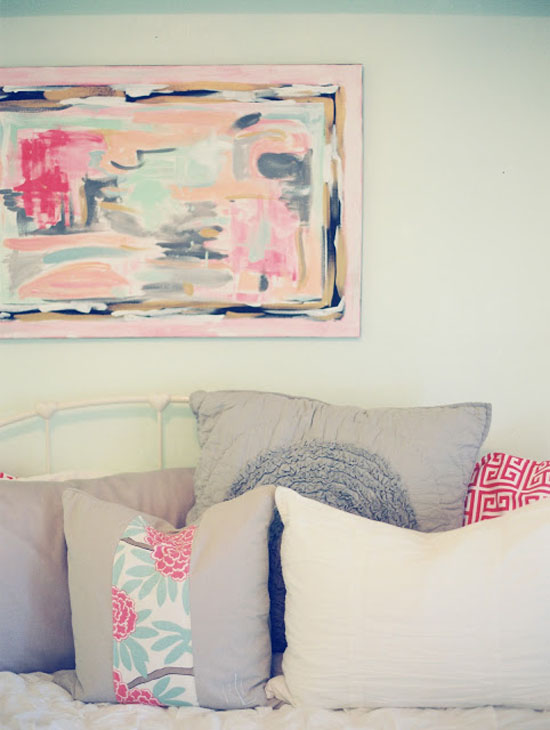
1. I created the abstract art myself by getting creative {and a little messy} with some pretty hues of pink and mint.
2. Instead of sewing the curtain panels entirely out of the beautiful patterned fabric you see at the bottom of the panel, I saved money by only using 18" of this fabric, paired with an inexpensive, simple cotton drape from West Elm.
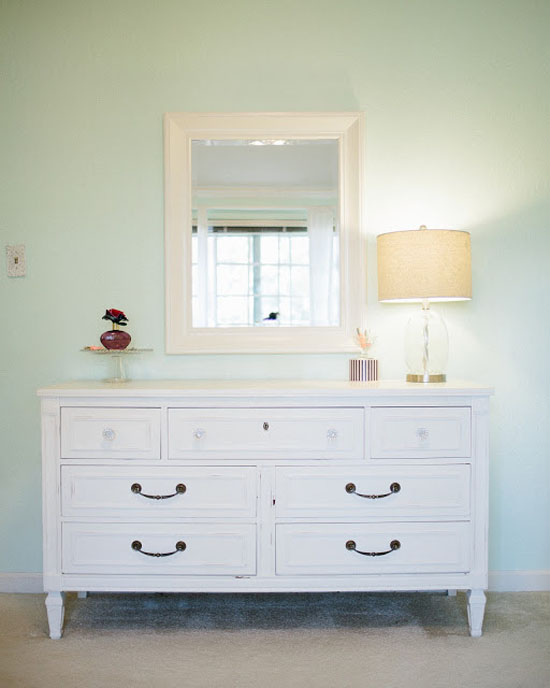
3. I found that white dresser at Goodwill for $70 and redid it so it fit with my style {and budget!}
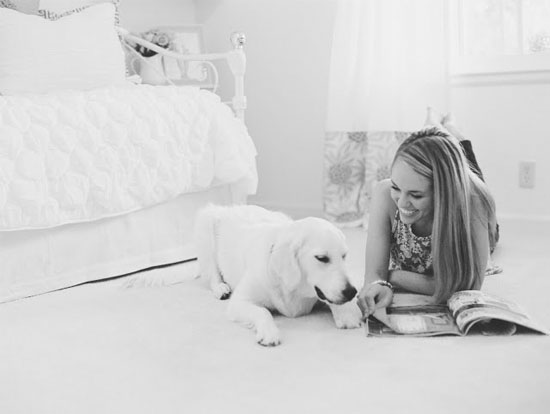
That girl up there is my adorable pup, Hope. Sometimes we like to read House Beautiful together. She's a good little assistant!
Hopefully these tips will help you when you design the next room in your home. For my whole room source list, you can visit this post here. What is your favorite spot in your home?
Thanks Aileen for having me today!
xoxo

24
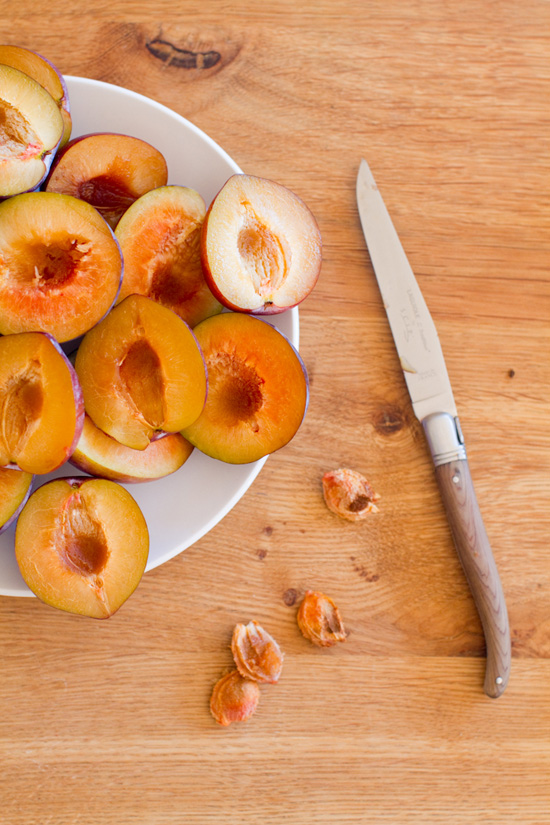
Hi, this is Audrey from This Little Street! Don't we all wish we were cruising the South with Aileen?! While she's having a blast sipping sweet tea and munching on fried chicken, I thought I'd share a little something delicious with you guys too. Now, this is ain't no Southern food, but since I'm French I thought I'd share the recipe to pretty much my favorite fall dessert: the caramelized upside-down plum tart. And to be honest, it's probably the best plum tart you'll ever have. Honest. It's sweet and a bit sour at the same time, and served with a bit of sweet cream it's the perfect fall dessert. This recipe is adapted from one of my favorite recipe books, "A passion for My Provence" by Lydie Marshall. I've been making this tart every fall since college - I crave it every time the air becomes crisp and boots come out. So, ready for the recipe?
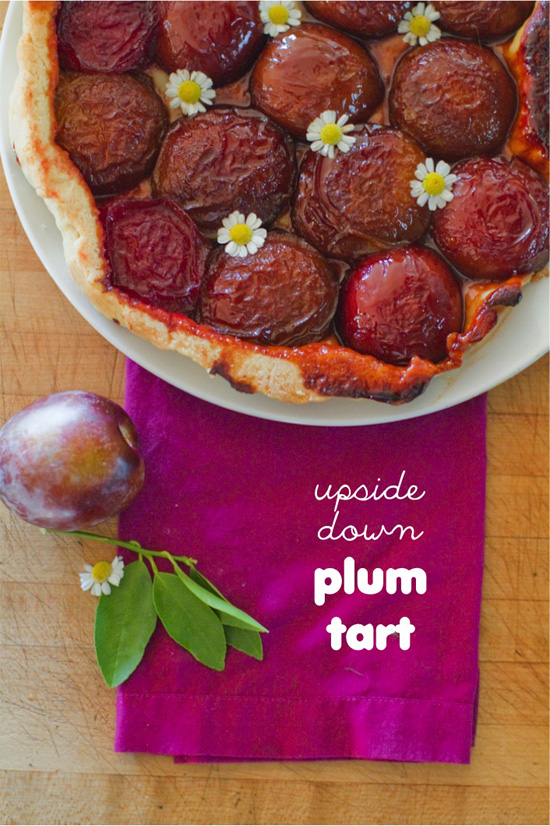
Caramelized upside-down plum tart
Ingredients for the short crust dough
8 tbsp (1 stick) butter
1 cup all-purpose flower
pinch of salt
2 to 3 tbsp cold water (depending on weather)
Ingredients for the filling
4 tbsp butter
1/2 cup sugar
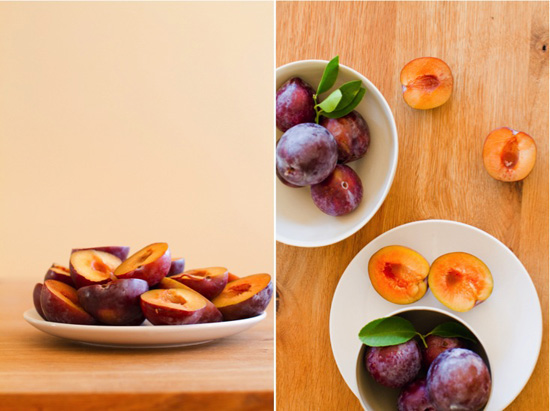
1 1/2 pounds plums (the dark ones work best for this recipe even though I used different one here)
1 tsp heavy cream
1 tsp sugar
Ingredients for the cream on the side
1 cup sour cream
2 tbsp sugar
Directions
1) Prepare your short crust dough
- cut the butter into smal pieces, and place in the freezer for 5 minutes (make it 10 if you're cooking in a room that's warm)
- Combine flour, salt and butter in the bowl of a food processor. Process for 10 seconds, add the water (2 tbsp in humid weather, 3 in dry weather). Process for another 10 seconds until the mixture looks like cornmeal.
- Put the content of the bowl on the table, and start working it with the heel of your hands, binding a small amount at a time, using a sliding motion to incorporate the butter and flour smoothly.
- gather the dough in a ball and flatten it. Wrap in wax paper and refrigerate for 15 minutes (or a bit longer if cooking in a room that's warm). You need to allow enough time for the butter to firm up.
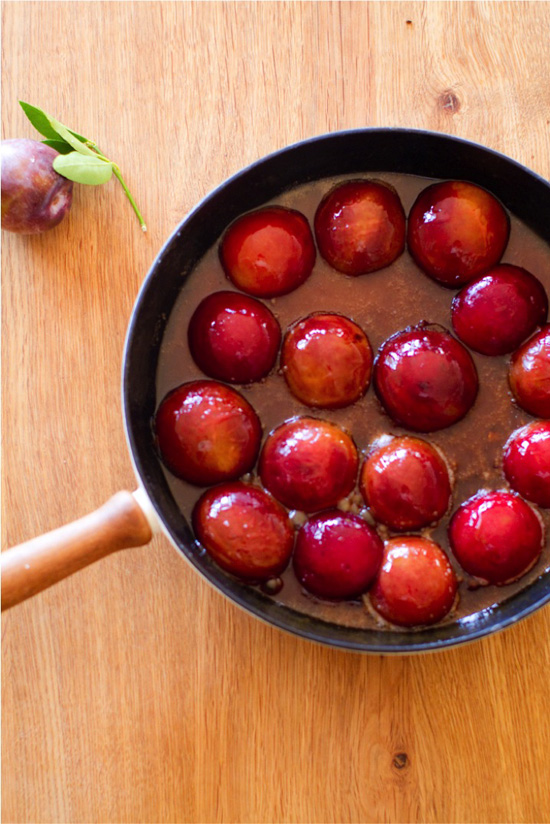
2) While the dough is cooling, start preparing the filling.
- In a 9-inch cast-iron or nonstick skillet, combine the butter, sugar, and plums. Caramelize the plums over high heat until the juices have thickened - about 20 minutes or so. PS: That's my very favorite part, when the juice from the plums start mixing with the butter/sugar, and your entire house starts smelling of plums :)
- Set the plums aside until the have cooled off.

3) Preheat oven to 425 degrees Fahrenheit's.
4) Roll out the dough to a 12-inch circle. Drape the dough over a rolling pin and flip it on the cooled plums with the dough hanging over the plums. If you caramelized the plums on the stove in a pan that can't go in the oven, no worries - just transfer the plums + juices in a non-stick 9-inch tart or cake pan, and drape the dough over them just the same....that's what I do :)
5) prick the dough with the tines of a fork and brush cream and sugar over it.
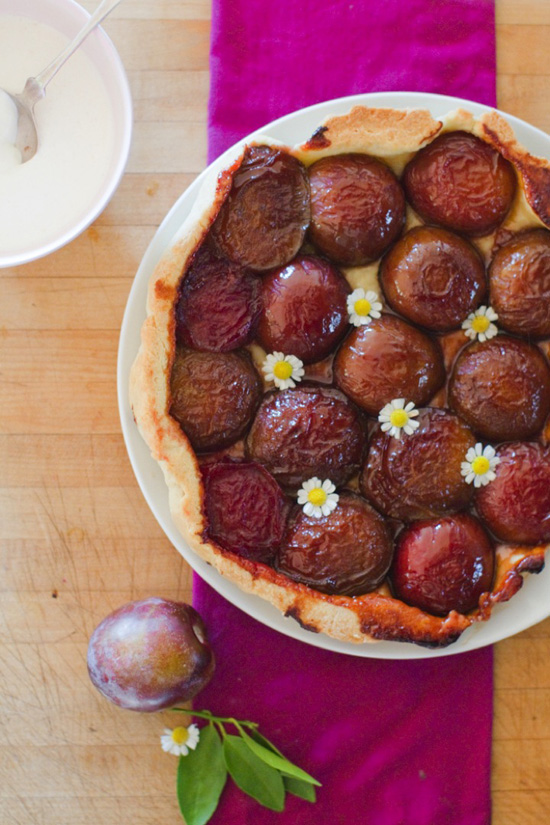
6) Bake the tart for 20 to 25 minutes or until the top is golden brown.
7) Unmold immediately on a serving dish. Eat warm or cold, served with the sour cream mixed with sugar.
22
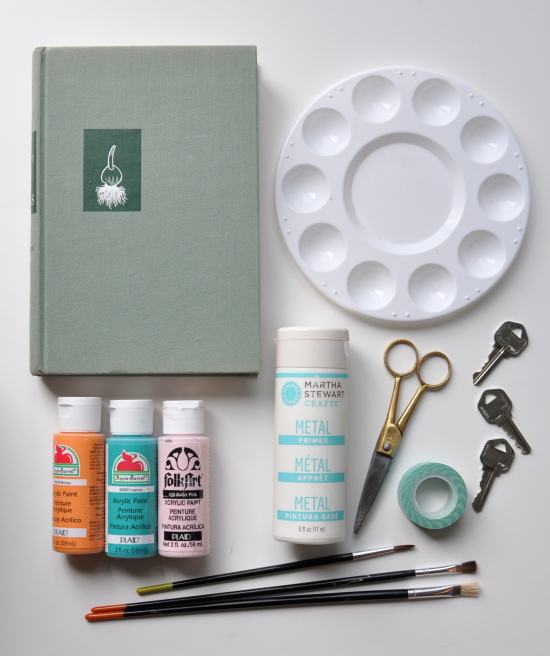
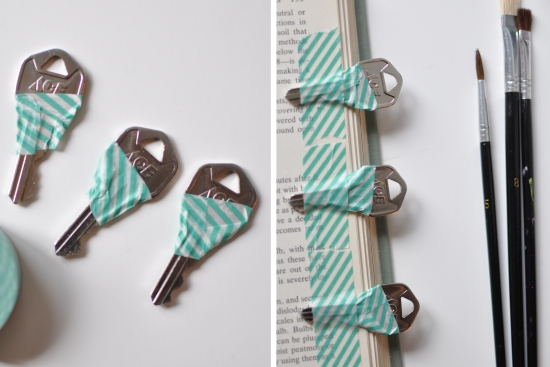
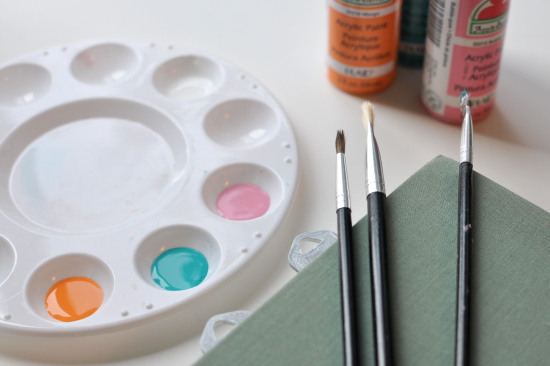
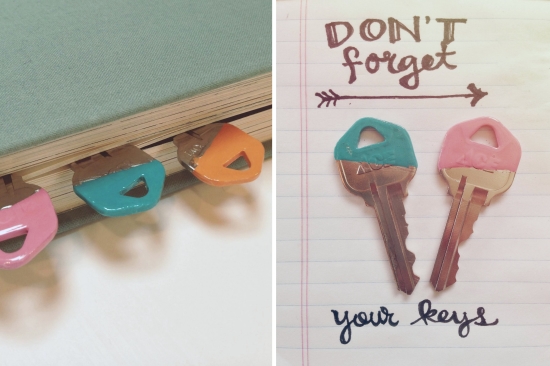
Hi, this is Renae from Leona Lane. I'm an ICU nurse by day (or sometimes night). In my spare time, I love making things, thrifting, baking and blogging about it all! I also love coffee, the changing seasons, anything vintage, cute cats, instagram, project life, long walks, pinterest, and people watching. I was born and raised in the Pacific Northwest and right now I'm calling Seattle home. I'm lucky to be living with my best friend (and husband) Joe and our cute (but crazy) cat Malcolm. I'm excited to be guest posting for At Home In Love today. I'm sharing a fun little DIY that I whipped up recently.

- Search
- Archives
