31
Since today is the last day of 2013 (whaaat?!), I thought I'd do a little recap of the most popular posts on At Home in Love this year! I looked up my top 10 posts by the most views and then I also picked my 10 favorites in a few of the categories that I write about most often. If you've read every single one of these posts, thank you for being such a loyal reader!!! I should bake you cookies or something. If you haven't seen them all, don't worry--I still love you--check them out now! Here they are, the best of 2013.
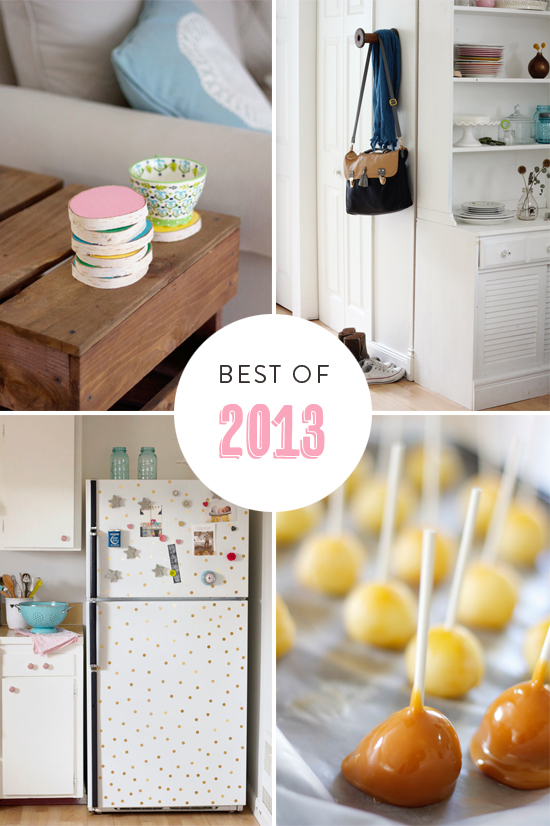
10 Most Popular by Views
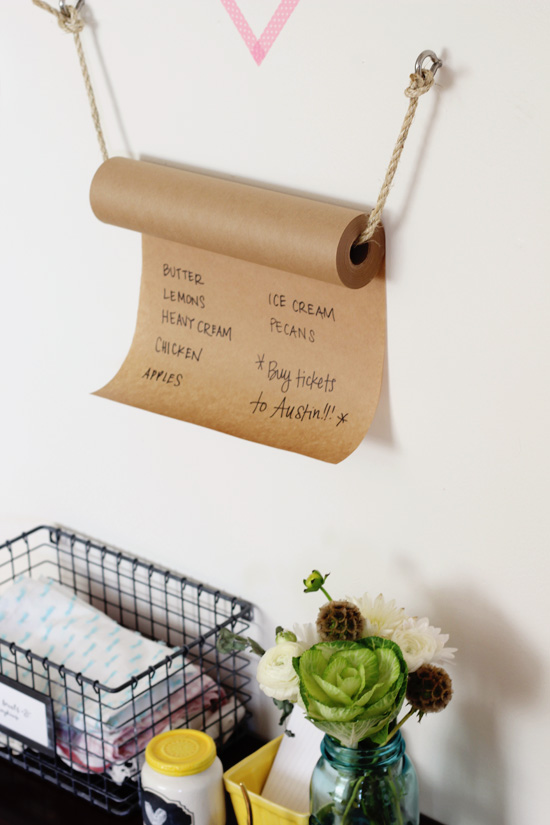
1. DIY Kraft Paper Grocery List
2. DIY Mini Caramel Apples
3. 10 Tips for Decorating a Rental
4. DIY Headboards
5. 15 Fabulous Free Fonts
6. 5 Creative Ways to Hang Artwork Without a Frame
7. DIY Polka Dot Fridge
8. DIY Splatter Paint Popsicle Stick Runner
9. DIY Shelves with Belt Straps
10. Wallpapered Fridges
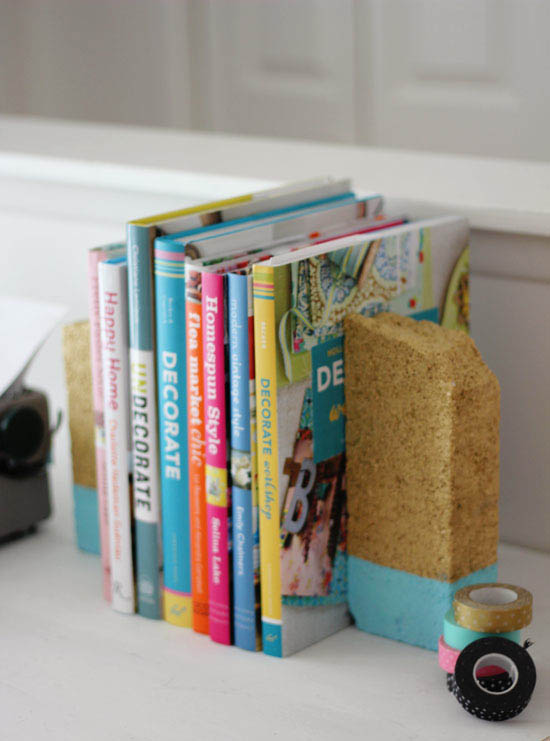
My 10 Favorite DIY Posts
1. Easy DIY: Dipped Brick Bookends
2. DIY Vintage Spool Wall Hook
3. Star Spangled Watermelon
4. Easy DIY: Wood Round Coasters
5. Creative DIY Drawer Pulls
6. DIY Drawer Knob Place Card Holders
7. DIY Concrete Magnets
8. Decorating with Nature
9. Easy DIYs are the Best
10. DIY Concrete Letters
My 10 Favorite House Tours
1. La Vie En Bleu: A Pretty Apartment in Paris
2. A Spartanette Adventure
3. The Fjeldborg House
4. Katharine Peachey's Vintage Cottage
5. Dream Room Makeover
6. Bright and Beautiful Seattle Studio
7. Sugar & Cloth House Tour
8. A Lovely and Cozy Home: Sarah Sandidge
9. A Colorful and Energetic Studio: Enjoy Events Co
10. A Charming Danish Home

My 10 Favorite Inspiration Posts
1. How to Add Farmhouse Style to Any House
2. What to Do With a Nonfunctioning Fireplace
3. Decorating on a Budget
4. Branch Out: Using Branches as Decor
5. Naked Cakes
6. Dark Walls
7. Oh My Deer: Decorating with Antlers
8. Mixing Patterns
9. 5 Wedding Trends I Love
10. Dresses on the Wall
My 10 Favorite Color Posts
1. Lavender and Mint
2. Color Palette: A Foggy Morning
3. 10 Tips for Choosing a Color Palette
4. Emerald City
5. 5 Tips for Pairing Black and Brown
6. Soft and Pretty Pastels
7. Everything’s Gonna Be All White
8. Orange You Glad
9. Very Cranberry
10. White + Wood
I'd love for you to tell me if you had a favorite post from this year, too! Or if there is anything you'd like to see more of in 2014...let me know.
Hope everyone has a great New Year's Eve tonight! I'll see you next year!!! (ahaha, I couldn't resist).

30
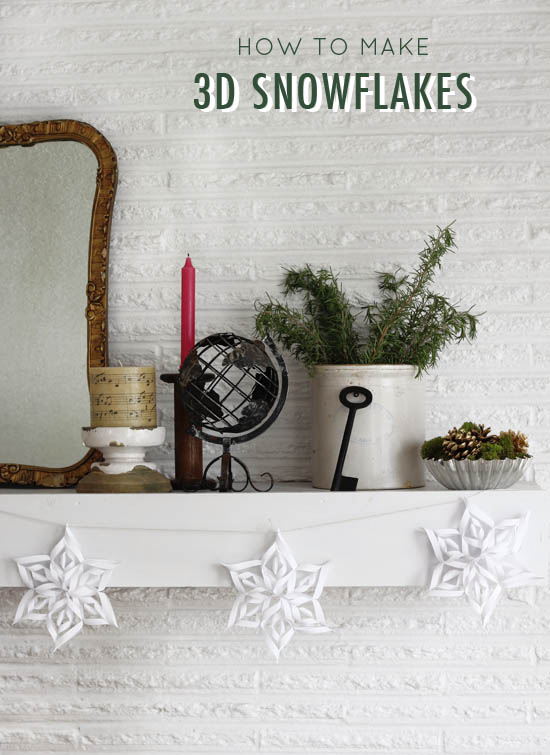
Seattle has really been slacking in the snow department--we've only had one snow day this year, and it was all melted by mid-afternoon! So for Christmas, I made some 3D snowflakes so we could still have a "white Christmas" of sorts. I learned how to make these from a girl at my work, so maybe everyone already knows about them...but they were new to me! I think they're pretty cool and a little more special than the flat cut-out snowflakes that I'm used to. Plus, I love DIY projects like this, where you already have all the supplies at home. Snowflakes make great decor all winter long (and technically, winter just began a week ago...isn't that weird?). I think some big versions of these would be really cool for a photobooth backdrop at a winter wedding, or--hey--a New Year's party!
You will need:
white printer paper (or whatever color you'd like to make your snowflakes)
scissors or a paper cutter
glue (I used this eco-friendly craft paste made 100% from recycled styrofoam)
a stapler
a hole punch
string, ribbon, or something to hang the snowflakes with
mini clothespins (optional)

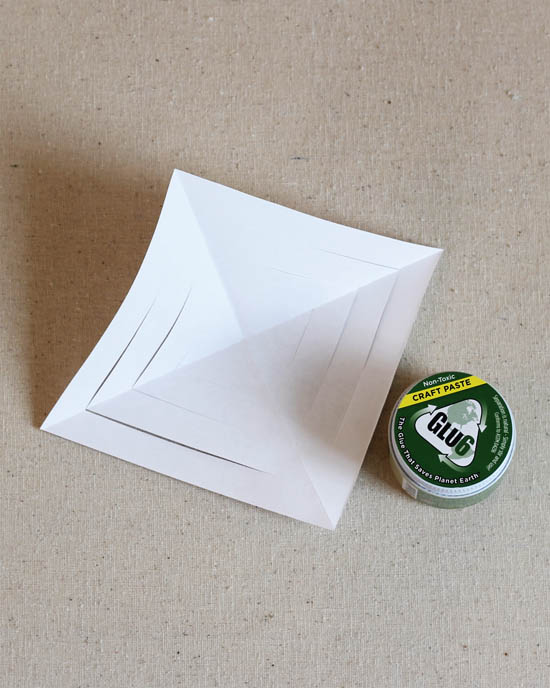
Cut six equal sized squares out of the paper. If you have a paper cutter, you can measure and cut a stack all at once--or if you just have good old fashioned scissors, the easiest way is to fold your paper in half diagonally and cut off the excess at the bottom. This works perfect since you'll be folding them that way anyways. Each square will be one arm of your snowflake, so using one sheet of printer paper per square will yield a pretty big snowflake! For the snowflake over my mirror, I did two squares per sheet of paper (I cut the paper in half “hamburger style" first), and for the smaller snowflakes in the garland, I was able to get six squares per sheet of paper.
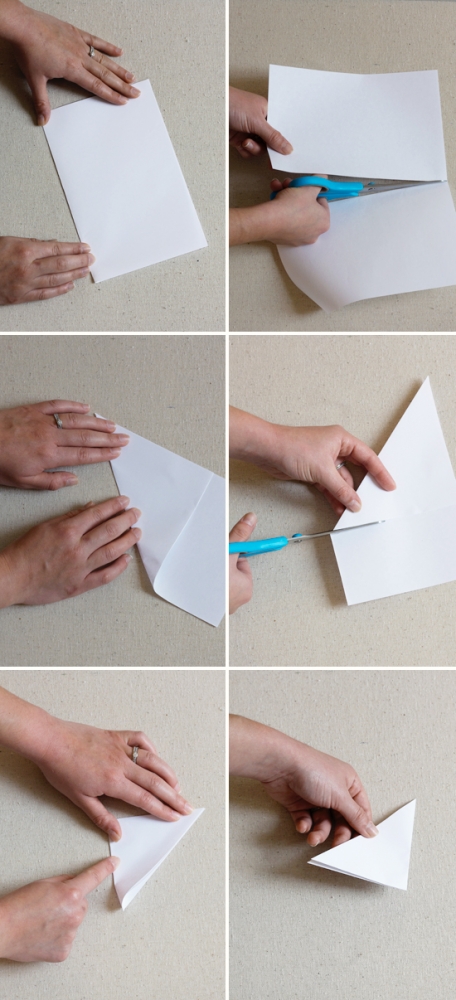
Fold each square in half diagonally once, then in half diagonally again. Hold the folded triangle so that the longest side is facing to your left and the two folded flaps are at the bottom. Cut three lines parallel to the left edge, not quite cutting through to the top. Try to keep an equal distance between each cut. I just eye-balled this step but you can also measure if you prefer.
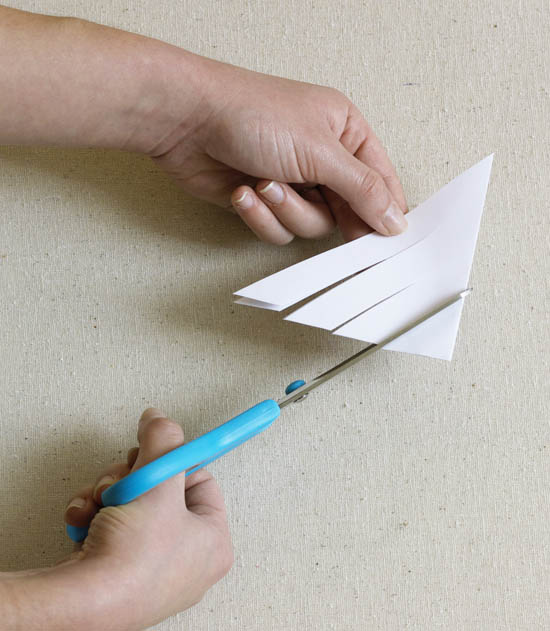
Unfold your triangle. It should look like the photo below--if not, you've cut on the wrong side. Cut the rest of the triangles in the same way.
Roll the two innermost flaps together to form a tube, put a dot of glue on one side, and press together. The Glu6 craft paste that I used was pretty thick and strong, which worked great--but if your glue is runnier and you're impatient, you could use mini clothespins to hold the two flaps together while the glue dries. Glue dots also work well, or you could use clear tape too.
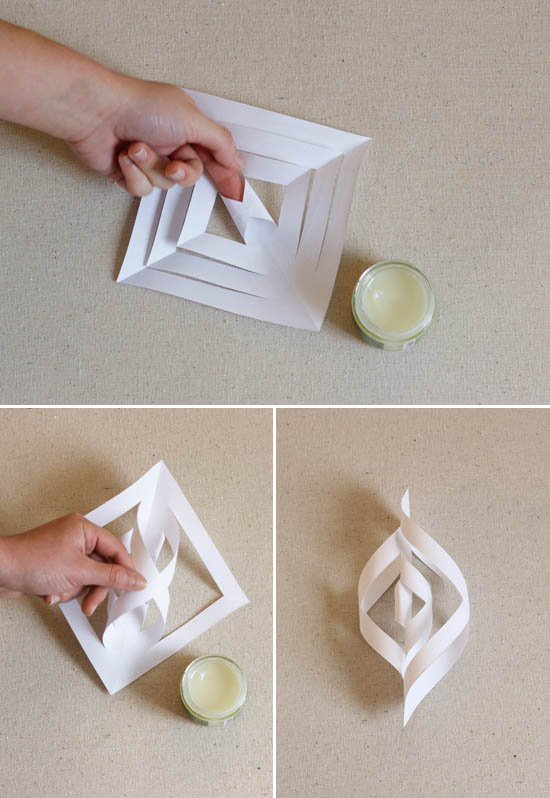
Once the first two flaps are glued together, flip the square over and roll the next two flaps together, gluing them in place. Alternate sides until all the flaps are rolled together and secured with glue (see above). This forms one arm of your snowflake. Repeat with the rest of the squares.
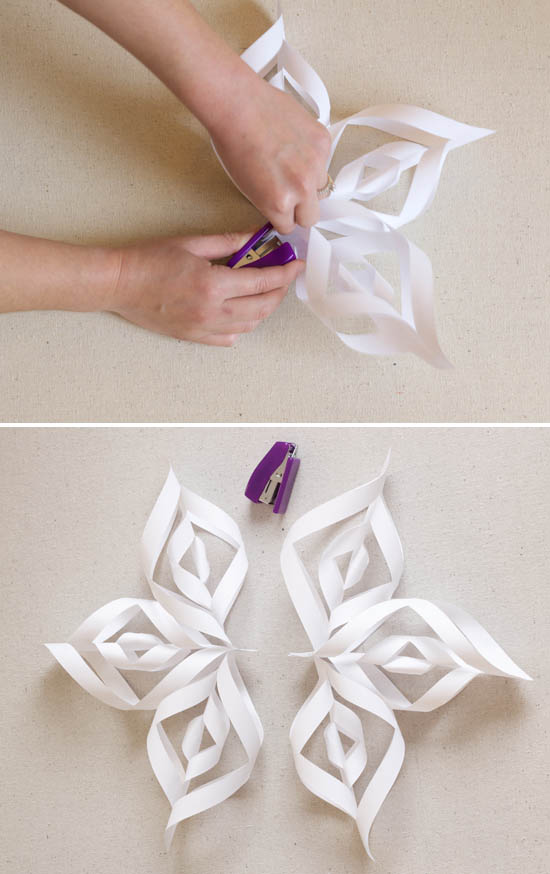
Once all six arms are made, you're ready to assemble your first 3D snowflake! Gather three of them in one hand and staple them together at the bottom. You'll notice that one side of each arm is smaller than the other, so alternate small sides with big sides so it looks pretty even. Do the same thing with the other three and staple together at the bottom.

Take your two sides and hold them together, so the bottom flaps are overlapping. Staple one more time. Your snowflake is almost complete! The last step is to secure the arms to each other. Just put a dot of glue where each of the arms meet and pinch them together. Voila! You're done!! If you want to make a garland or hang more than one of these, repeat these steps to make as many snowflakes as you want.
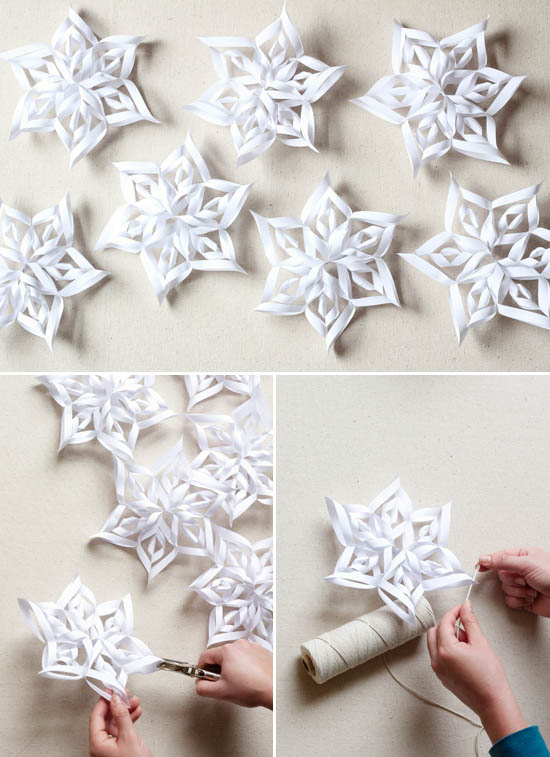
For the garland, simply punch holes at the top of each snowflake and thread your string through the holes. Easy peasy (and super cheap) winter decor!
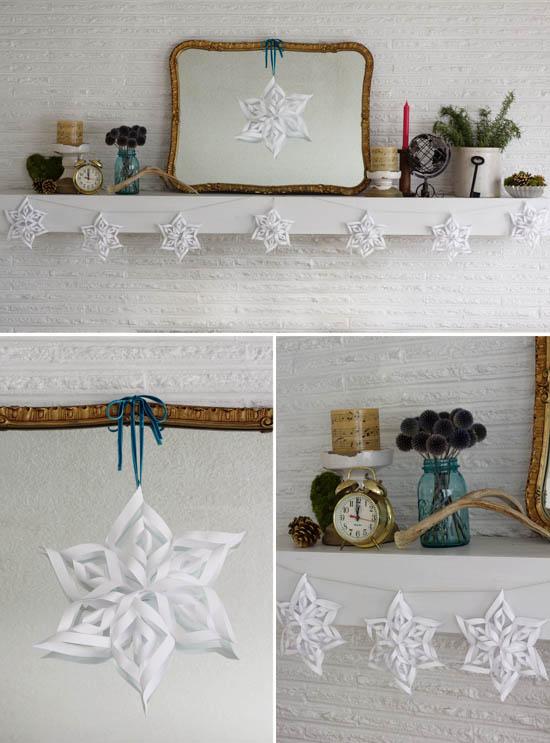
I know that seems like a lot of steps, but I promise once you get the hang of it, you can make a bunch of these really fast. I made this entire garland during half a movie.
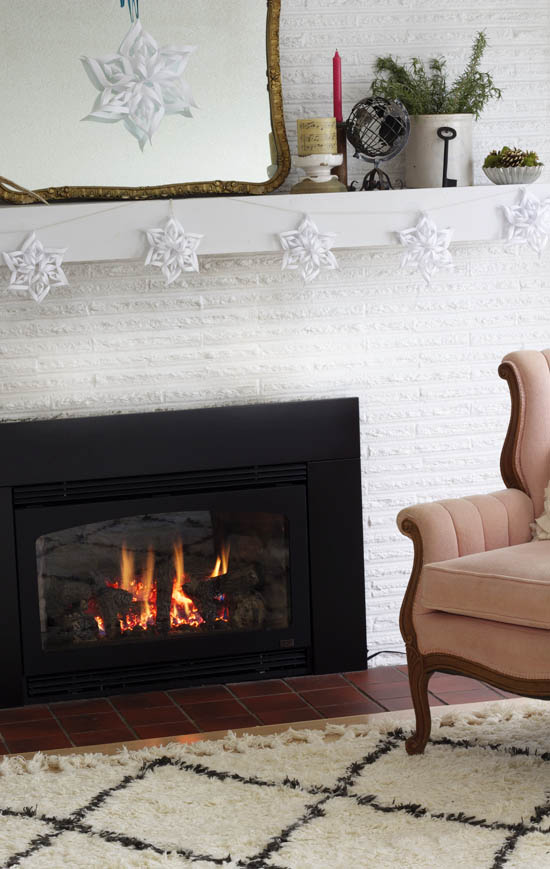
You can also see my new rug in the photo above. It finally came…and the living room is much cozier now!
Have you ever made 3D snowflakes? This would be a great project to do with kids, especially if they’re home and getting bored on winter break. And you won't even have to leave your house to gather the materials!
This post was written in partnership with Nine Lives Products.
23
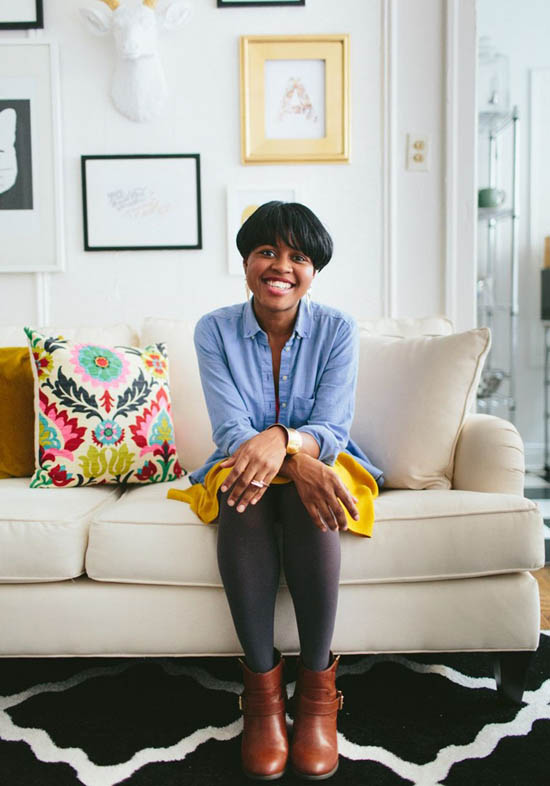
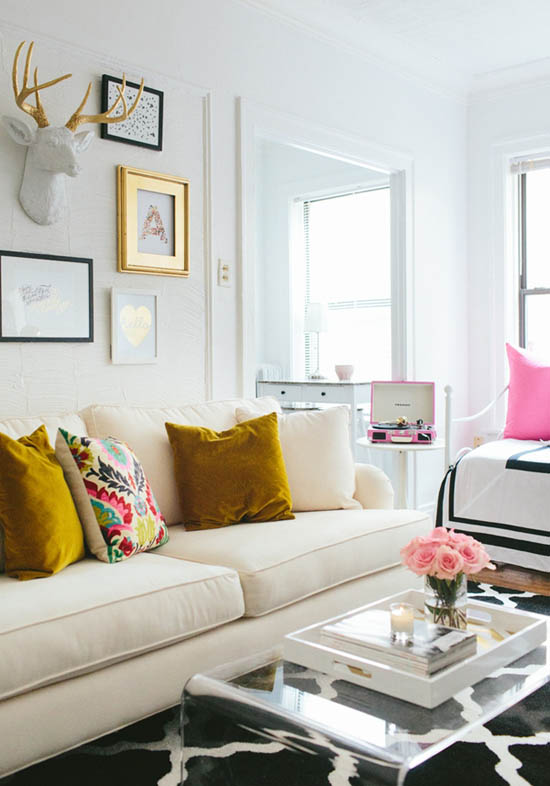
Did you guys see Aramide Esube’s gorgeous living room makeover on The Everygirl? It is pretty much my dream living room and I’m equal parts jealous that she won this awesome $5000 makeover and inspired by how pretty every last detail of it is. Well done, girl, well done.
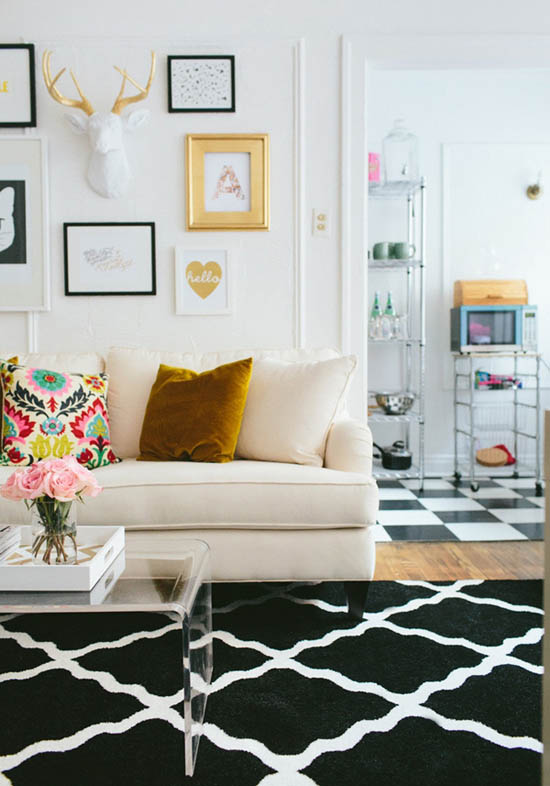
Aramide has a studio apartment, so this space needed to be multi-functioning--it’s both bedroom, living room, home office, and storage. The Everygirl did a great job of pulling together pieces that wouldn’t overpower the space (or the budget!). From an apartment sized sofa (which I am totally drooling over), to a Lucite coffee table that doesn’t take up much visual weight, to a daybed that can function as extra seating if need be, each piece of furniture was carefully chosen to work hard and work well.
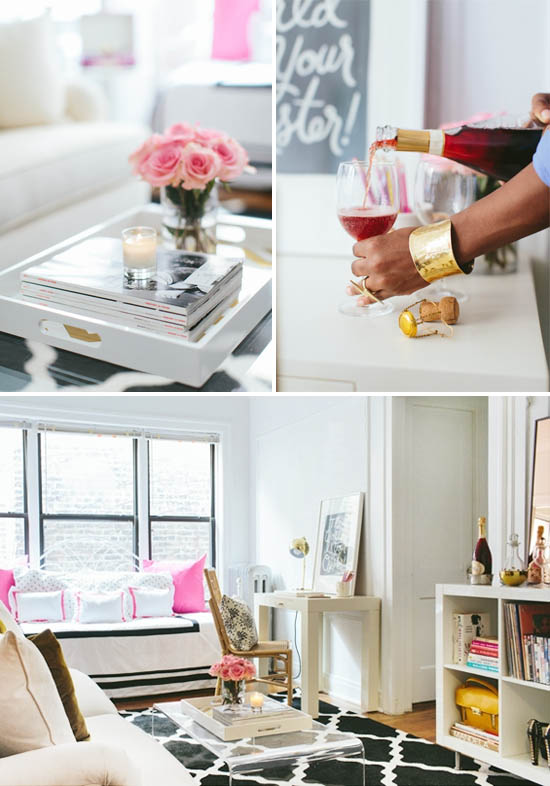

A pink record player?! I want!!
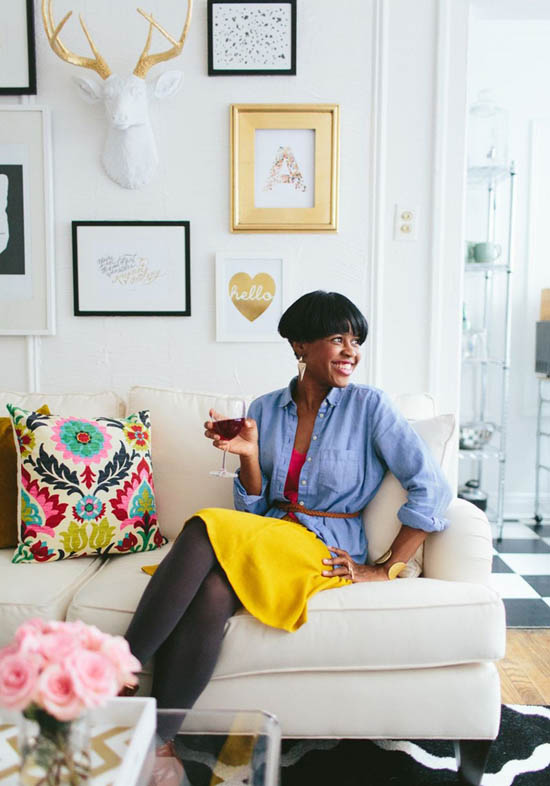
Isn’t Aramide so cute? She writes a style blog, so of course her outfit is totally perfect.
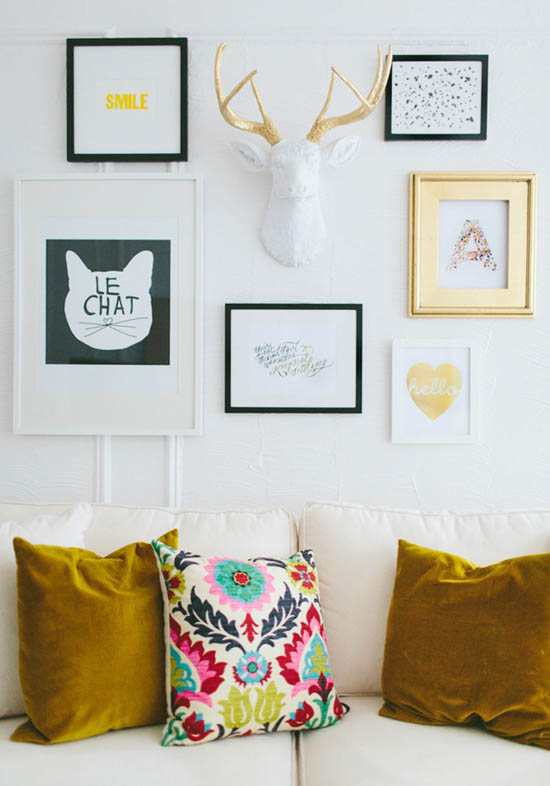
Love this gallery wall, especially the White Faux Taxidermy deer head.
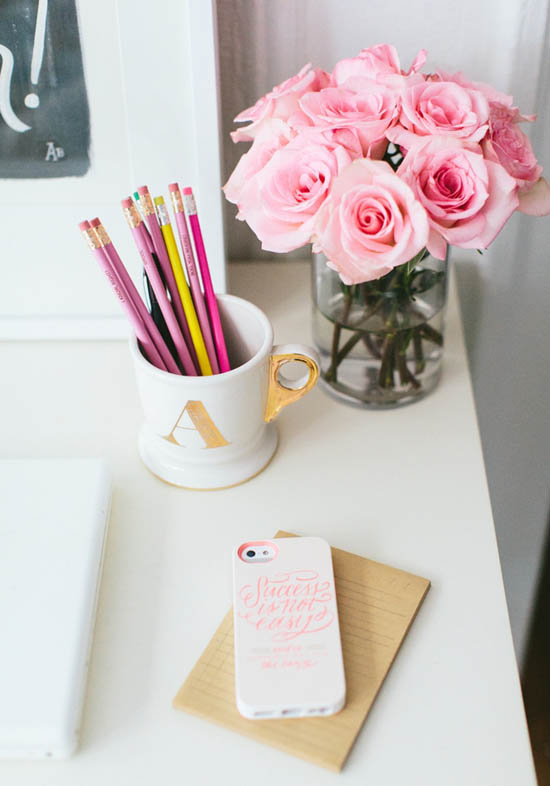
Some colorful pencils, pink roses, and a gold Anthro mug. You know, just the regular desktop essentials :)
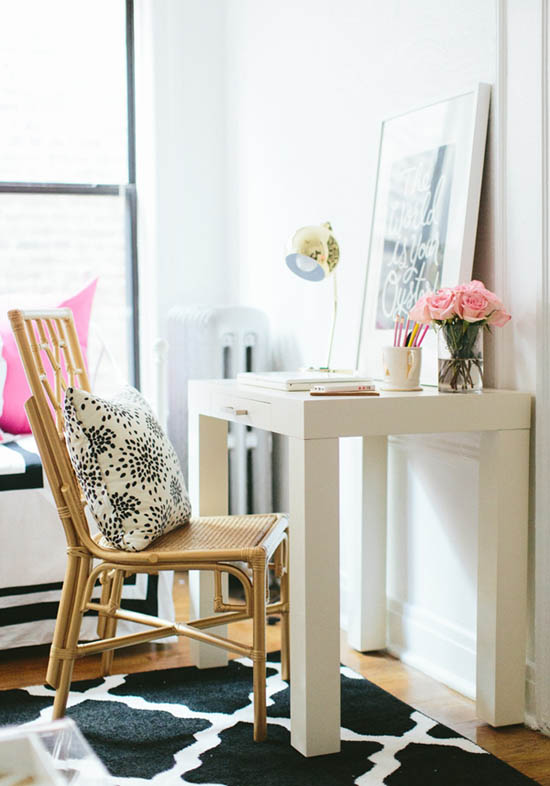
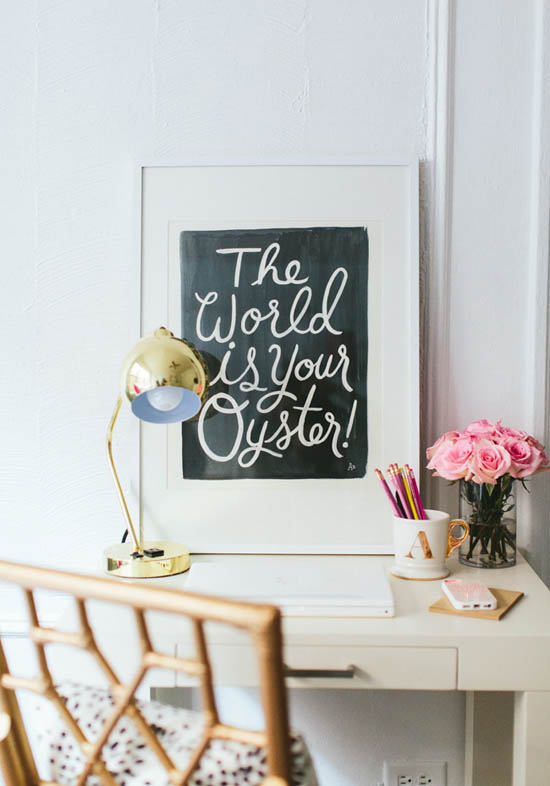
Sooo pretty, feminine, and stylish! I’m loving all the gold and pink, and I really want to get one of those “The World is Your Oyster” posters from Rifle. What do you like best out of this room?
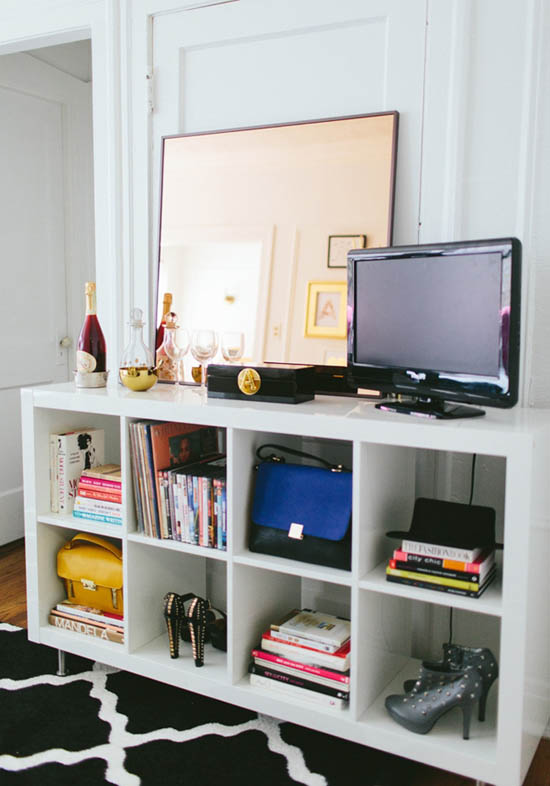
And here’s what I’m really impressed by--check out how budget-friendly all of these product sources are! I see they got a few things from PBTeen, which is totally one of my favorite tips for decorating on a budget. I’ll have to check out the rest of these shops too. Most of them I’m familiar with, but there are a few names in there that are new to me. I love finding stylish shops that are easy on the eyes and easy on the wallet!
LIVING SPACE: Sofa: Home Decorators $999 / Rug: RugsUSA $218 / Gold floor lamp: Urban Outfitters $98 / Floral pillow: Willa Skye Home on Etsy $42 / Velvet pillows: World Market $29.99 (Aramide already owned) / Coffee table: CB2 $279 / Chevron tray: C Wonder / Antlers: White Faux Taxidermy $119.99 / Le Chat poster: Mini and Maximus $50 / SMILE print: Heartfish Press on Etsy $6 / Keep Not Settling print: The Everygirl Shop $30 / Hello print: SS Print Shop $35 / Dots print: MadeByGirl $17.95
BEDROOM: Daybed: Macy's $349 / Black and White Duvet Cover: Pottery Barn Teen $99 / Pink Euro shams: Babun on Etsy $20 / Gold polka dot pillowcases and sheets: Pottery Barn Teen $79 / Pink trim boudoir shams: Biscuit Home $55
OFFICE: Desk: Pottery Barn Teen $199 / Chair: Society Social $275 / Fireworks pillow: Society Social $125 / Desk lamp: Urban Outfitters $69 / Oyster print: Rifle Paper Co. $50 / Initial mug: Anthropologie $10 / iPhone case: The Everygirl Shop $34
MEDIA STAND/BAR SHELVES: Lacquer shelves: Ikea $89.99 / Rose colored mirror: CB2 $149 / Decanter: Target $10.48 / Monogrammed lacquer box: C Wonder $78 / Gold bowl: CB2 $4.95
All images via The Everygirl. Head over there to see the before and read more about Aramide and the inspiration for this room.
19
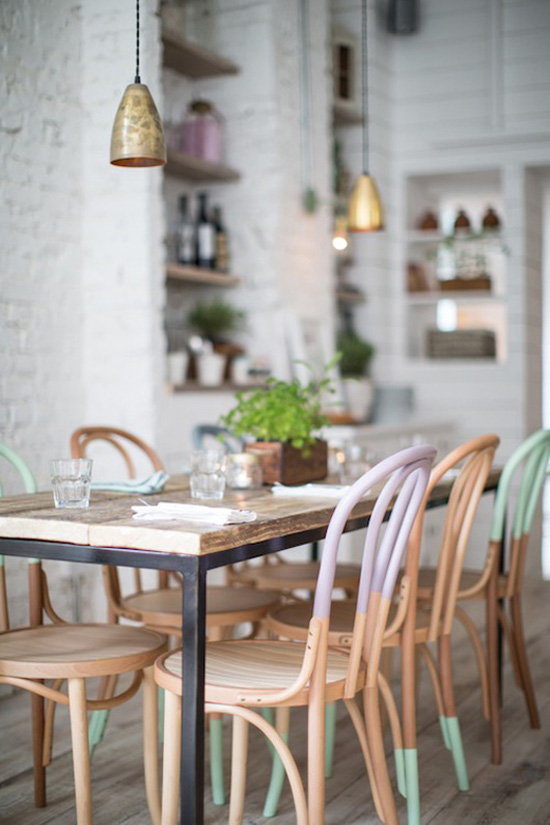
I first saw the photos of Aran Goyoaga’s beautiful studio on Instagram. It was the location for the Seattle Blogshop, and I was totally jealous that day, seeing photos roll in from all the people who got to attend it. I thought the space was just beautiful…with all that white, the exposed beams, and lots of light coming in. So obviously I had to find out more about the person behind this dreamy space! Aran is a food writer, stylist & photographer who lives here in Seattle. She recently started offering workshops and classes in gluten-free cooking, food photography, prop styling, and floral arranging (which all sound amazing…wish I could afford to go to every single one!). Plus, she’s written a book: Small Plates & Sweet Treats! Pretty talented lady.
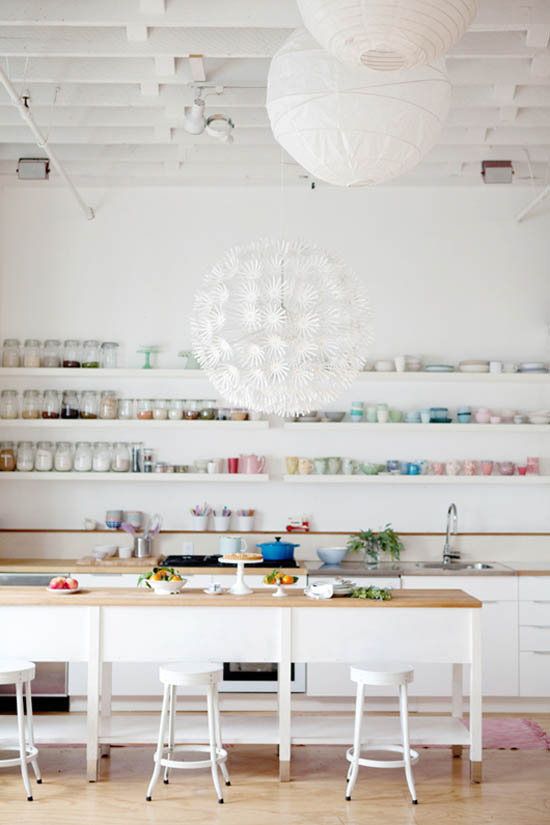
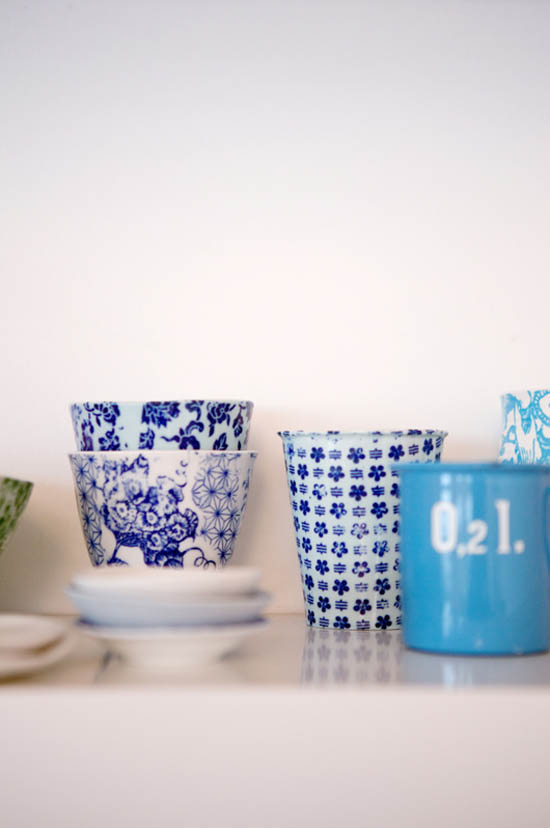
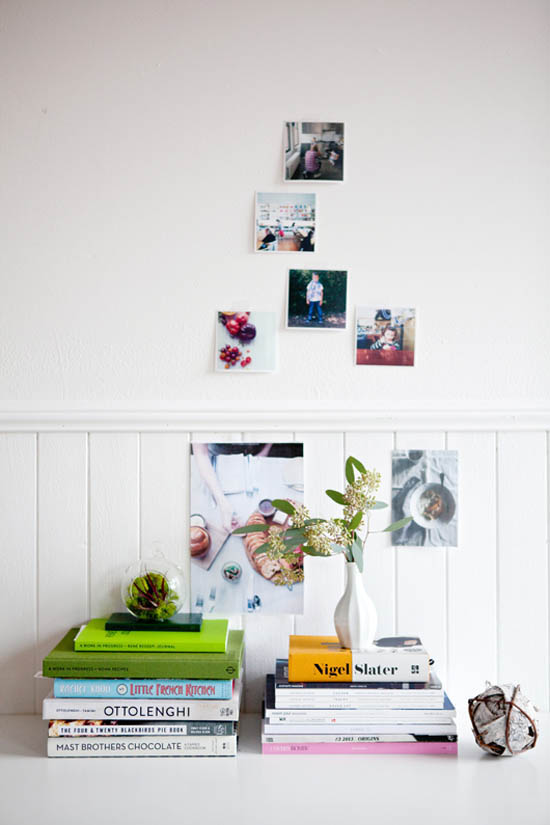
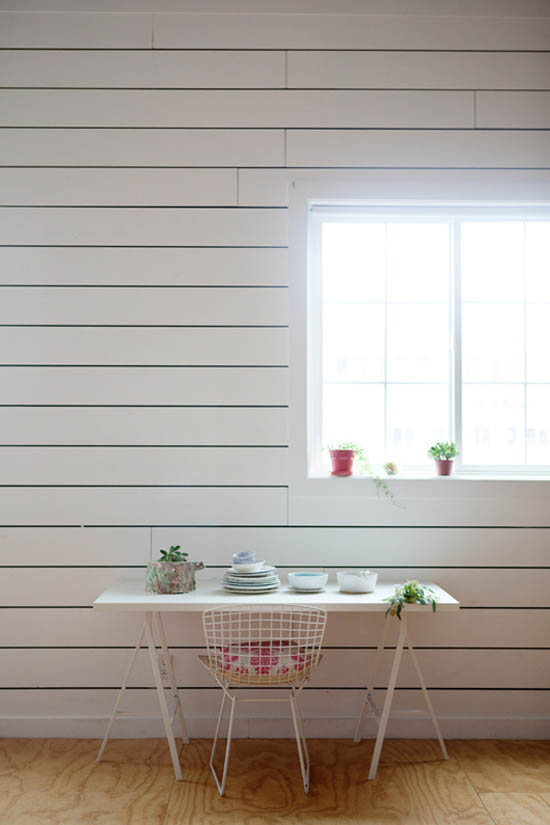
That kitchen area is just to die for. I love, love, love the neatly arranged rows of open shelf storage, with all the pretty tableware.
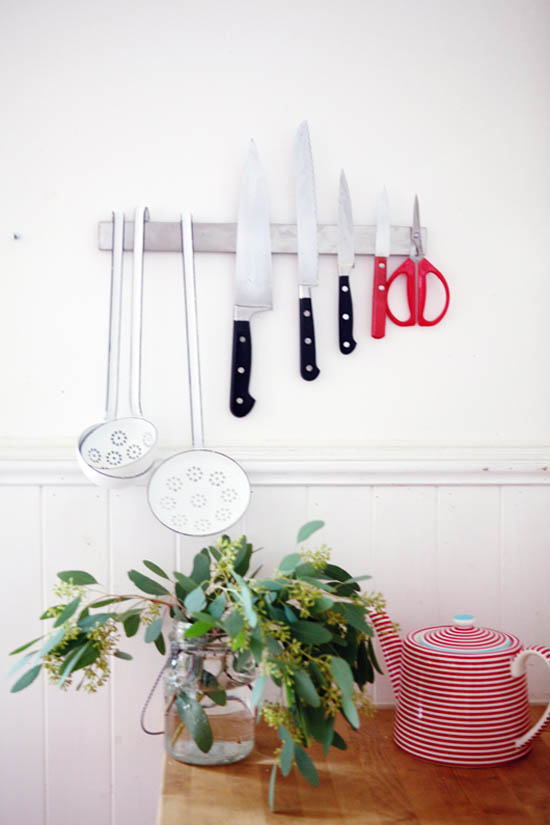
I like this way of storing knives too. I’ve heard it’s better for your knives as well as being handy.
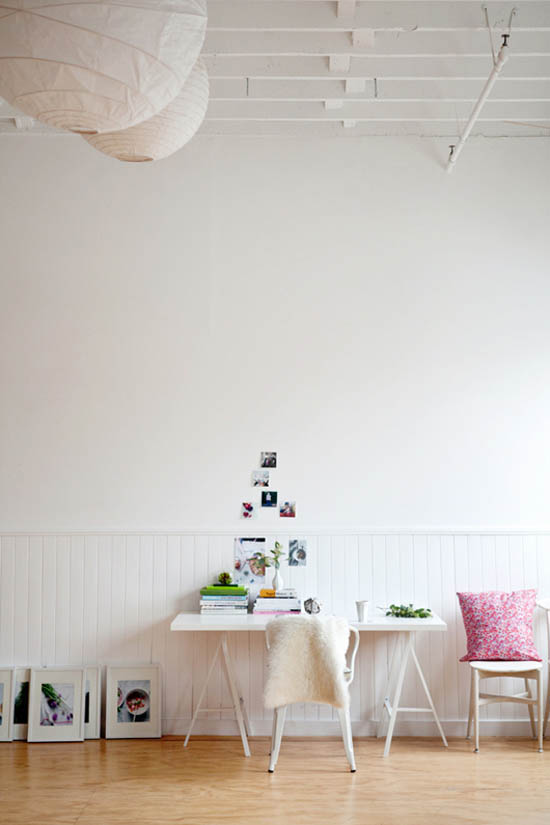
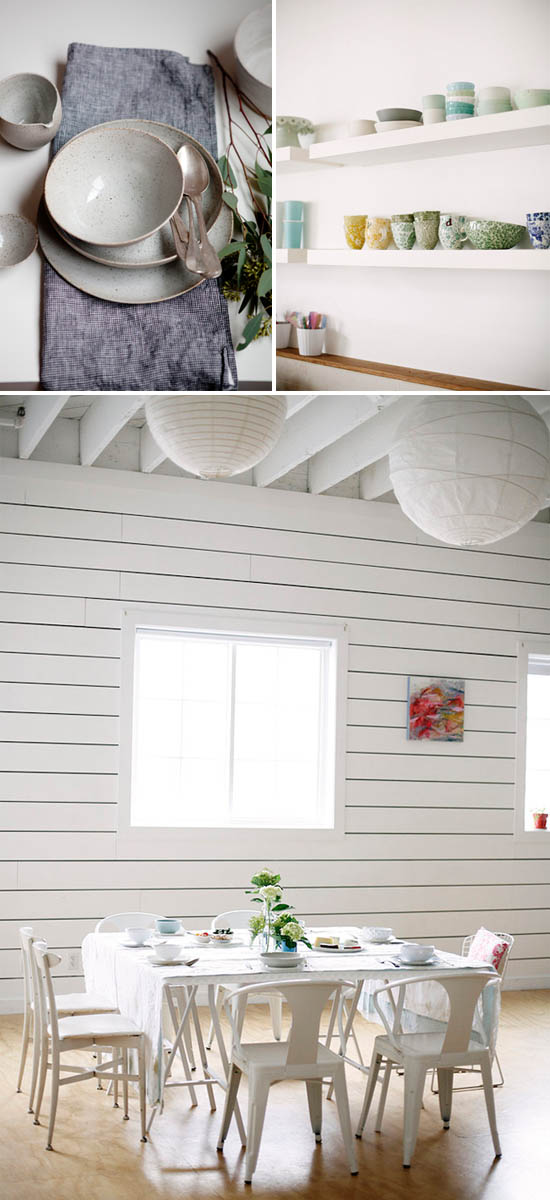
The rest of the studio is reeeeaaally pretty too! I like how Aran kept the space open, airy, and bright. It feels like the perfect blank canvas for lots of inspiration and creativity--a place for beautiful things to happen.
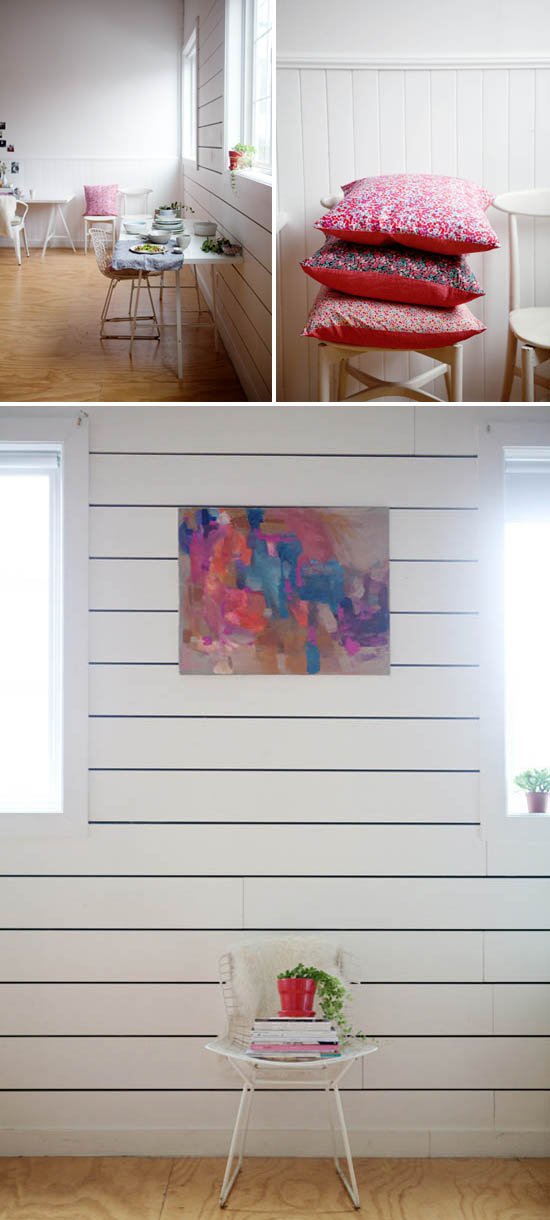
Love this artwork by Jenny Vorwaller--another talented Seattleite!

So good, right? I can’t get enough of it. What’s your favorite part? I think that first photo has got to be my favorite. Dream kitchen!!
All photos by Cannelle et Vanille
P.S. There's a great giveaway going on at The Proper Pinwheel--something for you and something for your little one!
- Search
- Archives
