13
One of the best things about blogging is “meeting” people all over the world who share your interests. I first came across Katy of Apartment Apothecary through this beautiful house tour that she posted (and I asked to share). I fell in love with her blog, and I’ve been following it ever since. Her style is similar to mine, and her own home is really inspiring. So when Katy asked if I’d like to share a DIY project she recently did, I knew I would love it. And I do! I’m excited for you all to see, and thought it would be best for you to get the instructions directly from Katy. So I’ll shut up now and let her take it from here!
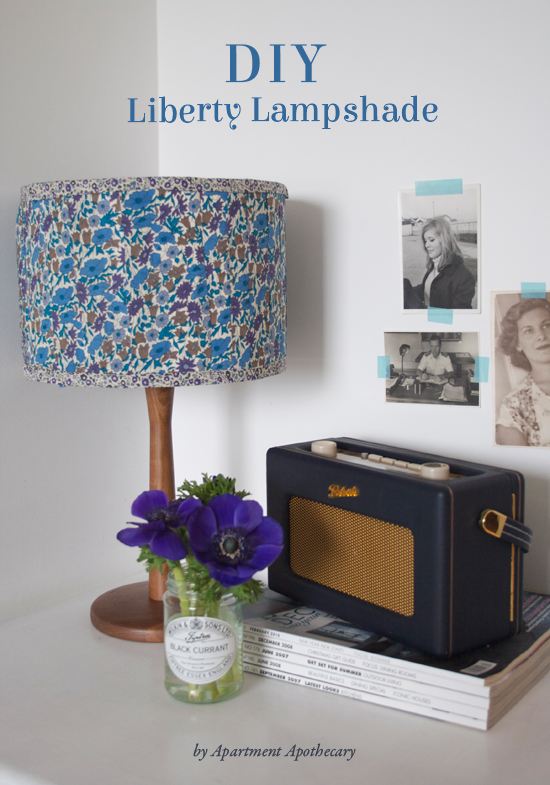
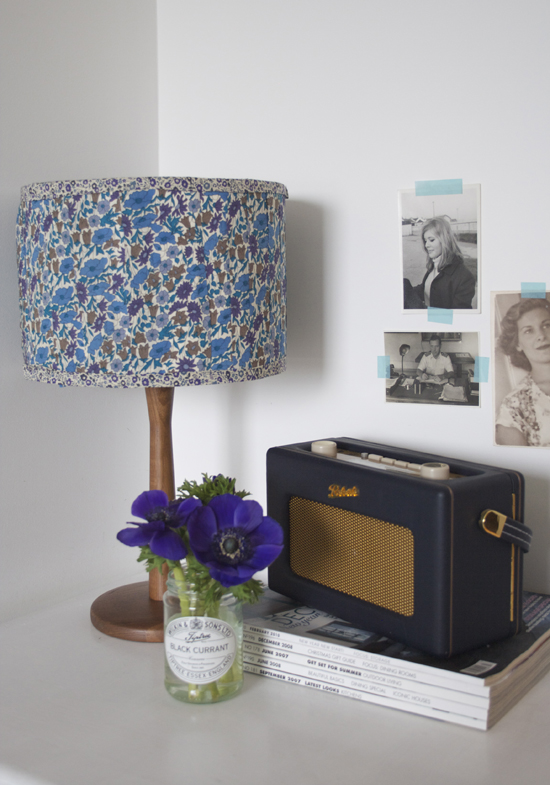
Hi! My name is Katy and I blog over at Apartment Apothecary. I love Aileen’s style and her blog is just beautiful so I am very excited to share a project here today. I live in London and my favourite store of all time is Liberty of London; I am a self-confessed Liberty print addict and I use it whenever I can. I have always thought that there is a massive gap in the market for gorgeous, unique lampshades so I want to show you how you can use your favourite fabric to turn a boring, plain lampshade into something really special. This is an easy, inexpensive project and it doesn't take long to do - the best kind of project in my book!
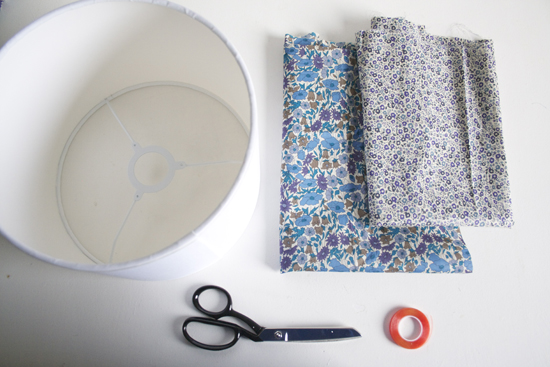
You will need:
Double sided fabric tape
Scissors
Plain lampshade (any shape or size)
Lightweight cotton (the lighter in colour the fabric, the more light will be released from your shade). I have used Liberty’s Poppy and Daisy for the main part of the shade and Fairford for the trim.
The amount of fabric you will need will depend on the shape and size of your shade.
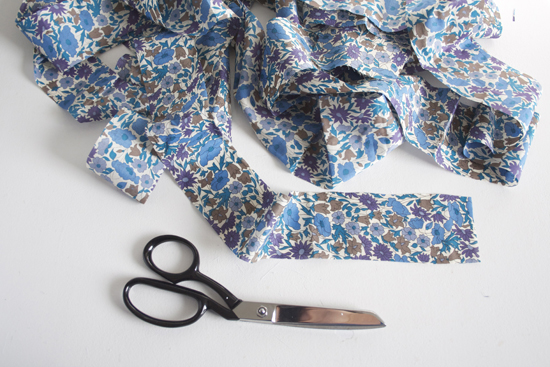
Step one: Cut your main fabric in to long strips that measure 5cm in width.
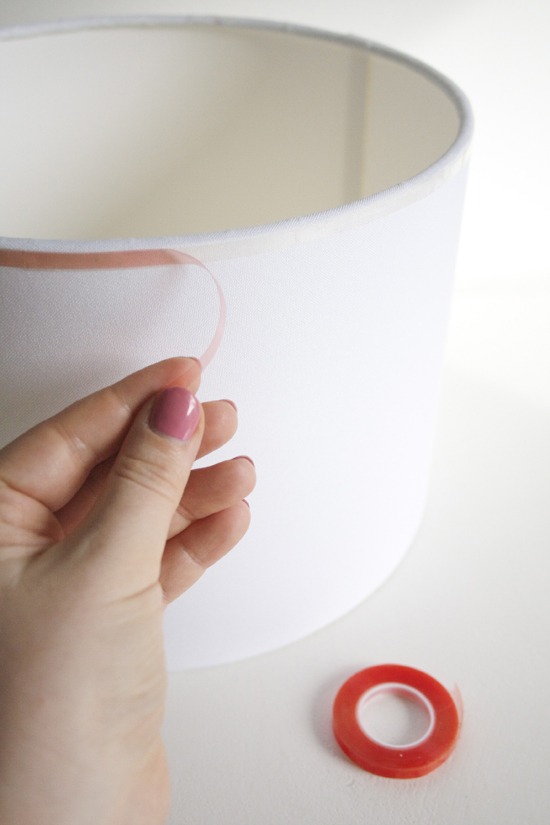
Step two: Stick a length of the double-sided fabric tape around the top edge of the shade on the outside.
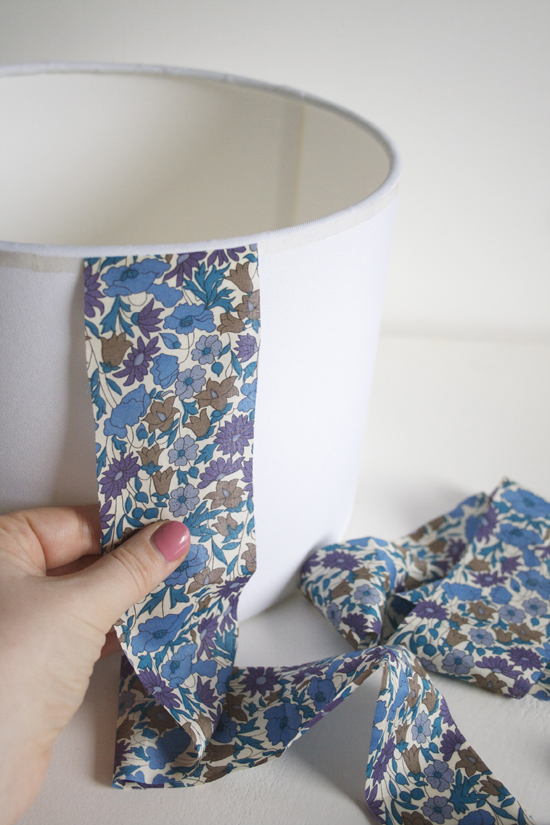
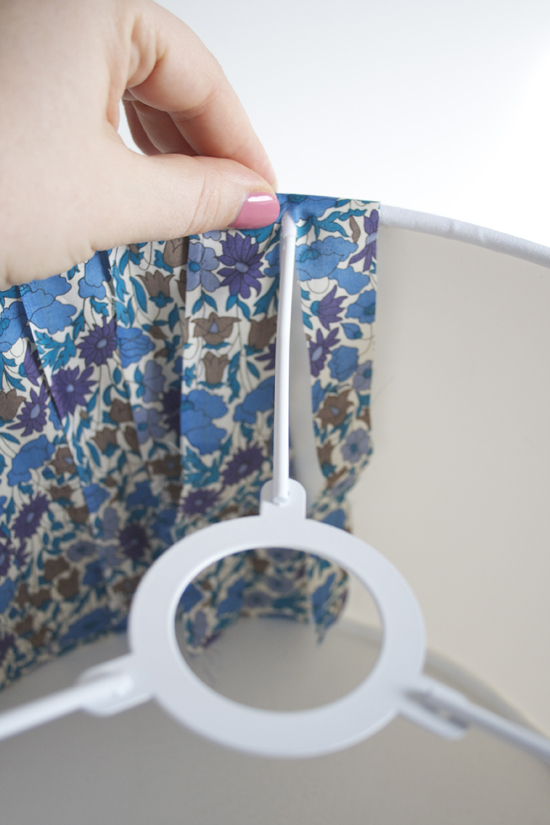
Step three: Begin by sticking a strip of fabric to the tape at the top of the shade on the outside.
Step four: Wind the strip down the outside of the shade, under the bottom, up the inside and back over the top. Continue winding the strip around the frame from left to right, overlapping each strip by about 2cm.
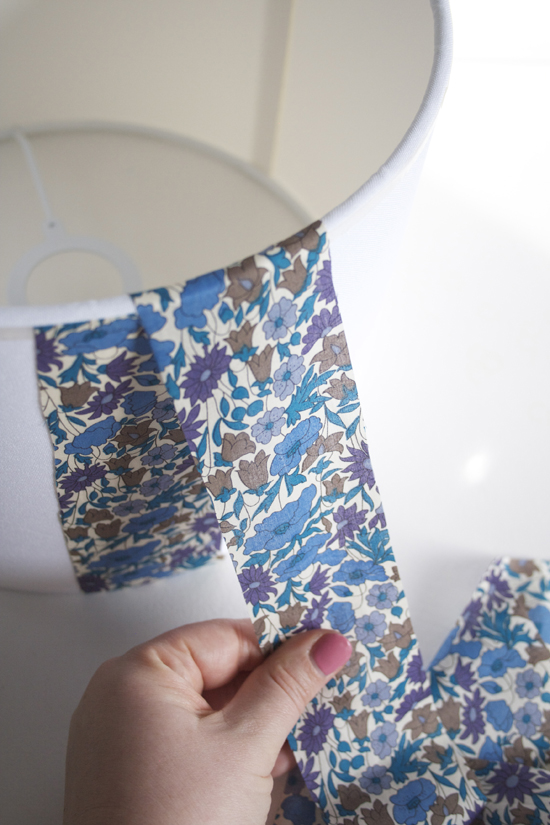
Step five: When you reach the end of the first strip cut it so it ends at the top on the inside of the shade. Add a piece of tape here and stick it down.
Step six: Add a new strip to the top on the outside of the shade and continue the process. Always start and finish a strip at the top as this will be covered by a trim.
Step seven: When you reach a strut, make a slit in the fabric so it will fit around the strut.
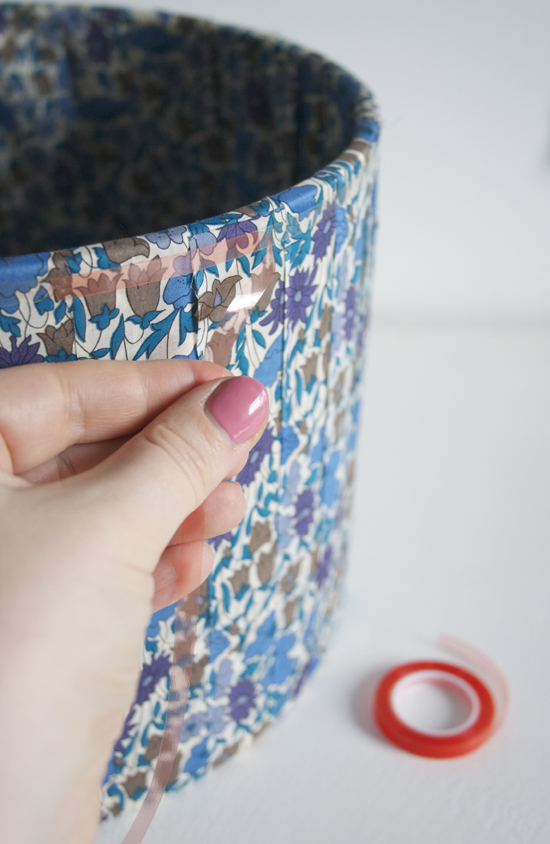
Step eight: Add another length of the double sided tape around the top and bottom edges of the shade on the outside and inside.

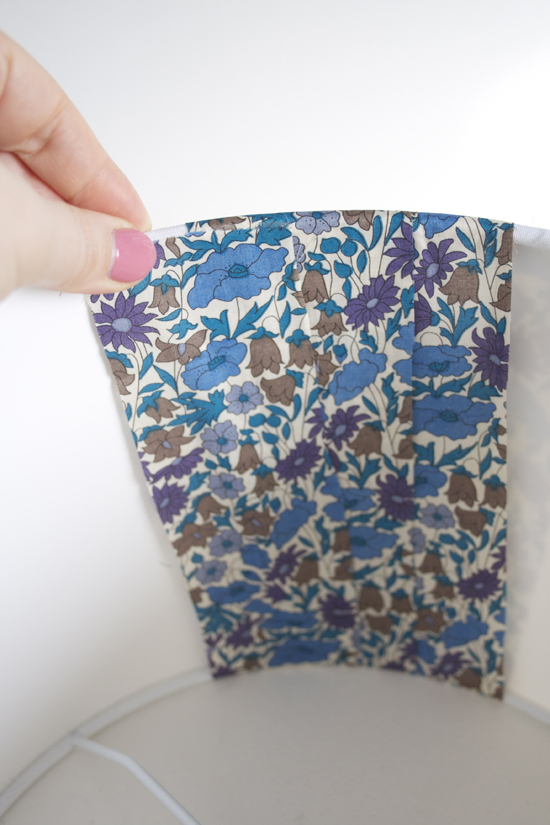
Step nine: Either with a matching or contrasting fabric make a trim to cover the top and bottom edges of your shade. It should be the length of your shade’s circumference and 5cm wide. Press 2cm over on both sides.
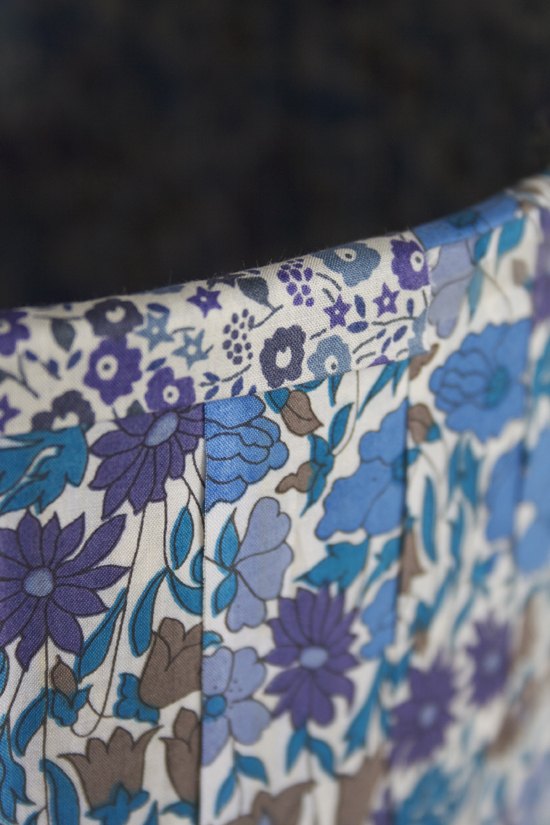
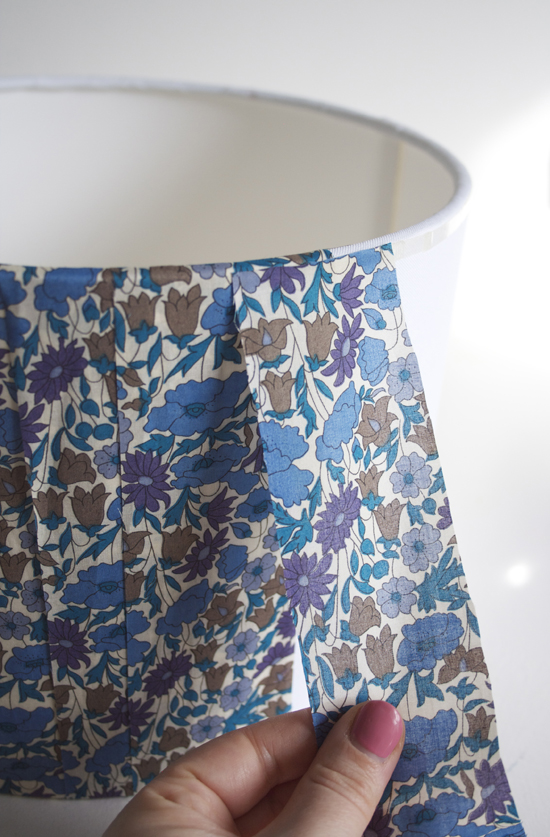
Step ten: Stick your trim over the top and bottom of the shade.
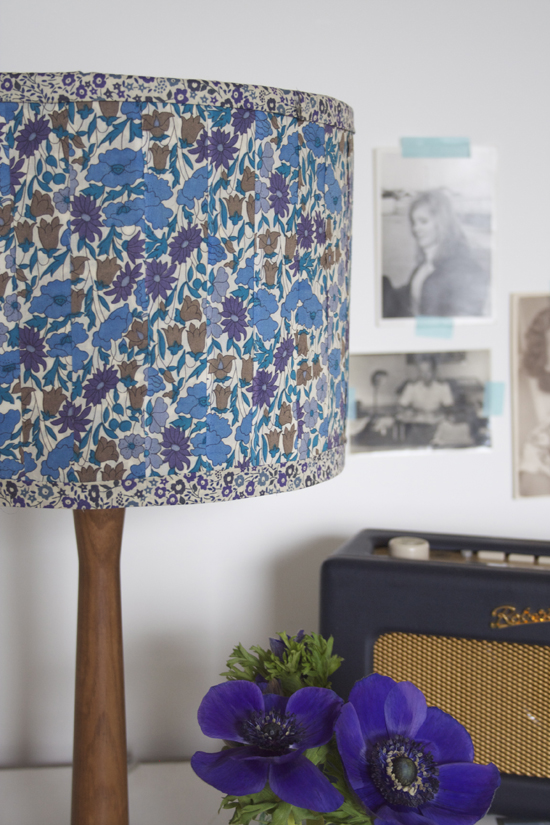
You’re done! I hope you enjoy your beautiful, custom-made lamp shade.
So cute!! I’m totally inspired to upgrade my own lampshades. And because there isn’t any glue involved, I think the fabric would come right off without damaging the lampshade if you decide you want to change it up later.
If you liked this project, be sure to head over to Apartment Apothecary, check out Katy’s lovely blog, and say hello!

12
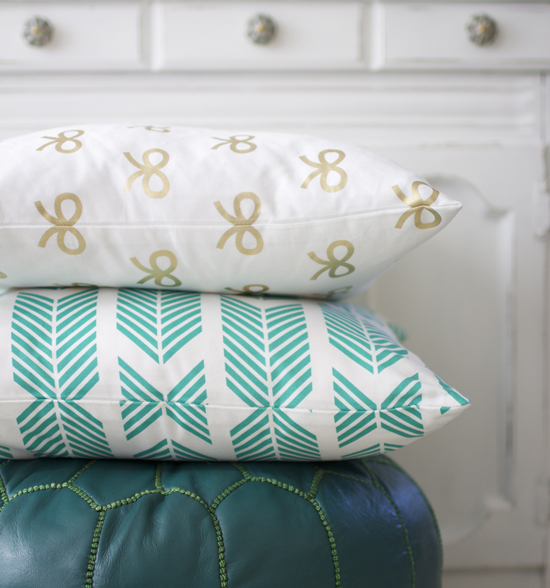
I dropped a couple hints in this post and this Instagram, and finally here it is...I’m sharing some photos of my new living room pillows and doing a giveaway with Caitlin Wilson Textiles! If you’re not already familiar with Caitlin Wilson, get yourself on over to her site. She designs the cutest pillows, rugs, and fabrics in fresh, feminine colors and bright, playful patterns. I’m a big fan, and I think you will be too. This week, we’re giving one of you the same gold bows pillow that I have. It’s my favorite, so I hope you'll like it as well!
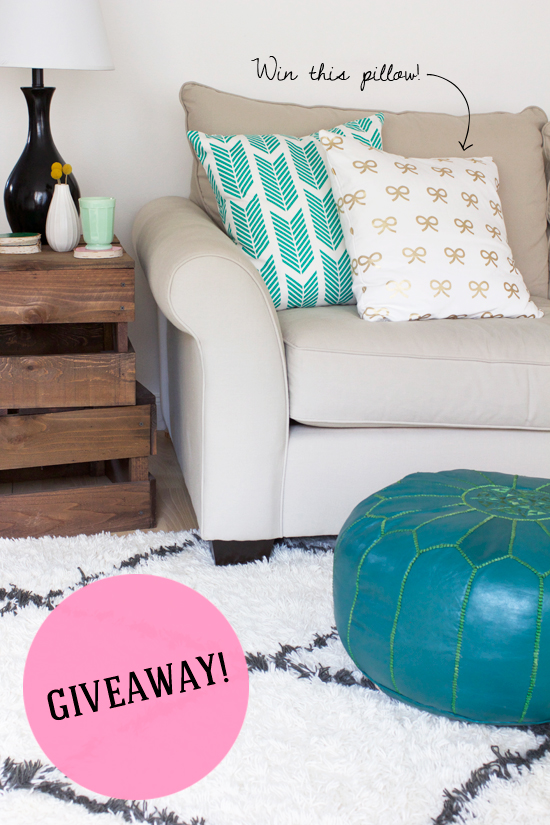
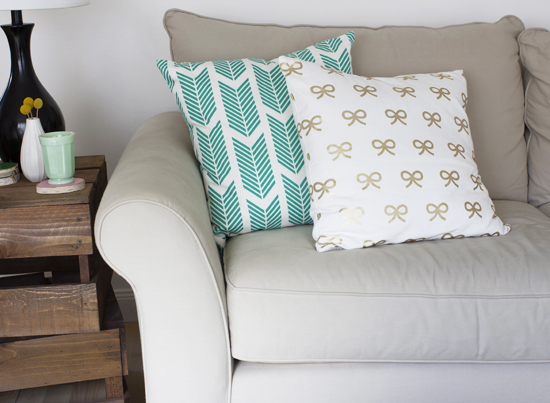
I’ve been obsessed with anything gold foil lately, so I thought the bow pillow would be a good way to introduce the trend to my house in a subtle way. There are several other gold foil pillows that Caitlin sells as well, including this awesome scalloped one and this adorable polka dot one. It was a tough choice, but the little bows did me in. Sooo cute. This pillow would be perfect for a little girls’ room too!
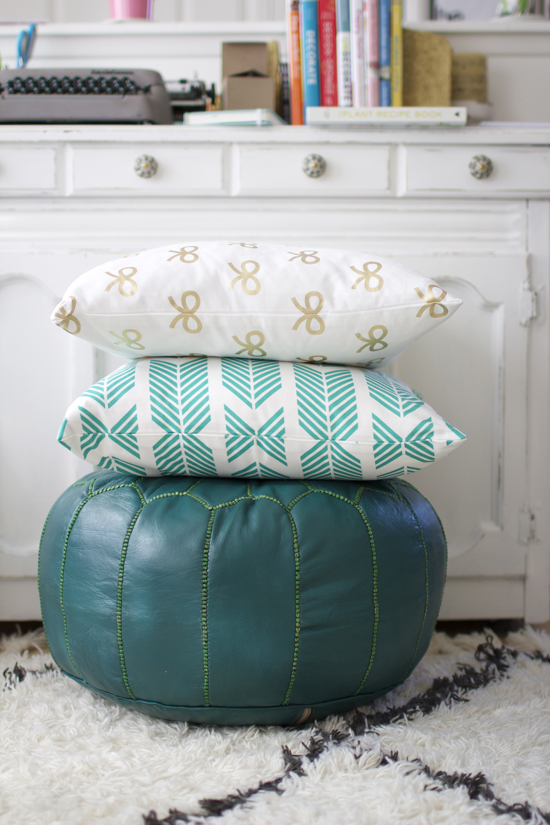
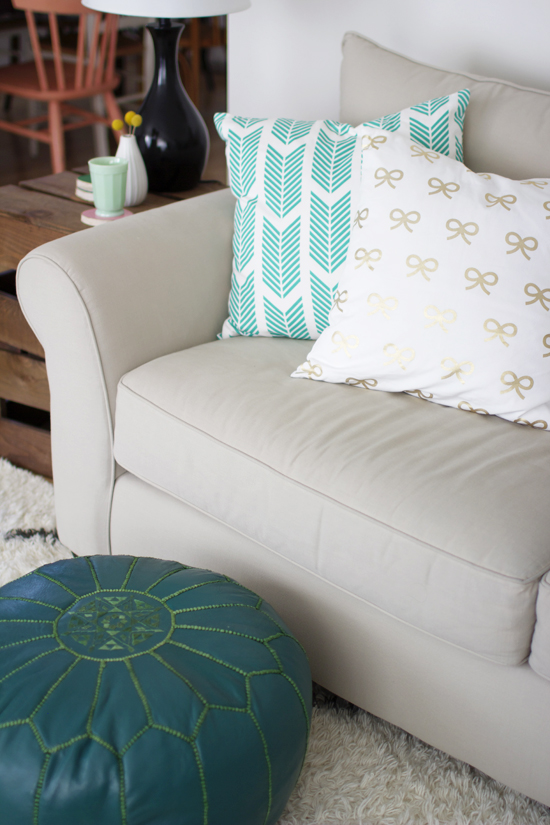
And so I didn’t make our living room too girly, I asked Ben to pick out the second pillow. He went with the teal arrows pillow, which I like a lot as well. Plus, it matches our pouf perfectly! Nicely done, Ben.
So…time to enter the giveaway! Enter using the Rafflecopter below. All the extra entries are totally optional, so even if you don’t have social media, you can still enter the giveaway by leaving a comment.
Good luck; I hope you win!
Thanks to Caitlin Wilson Textiles for partnering with me on this post.
11
As I mentioned yesterday, I’m taking a couple days off of work this week. So what does a girl do when she has a day off? Shopping, of course. My preferred way to shop is online--at home, in some comfy leggings, listening to music with some snacks by my side. So I did a little of that yesterday! And I found a lot of things that I really, really want. What would you get, out of all of these?
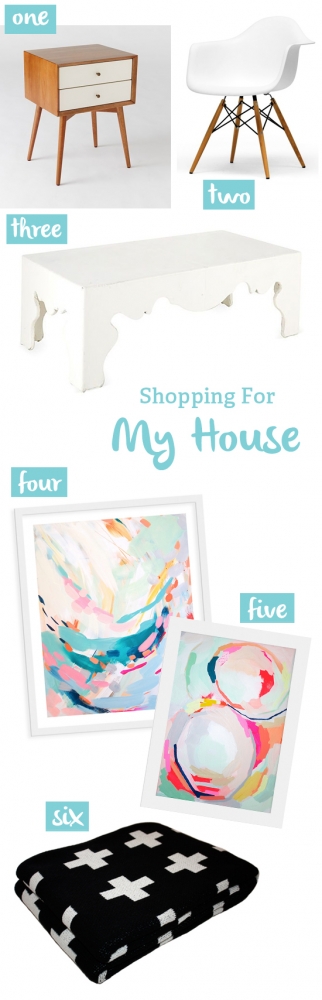
One: A leggy mid-century nightstand from West Elm - $299. I love how the drawers are painted white but the rest of the table is wood. I’d need a pair, though--so really $600. Two: Molded plastic armchairs from Overstock - $148 for a pair. I talked about Eames chairs in this post, and these ones look like decent replicas for a very good price. I only need one (for a desk chair) so I convinced my friend Renae to split the pair with me. Three: A pretty, chunky coffee table from One Kings Lane - $699. I have a feeling Ben will nix this one, both for the price and because it’s white. He thinks we have too much white and neutral in our house as it is. But I really like how it’s substantial and chunky, but won’t take up as much visual weight as a dark wood table. It’s got some fun style too, without being trendy. Our current coffee table is a placeholder that we found at a thrift store for $5 and fixed up. It’s not really the right proportion to our sofa (too small) and I haven’t really styled it or anything. It just kind of sits in the middle of the room and gets used when we play games or eat breakfast in the living room. Four & Five: Gorgeous abstract paintings by Britt Bass, on One Kings Lane (first one / second one) - $189 for either. I’ve been wanting to buy some real art for awhile, and I just came across Britt Bass a few weeks ago. I love her work, and these are two of my favorite pieces. When I saw these prints (framed) on One Kings Lane, I was really tempted to snap one up. What do you think? Which one do you like better of the two? Six: Cross blanket from Spearmint Love - $150. I mentioned this blanket in Friday’s post, and I’m still considering it. Our duvet is patterned (it’s the mint green one in this post)…do you think it would clash with this blanket? Should I just get a solid color knit blanket instead--like maybe a mustard yellow?
Alrighty, opinions time! I want to hear what you think I should get. I definitely don’t have the budget to get all of these--probably only one or two of them, depending on which ones. So what would be your picks? And have you seen anything similar for less somewhere else? Especially nightstands…I really want a pair of nightstands similar to those West Elm ones, but I’d rather not pay $600 if I can avoid it. Furniturebox offer great value contemporary furniture, perfect for when you want to redecorate your home. And I tried looking on Craigslist but didn’t find any that I really loved. Do you have any tips? I’ll be thrifting too, of course.
05
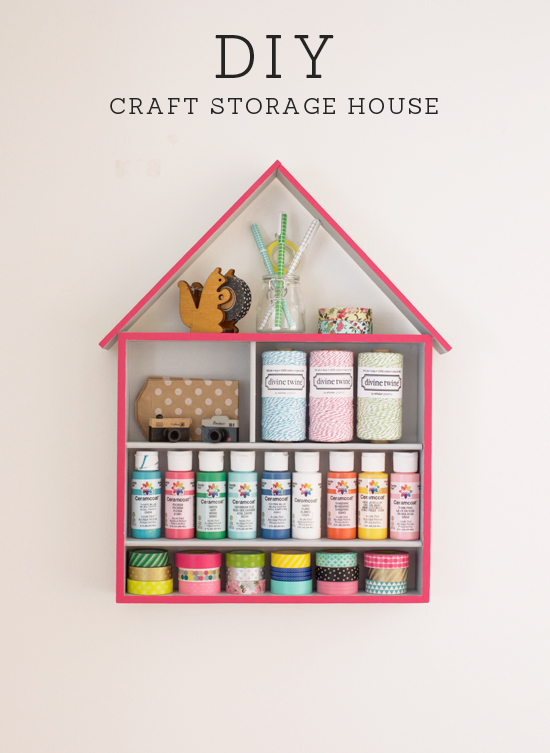
Today’s DIY project was inspired by the house shaped boxes on the wall in this post. I thought they were so cute, and knew right away that I wanted to try making my own! But instead of building the house from scratch, I found a flatware organizer at Goodwill for $2.99, which served as the main part of my house. I’ve seen a lot of flatware organizers at thrift stores, so I’m pretty sure you could find one too if you look. Of course, you could always build the house yourself with wood boards from the hardware store. That way, you can make the shelves exactly the size you want!
To make your own DIY craft storage house, you will need:
-One flatware organizer
-One thin wood board (mine was a 0.25 x 2.5 x 48” poplar board from Home Depot)
-Detail sander or sandpaper
-Two colors of paint (one as the base coat, and one for the accent color)
-Painter’s tape
-Hot glue gun
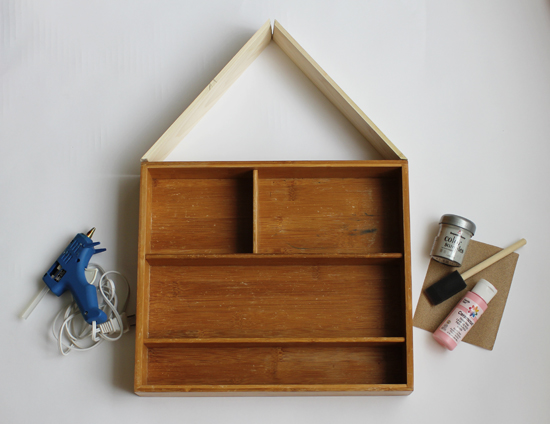
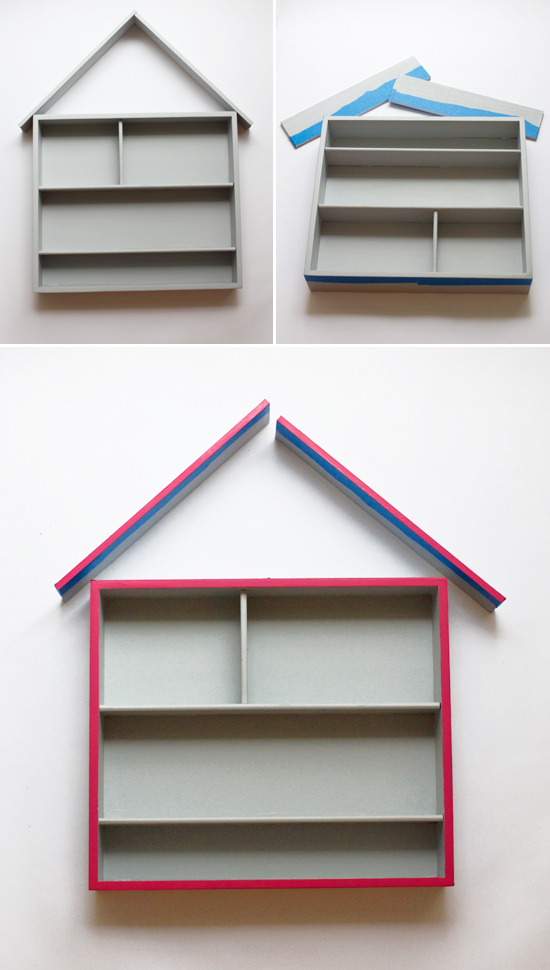
My original intention was to cut the boards at an angle to form the roof of the house, but as you can see in the photo above, I couldn’t get the angles to meet just right (I only have a hand saw, no fancy power equipment). So I went with Plan B, which actually turned out even better. This time, I simply cut the board into two pieces with straight edges, meeting up at a 90 degree angle. I let the edges of the boards hang over on either side to form the roof. Next, I sanded the flatware organizer and the boards, then painted them gray. I taped off off the border of the house with painter’s tape and painted the edges pink to give them a pop of color.
Once the paint was dry, I peeled off the tape. Next, I used hot glue to connect the two boards at the top at a 90 degree angle. Once that was secure, I centered the roof and glued it on either side, where it met the corners of the flatware organizer.
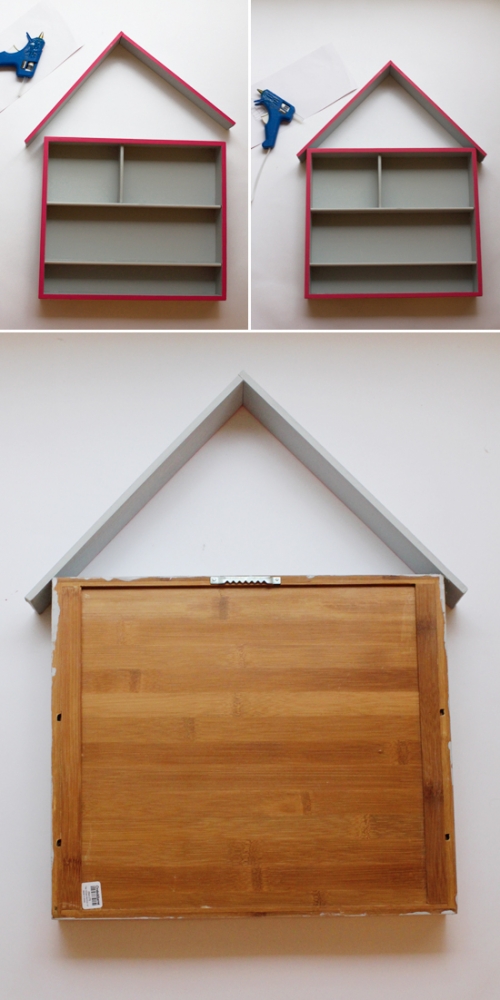
Lastly, I flipped the whole thing over and nailed a picture hanger on the back.
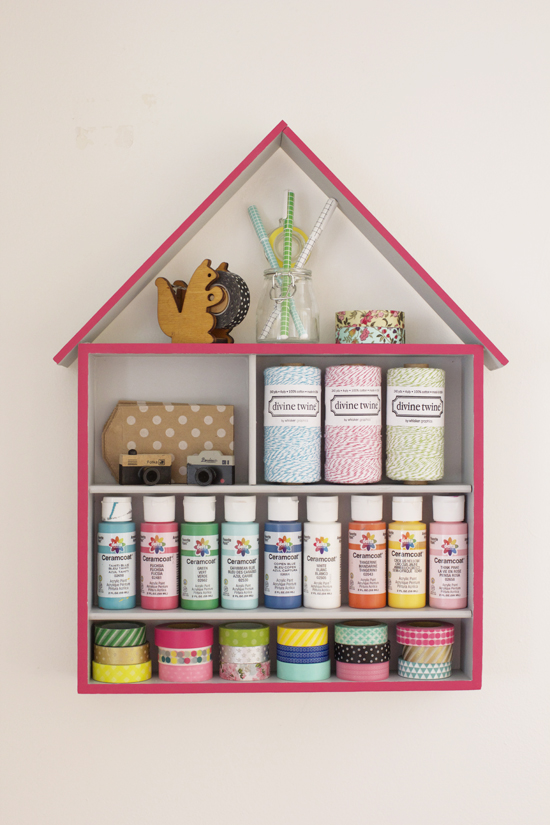
And that’s it! I think this project turned out really cute, and once I figured out the roof, it was really easy. You could also use your DIY house box to store other small things like nail polish, or to display little treasures and tchotchkes.
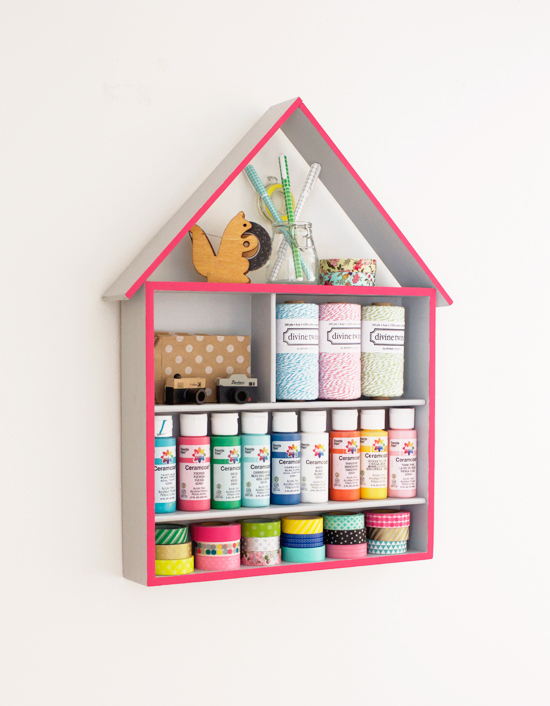
Now, let’s talk about all the craft supplies stored in my little house. Aren’t they cute?? Except for the acrylic paint, everything in there is from Cutetape. They seriously have the best selection of washi tape, not to mention other awesome craft supplies like baker’s twine, stickers, pens, gift bags, and stamps. And that squirrel tape dispenser…SO adorable, am I right?
Thanks to Cutetape for partnering with me on this post!
- Search
- Archives
