10
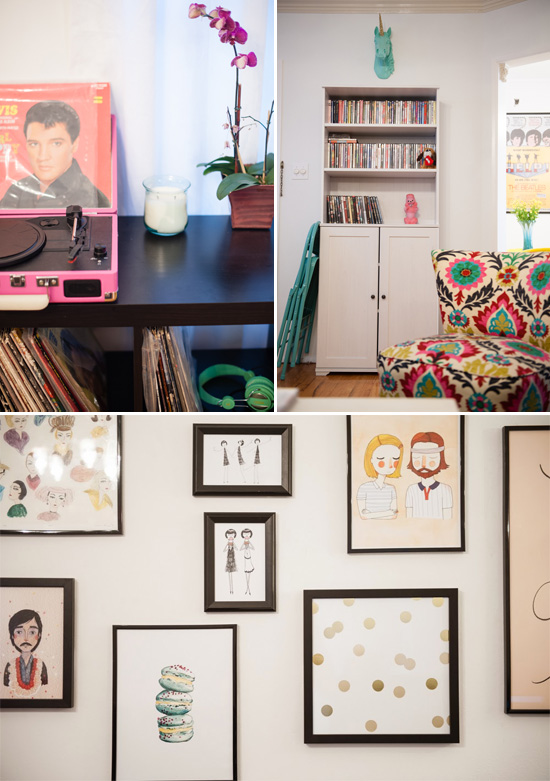
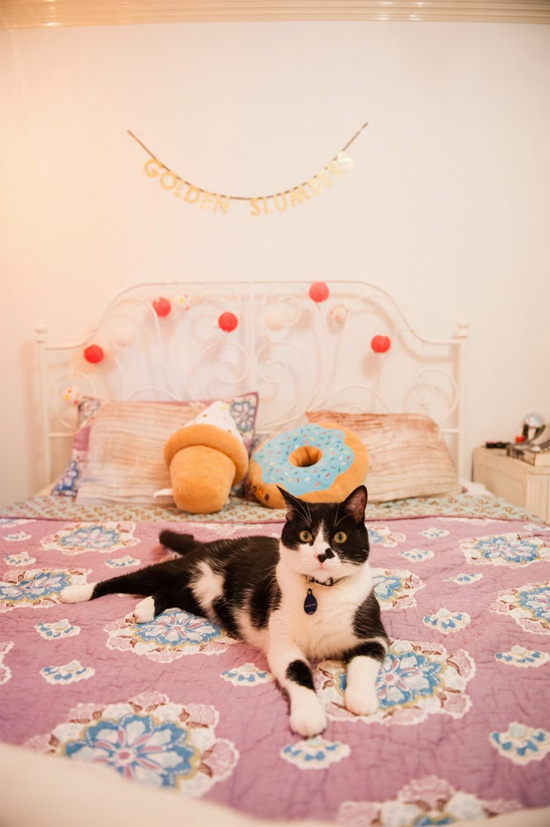
Happy Tuesday, m’dears. I have a really cute apartment tour to share with you all today! It’s the home of Jenna Fields from the blog Circus of Cakes. It’s full of color, retro details, and sweets (both real and decorative). Jenna had been on the hunt for a 1920's apartment with hardwood floors, a tiled kitchen, and plenty of white space, when a friend of hers signed a lease for another unit in the building. That’s how she stumbled on to this gem! Having spent the last couple months looking and looking for a new place to rent, I have to say she got pretty lucky! If we’d found a place like this, I would have wanted it for sure. Unfortunately, we just gave up and renewed the lease on our current place…we couldn’t find anything better in our price range. Oh well, at least we don’t have to deal with moving! But back to Jenna’s place…I think you’re going to love it. From Jenna: I live in a restored 1920's apartment in the heart of Los Feliz with my boyfriend, Chris and tuxedo cat Ringo. Each room is a little different in terms of the style, but the retro vibe ties it all together. I would say the decor is a mix of my love of the 1960's, Palm Springs, sweets (of any kind) and a little rock and roll (I happen to be pretty into Elvis these days).
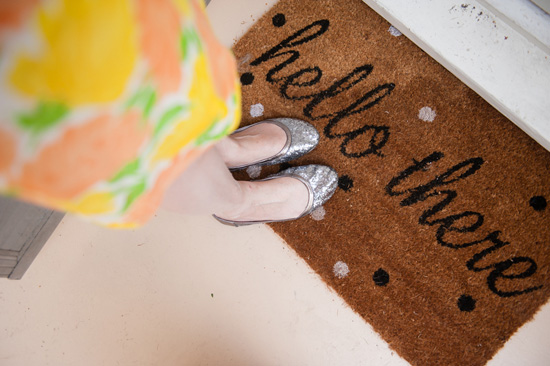
I love this doormat! Snatch one up for yourself here...or if you’re a DIY kind of girl, I did a tutorial for painting doormats last week. Perfect timing...
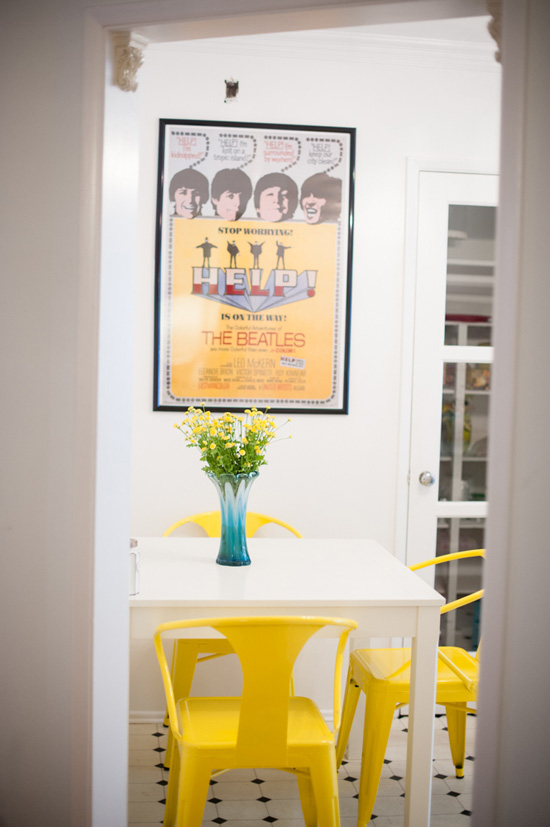
Ooh, and I love those yellow chairs. They’re so cute against the black and white kitchen floor! They’re replicas of Tolix chairs, from Overstock.

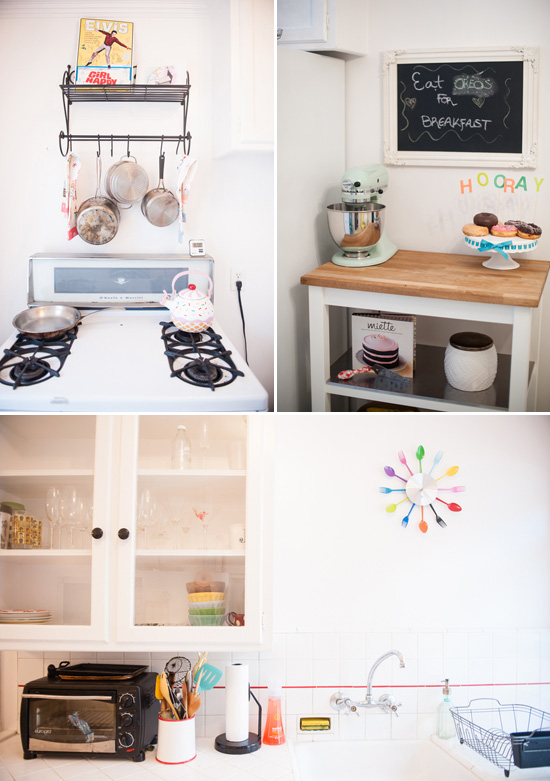
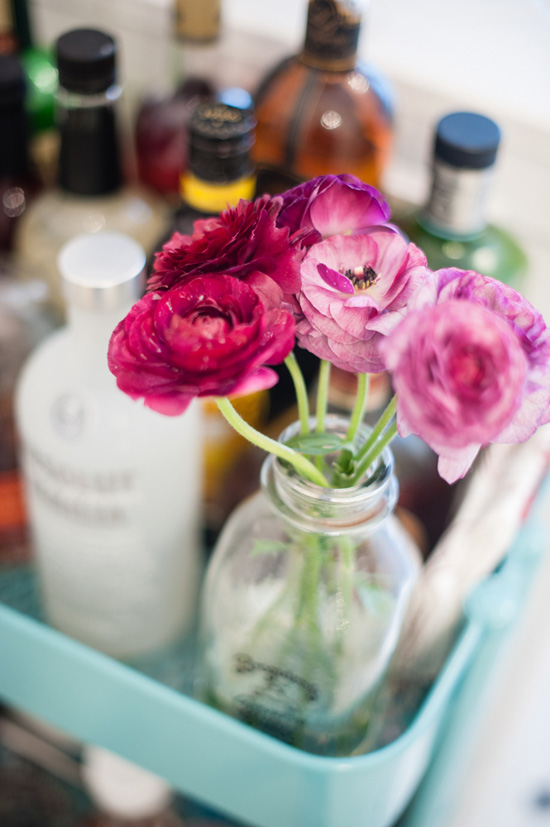
Jenna’s whole kitchen is so cheery. I totally want that turquoise bar cart (it’s from Ikea). The silverware clock and the donut teakettle are so darling, too.
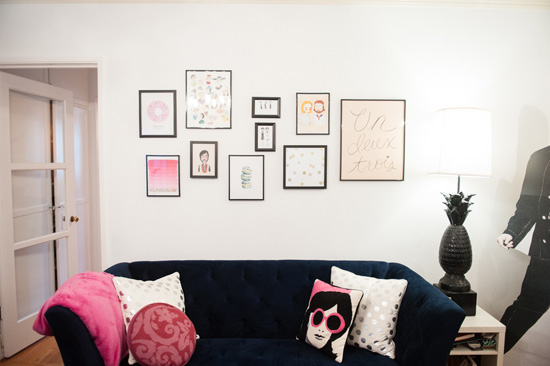
Then there’s her adorable living room. The pineapple lamp! The polka dot pillows! So good.

The gold dots on the wall are from Urban Walls, and the donut pillow is from Dylan’s Candy Bar. I love it!!
Huge thanks to Jenna for sending over these photos! If you have an apartment or house that you’d like me to feature, check out my submissions page here. I’d love to hear from you.
See more of Jenna’s apartment on her darling blog. You can find her on Facebook, Twitter, and Instagram too.
All photos by Desiree Asher Photography.

09
I am definitely not a professional photographer, but there are a few things I’ve learned about shooting interiors since I started blogging. It’s a little different than photographing people, but in a way I think interiors are easier…you can take your sweet time setting up the shot and don’t have to rush to try to capture a certain look or moment before it’s gone. But interiors can be hard too! So I wanted to share my top 10 tips for photographing interiors. Feel free to chime in with your own tips. Like I said, I’m not a professional…I’m definitely still learning too!

1. Shoot in natural light. This is the number one tip I have for you (whether you’re shooting interiors or people, really). Turn off the lights and open up the windows. Try to plan your photoshoot for a time when there’s a lot of natural light coming in.
2. Use a tripod. This has made such a difference for me, especially in situations where there wasn’t much natural light available. Using a tripod means you don’t have to try to hold your hands steady, so you can keep your ISO low (around 200), and still get a photo that’s nice and crisp.
3. Use the 2 second delay when you’re using a tripod. If you’ve already been using a tripod but notice that your photos still come out blurry sometimes, try setting your camera to a 2 second delay. That way, the camera isn’t shaking from you pressing the button and is totally still by the time it takes the photo.
4. Line up the edges. Take some time to line up any straight edges with the edges of the photo (as best as you can). Yes, you can straighten the photo up later by cropping it, but it’s so much easier if you’ve already squared up the lines when you take the photo.
5. Don’t be afraid to hide the not-so-pretty stuff. The human eye will edit out things like cords, outlets, recycling bins, etc. The camera will not! So don’t be afraid to move a piece of furniture a little bit over to hide an outlet, or tuck a lamp cord away for the shot. I’ve heard people complain that this makes house tours less genuine, but I don’t understand why. When you’re shooting your home, you want it to look it’s best! If you were getting your engagement photos taken and you had a zit, you would probably cover that thing up, am I right? So don’t be afraid to cover up the blemishes you notice as you’re setting up your photo.
6. Do a little bit of styling. Similarly, don’t feel silly about styling the room, even if it’s not necessarily how it normally looks. Think of this like getting dressed up for those engagement photos. You want your house to look extra pretty! Buy some fresh flowers, put a bowl of lemons on the dining table, put away all the shoes at the front door except your favorite pairs, etc.
7. Take both full room shots and detail shots. Take some photos of the room in it’s entirety, then get up close and personal with some of your favorite details. Having a variety of shots is much more interesting than a bunch that are shot from the same distance away. After all, people are naturally curious. When I see a room that looks really interesting and beautiful, I like to see some detailed close-ups than give more information about the elements that make up that room. Likewise, if I see a detail shot that I really love, I always want to see the full room that it lives in, to get some context!
8. Move things if necessary to get the shot you want. Speaking of taking full room shots, this is one of the biggest challenges in a small space (ahem, my house). I often end up backed all the way up to the opposite wall to get a photo--and when I took photos of our bedroom, I was actually in our hallway, shooting through the door. If you find that you need to get further back but there are things blocking your way (or blocking the shot), move them!! It can seem like too much effort to move a chair or a side table just so you can get a shot that’s a little further back…but I think it’s worth it. A little bit of extra room can make a big difference.
9. Review your photos as you go, and adjust what you don’t like. I hardly ever get it exactly right on my first shot. Try your best to get everything styled and lined up, then take the photo. Now, before you go on your merry way, pause and look at the photo. Is there anything you don’t quite like about it? Is it too over-exposed? Is there a rotten banana in the background? Take the time to fix whatever it is that you don’t like…then take another shot. Don’t move on til you have the photo you want.
10. Simple angles are usually the best. Interiors are pretty straightforward, and people don’t usually look at house tours to see some avant-garde photography--they want to see the room itself. I personally hate fish-eyed photos where the edges look distorted. I also hate when people try to shoot things from “interesting” angles that are too distracting. It’s fine to try some photos from a different point of view--from directly above, from an angle, etc. But if you try to get too artsy, either with the angle or with some crazy filter, I can almost guarantee it won’t turn out as well as if you just kept it simple.
I hope this post was helpful! Feel free to leave a comment with any questions your have. I’ll do my best to answer them. And if you have your own tips (or if you disagree with mine), I’d love to hear about that too!
06
There’s nothing more irritating than getting changed into comfy clothes, popping some popcorn, and getting all settled in to watch a movie, only to spend an hour going through the Netflix “Watch Instantly” section and finding nothing that looks good (or that you can agree on). Well, if you run into that situation this weekend, I have a few suggestions for you!
1. Miss Pettigrew Lives for a Day: I just saw this movie this week, and loved it! The storyline is super cute and charming, and the 40s backdrop is beautiful too. / 2. My Week with Marilyn: I thought this movie was really interesting, although Ben totally fell asleep in it…I think he was just really tired :) / 3. Psych: This isn’t a movie, it’s a TV show--and it’s one of our favorites! It’s like The Mentalist, but suuuuper funny. / 4. Life is Beautiful: If you’ve never seen this movie before, you absolutely have to. It’ll make you cry for sure, but it’s also heartwarming and beautiful. / 5. Safe Haven: I’m a sucker for anything by Nicholas Sparks. I read the book and really liked it, so of course I had to watch the movie too! / 6. Turbo: If you’re looking for something a little more light-hearted, we both really liked Turbo. / 7. I Give It a Year: This movie was also really funny, although the message wasn’t necessarily a feel-good one. But Simon Baker is in it, so...
Have you seen any of these? What was your opinion of them? Do you have any gems to suggest from Netflix Instant?
P.S. A few other links from this week that I wanted to share:
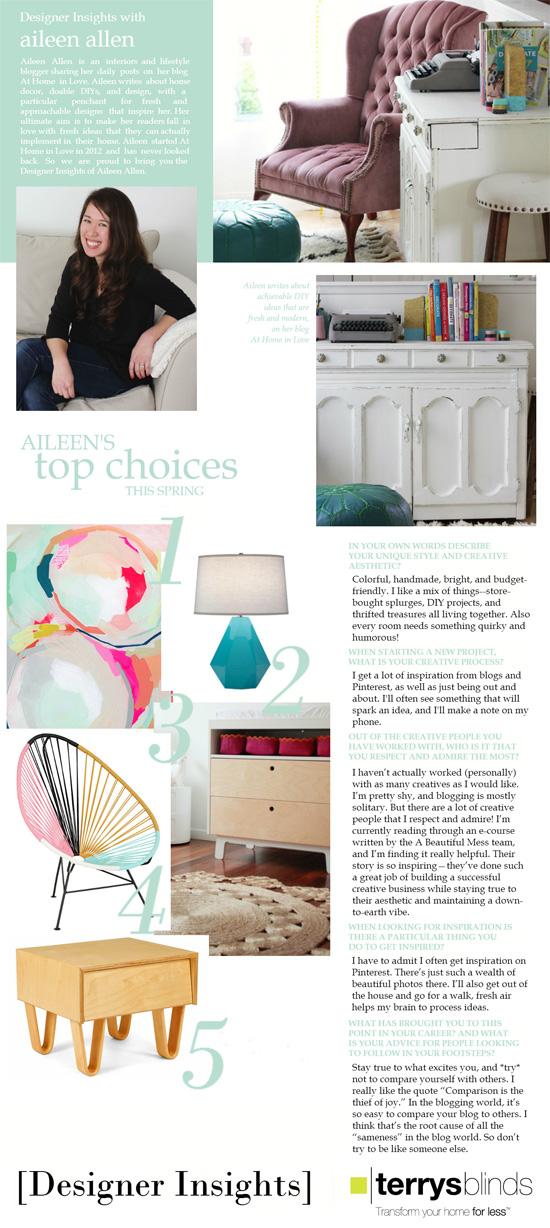
I was featured on Terrys Blinds' Designer Insights series, where I shared my top 5 picks for this season, as well as a little bit about my creative process.
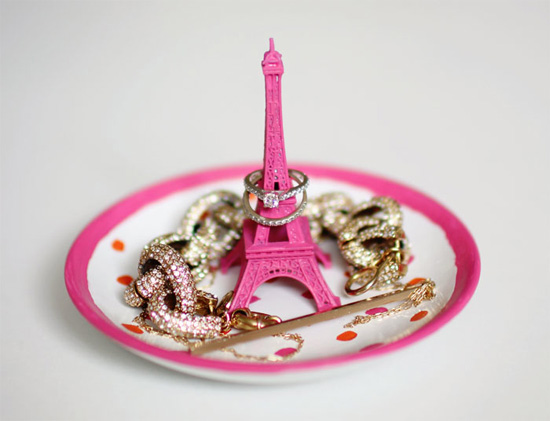
I shared this sweet little DIY project on This Little Street (one of my favorite blogs)…an Eiffel tower ring dish!
Happy weekend, everyone!
05
You guys! I have an awesome company to introduce you to today, as well as a giveaway (yay!). But first, I wanted to share with you all how I make homemade Italian sodas. I’ve always loved Italian sodas, and when the weather starts getting nicer I’ll often crave them…especially on really hot days. There’s a coffee shop near our house that makes them, but they’re almost $4 a cup, which can add up quickly. So I make my own! It’s really not hard at all, and the ingredients are pretty cheap. The syrup is the most expensive part, and it’ll last you for quite a long time. Once you’ve mastered how to make these, I bet you’ll be whipping them up all the time!

I think the key to a good Italian soda is to use ginger ale instead of club soda. It gives it more of a bite and makes it more refreshing! But most recipes call for club soda, so you can use that too…just promise me you’ll at least give my way a try :)
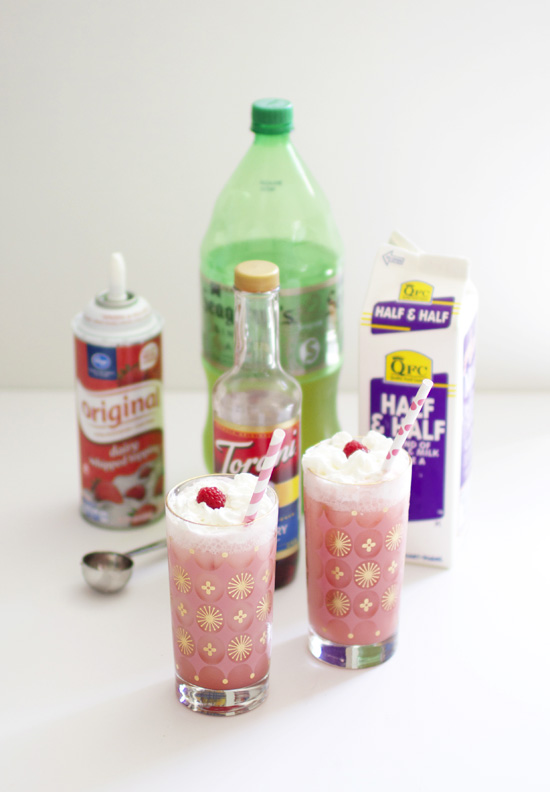
Here’s what I do:
Put 1.5 Tbsp of flavored syrup in the bottom of the glass. My favorite is Torani raspberry syrup, which you can buy at the grocery store. It’s also on Amazon if your grocery store doesn’t carry it.
Place a few ice cubes in the glass (fill about a third of the way up).
Pour ginger ale til there’s about 1" of room at the top of the glass.
Splash in some half and half (about 1 Tbsp).
Stir together, and top with whipped cream.
Add a cute straw and enjoy!

That’s it! See, super easy, super yummy, and totally budget-friendly. I was going to try to come up with a sexy cocktail recipe for you guys, but honestly, I’m so tame. Haha! So I figured I should stick with what I know. Hope you get a chance to try making some homemade Italian sodas sometime! Tell me if you do.
And now for the part you’re really going to be excited about….

A giveaway! Did you notice those beautiful glasses that my Italian sodas were in? They’re from Bombshell Bar Goods and I just loooove them. In fact, I love everything on Bombshell Bar Goods’ website. They have the most chic glassware and ice buckets. And lucky you, that’s exactly what we’re giving away today: one set of Yours and Mine glasses and one Band of Gold ice bucket. So you’ll never get your drinks mixed up again! Enter using the Rafflecopter below.
Thanks to Bombshell Bar Goods for partnering with me on this giveaway!
- Search
- Archives
