31
Gah, you guyyysss. I can hardly believe that tomorrow is the first day of 2015! This year has seriously flown by. But it’s been a good one…lots of fun stuff here on At Home in Love, new jobs for both Ben and I, and we got two (adorable) new nieces this year. As good as this year has been, I have a feeling next year is going to be even better. The first thing I’m really excited for is our trip to Europe. Yep, we fiiinalllllyyyy bought tickets, after (literally) talking about it for years! I am super pumped. I’ll probably do a post a little later on when we have more of the details sorted out, to get all of your advice and recommendations. I’m also hoping we’ll have enough saved to start the house-hunting process, and I have lots of plans for this ol’ blog too. What are you looking forward to in 2015? I’m not big on resolutions, but I am a big fan of having goals and writing them out. I might share mine with you guys a little later, if you’re interested. But first, before we totally move on with our lives, I thought I’d share my top 20 blog posts from 2014 (according to Google Analytics)! The funny thing is, the top few posts are actually from 2013. I guess that shows that blog posts have a pretty long shelf life! Or maybe that my posts from 2014 weren’t that great…haha. I’m going to go with the former!
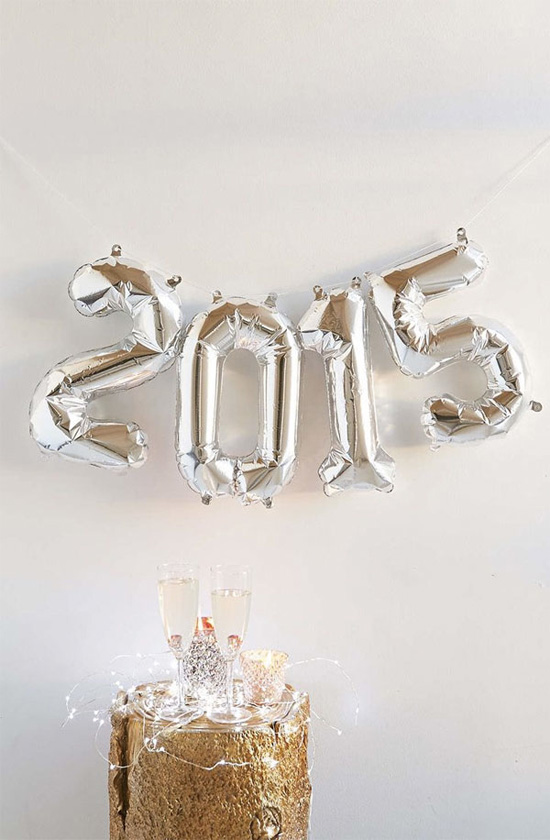
Image via Apartment 34
Top 20 Blog Posts of 2014:
1. DIY Mini Caramel Apples
2. 10 Tips for Decorating a Rental
3. 5 Creative Ways to Hang Artwork Without a Frame
4. How To Make 3D Snowflakes
5. 13 Creative Wall Ideas
6. 5 Tips for Choosing Bedding
7. DIY Kraft Paper Grocery List
8. 15 Fabulous Free Fonts
9. 15 Favorite Free Fonts
10. English Roll Arm Sofas
11. DIY Craft Storage House
12. DIY Polka Dot Fridge
13. Vintage Moroccan Rugs
14. Creative DIY Drawer Pulls
15. Wallpapered Fridges
16. DIY Shelves with Belt Straps
17. 12 Free Fonts for Holiday Cards
18. DIY Gemstone Magnets
19. DIY Liberty Lampshade
20. DIY Paint Stick Mini Pallets
Did you have a favorite blog post from 2014? Or is there anything you’d like to see more of next year? I’d love to hear!
And last but not least, Happy New Year!!! I hope you all have a super fun NYE, whether you’re going out and partying it up or staying in with some champs and sweats. We’ll be heading over to our friends’ house and playing games, so it will be pretty chill (just the way we like it). I’ll see you next year!

23
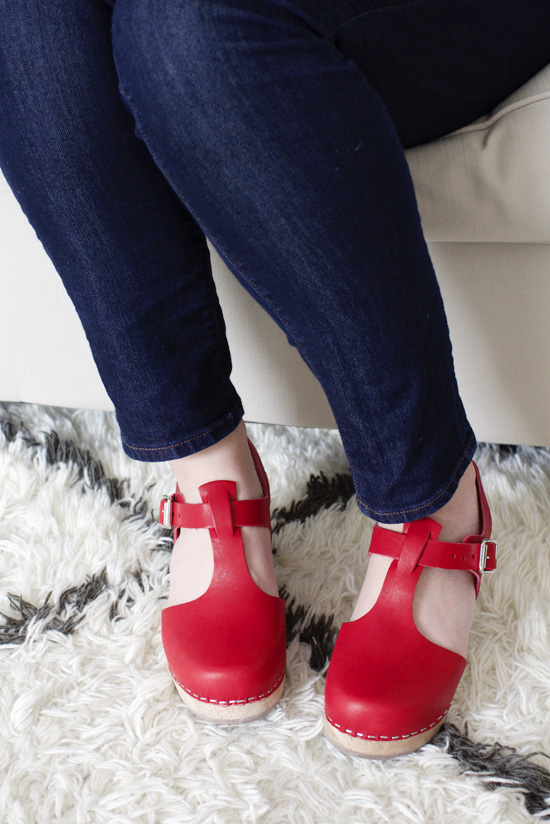
Remember when I talked about trying to figure out my personal style? Since that post, I’ve been making an effort to buy more clothes that are colorful and cheery and make me smile. This outfit is one of my new favorites. I probably shouldn’t admit this, but I wore it twice last week--once to work, and once on the weekend! It’s okay as long as I didn’t see any of the same people...right?

I’m especially obsessed with my new red clogs from Lotta. They’re so cute and super comfy.
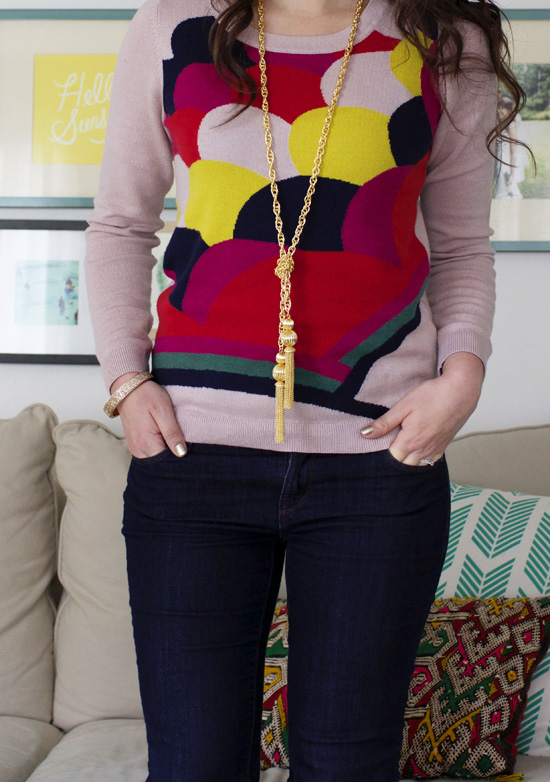
I’m also kiiind of in love with this sweater from Boden…and how cute is the tassel necklace from Lisi Lerch?

So, what outfit have you had on repeat lately? Remember, you can always make any outfit truly your own with a few extra accessories, like frames from www.eyeglasses.com or other unique touches!
22
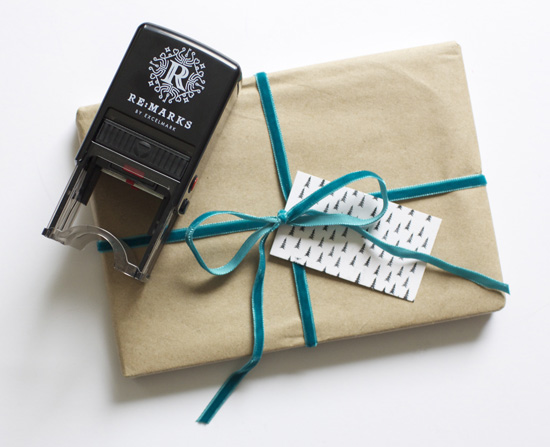
I’m going to be honest with you guys…I hate wrapping presents. I can never get it to look all neat and pretty, and it frustrates me to no end. So I either use gift bags so I can avoid wrapping altogether, or add cutesy elements to distract from my lackluster wrapping skills. Lucky for me, wrapping things in brown paper and adding cute embellishments is totally on-trend right now! It's also perfect for last-minute procrastinators and cheapskates who don't want to go out and buy wrapping paper (I fall into both categories). Just grab some paper bags from the grocery store! And there are about a million and one ways to dress up those brown paper packages. Some ideas are more elaborate, but since there isn’t much time left before Christmas, I decided to keep it simple and create some easy stamped gift tags. You could pound out a bunch of these in just five minutes. Or you could stamp the paper itself and create your own custom gift wrap!

To make these, I used a Re:Marks stamp mount. It's seriously awesome, because the ink is contained within the mount itself so you don’t have to use a separate ink pad. And the die plates are interchangeable, so you can use the same mount for an unlimited number of stamps! Check out their blog post to see how it works.
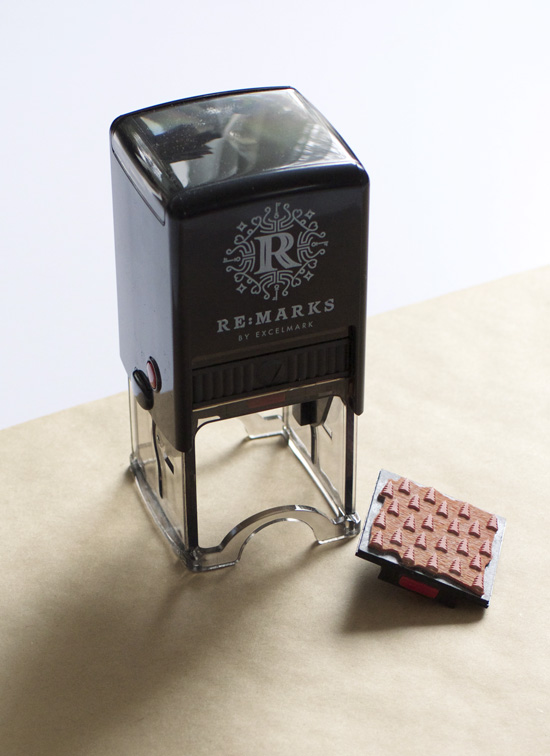
The stamp comes with a cute “thank you” stamp as the default, and a code to get your own personalized stamp design. They have a bunch of pre-designed options, like address stamps and monograms that you can customize with your own information. Or you have the option to upload your own design. Since I’m totally obsessed with these Scandinavian trees, I ordered a stamp with the same pattern.
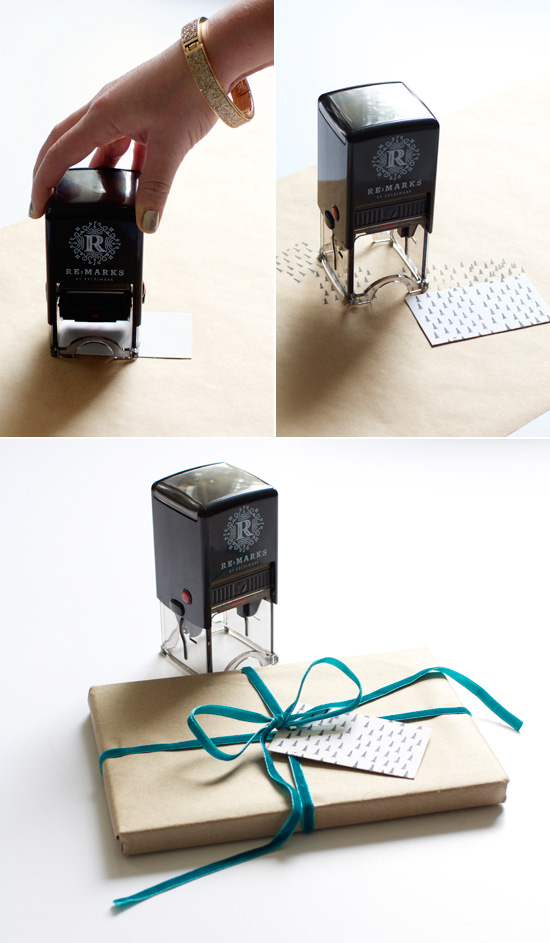
I used some leftover blank business cards (from this post) for the gift tags. Once they were stamped, I simply hole punched one side and tied them onto the package with ribbon. Easy peasy!
I am truly in love with how clean and easy the Re:Marks is to use, and I love the customization option--I already have a few more stamp designs on the way! I wanted you guys to see how awesome they are as well, so today I’ve partnered with RubberStamps.com to give away FIVE Re:Marks stamp mounts. I’m super excited that there will be five winners…so your chances are pretty dang good! Enter using the Rafflecopter below.
How are you wrapping your gifts this year? And what would you get for your custom stamp, if you win the giveaway?
P.S. Speaking of giveaways...we're almost to the end of 24 Merry Days!! Have you been entering all the giveaways? There are still quite a few that are open, including a Drop kitchen scale and an iPad mini on Sugar and Charm, an Instax camera on This Little Street, and a $200 gift card to Lint & Honey on A Thousand Threads.
Thanks to RubberStamps.com for partnering with me on this post!
11
I've been obsessed with the Scandinavian tree pattern on the pillows from my Artsy Modern giveaway (which you can still enter, by the way)! So I came up with this project. I think these trees are the perfect way to add some winter festivity in a subtle, modern way. You know I’m all about simple, easy seasonal updates...
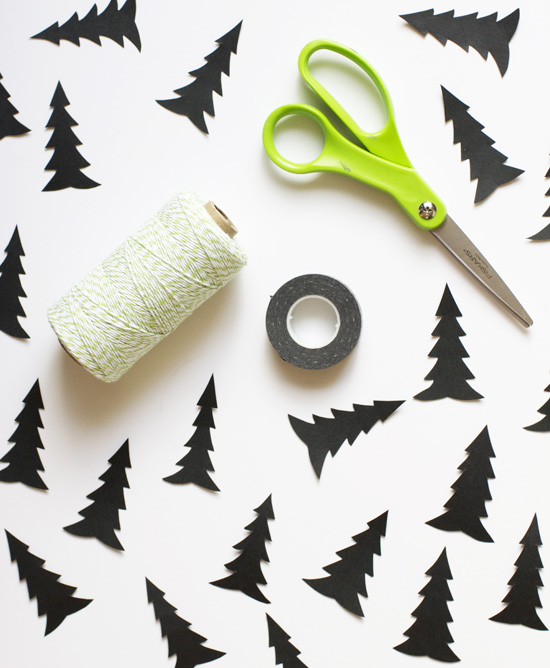
To make this garland, I simply cut the trees shapes out of black cardstock with scissors. Each one turned out a little different, which is fine by me. Perfection is boring, right?
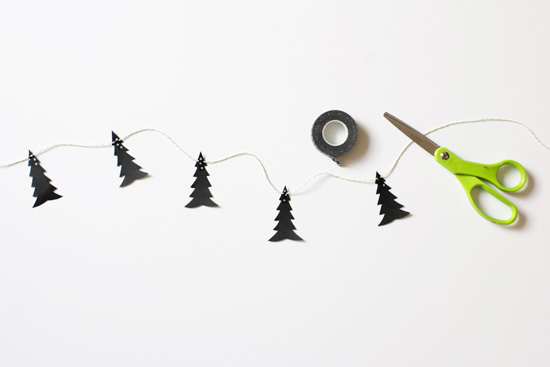
Instead of punching holes into the shapes, I decided to tape them to keep the look clean. I used small strips of black washi tape and spaced the trees out evenly (or close enough).
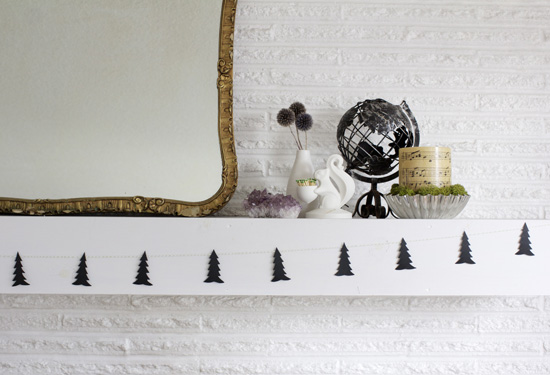
Once I was done, I hung the garland up with the tape side on the back.

EASY! Plus, I love that while this garland is kind of Christmas-y, it wouldn’t be weird to keep it up year-round.
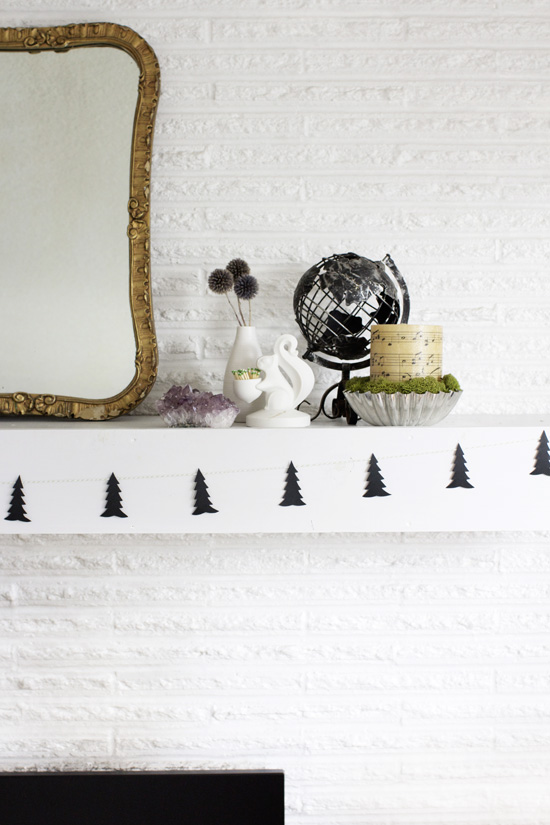
What do you think? Are you digging this Scandinavian tree pattern as much as I am?
P.S. Head over to Shrimp Salad Circus to enter today’s 24 Merry Days giveaway…it’s Julep!
- Search
- Archives
