30
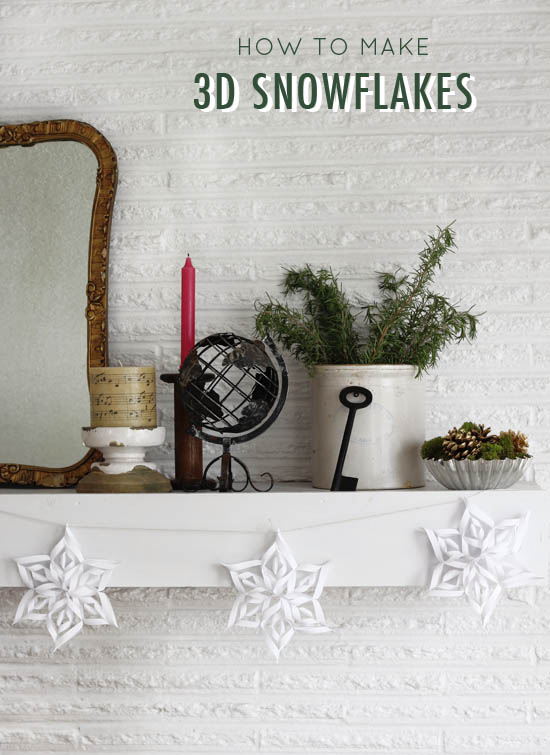
Seattle has really been slacking in the snow department--we've only had one snow day this year, and it was all melted by mid-afternoon! So for Christmas, I made some 3D snowflakes so we could still have a "white Christmas" of sorts. I learned how to make these from a girl at my work, so maybe everyone already knows about them...but they were new to me! I think they're pretty cool and a little more special than the flat cut-out snowflakes that I'm used to. Plus, I love DIY projects like this, where you already have all the supplies at home. Snowflakes make great decor all winter long (and technically, winter just began a week ago...isn't that weird?). I think some big versions of these would be really cool for a photobooth backdrop at a winter wedding, or--hey--a New Year's party!
You will need:
white printer paper (or whatever color you'd like to make your snowflakes)
scissors or a paper cutter
glue (I used this eco-friendly craft paste made 100% from recycled styrofoam)
a stapler
a hole punch
string, ribbon, or something to hang the snowflakes with
mini clothespins (optional)

Cut six equal sized squares out of the paper. If you have a paper cutter, you can measure and cut a stack all at once--or if you just have good old fashioned scissors, the easiest way is to fold your paper in half diagonally and cut off the excess at the bottom. This works perfect since you'll be folding them that way anyways. Each square will be one arm of your snowflake, so using one sheet of printer paper per square will yield a pretty big snowflake! For the snowflake over my mirror, I did two squares per sheet of paper (I cut the paper in half “hamburger style" first), and for the smaller snowflakes in the garland, I was able to get six squares per sheet of paper.
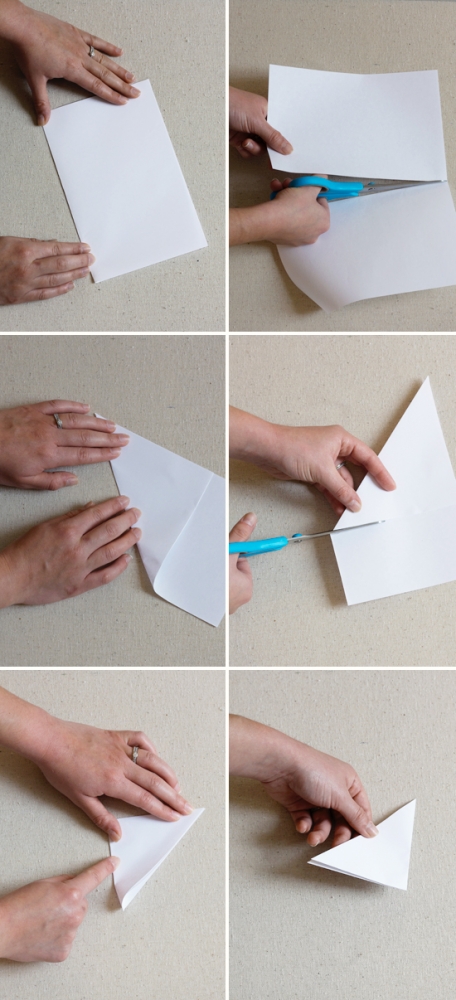
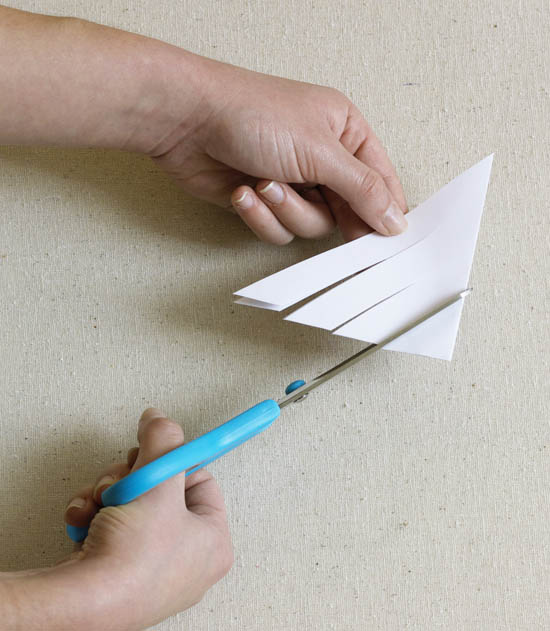
Fold each square in half diagonally once, then in half diagonally again. Hold the folded triangle so that the longest side is facing to your left and the two folded flaps are at the bottom. Cut three lines parallel to the left edge, not quite cutting through to the top. Try to keep an equal distance between each cut. I just eye-balled this step but you can also measure if you prefer.
Unfold your triangle. It should look like the photo below--if not, you've cut on the wrong side. Cut the rest of the triangles in the same way.
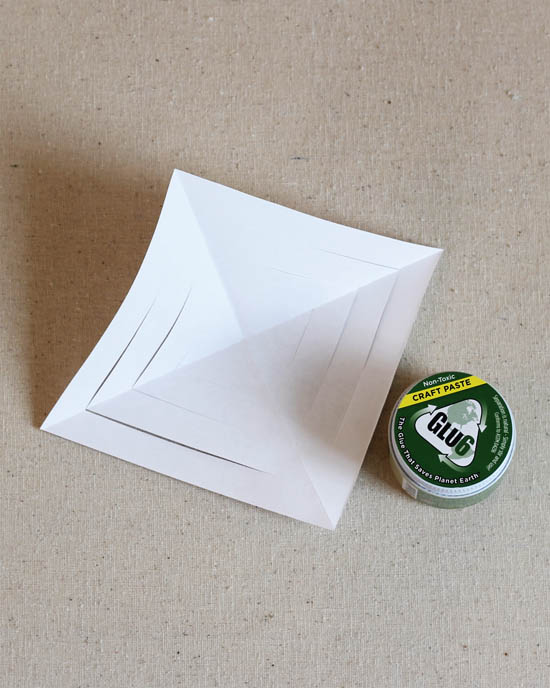
Roll the two innermost flaps together to form a tube, put a dot of glue on one side, and press together. The Glu6 craft paste that I used was pretty thick and strong, which worked great--but if your glue is runnier and you're impatient, you could use mini clothespins to hold the two flaps together while the glue dries. Glue dots also work well, or you could use clear tape too.
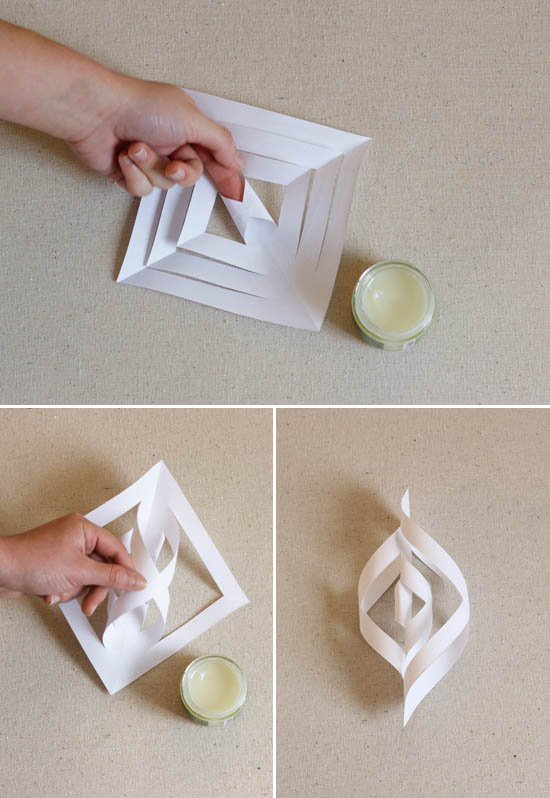
Once the first two flaps are glued together, flip the square over and roll the next two flaps together, gluing them in place. Alternate sides until all the flaps are rolled together and secured with glue (see above). This forms one arm of your snowflake. Repeat with the rest of the squares.
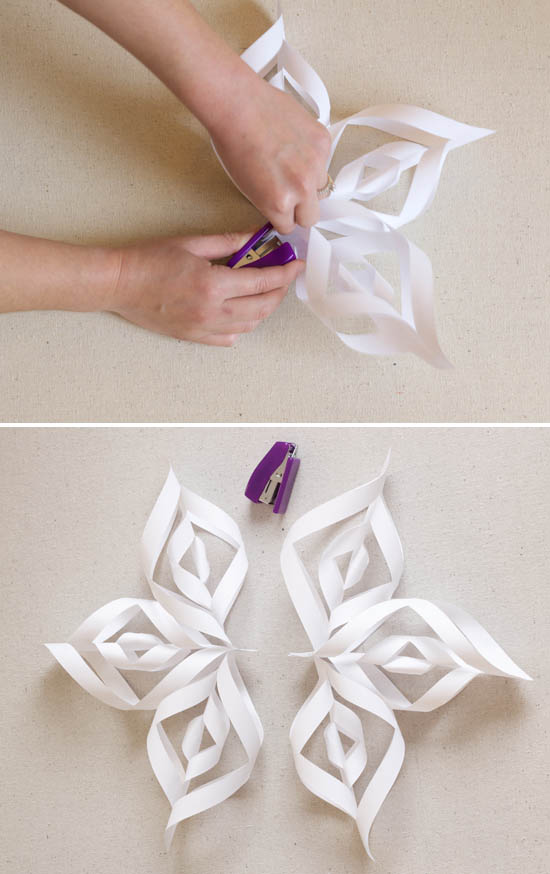
Once all six arms are made, you're ready to assemble your first 3D snowflake! Gather three of them in one hand and staple them together at the bottom. You'll notice that one side of each arm is smaller than the other, so alternate small sides with big sides so it looks pretty even. Do the same thing with the other three and staple together at the bottom.
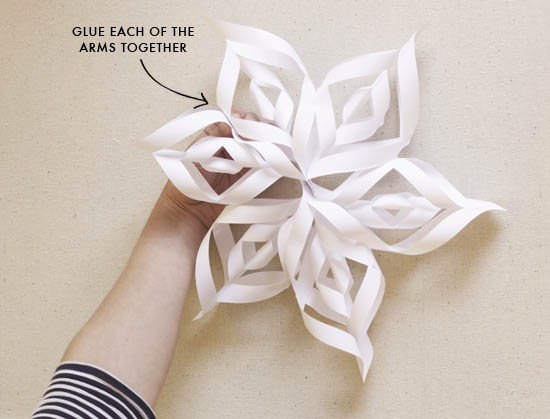
Take your two sides and hold them together, so the bottom flaps are overlapping. Staple one more time. Your snowflake is almost complete! The last step is to secure the arms to each other. Just put a dot of glue where each of the arms meet and pinch them together. Voila! You're done!! If you want to make a garland or hang more than one of these, repeat these steps to make as many snowflakes as you want.
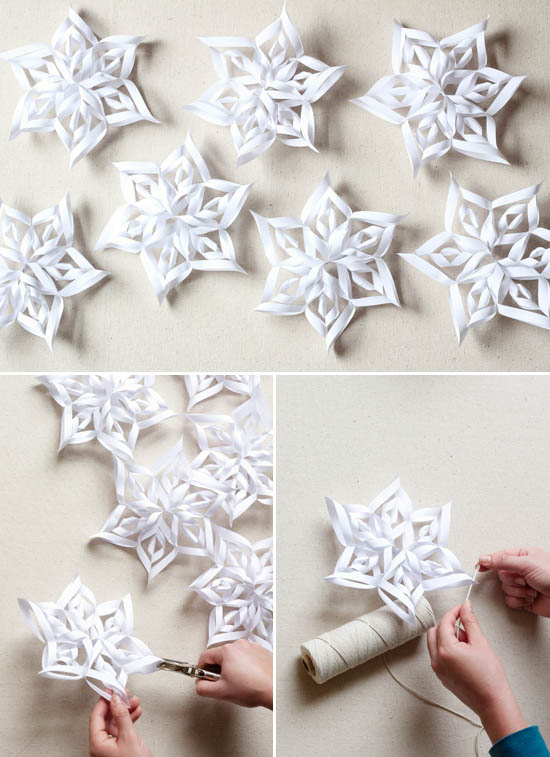
For the garland, simply punch holes at the top of each snowflake and thread your string through the holes. Easy peasy (and super cheap) winter decor!
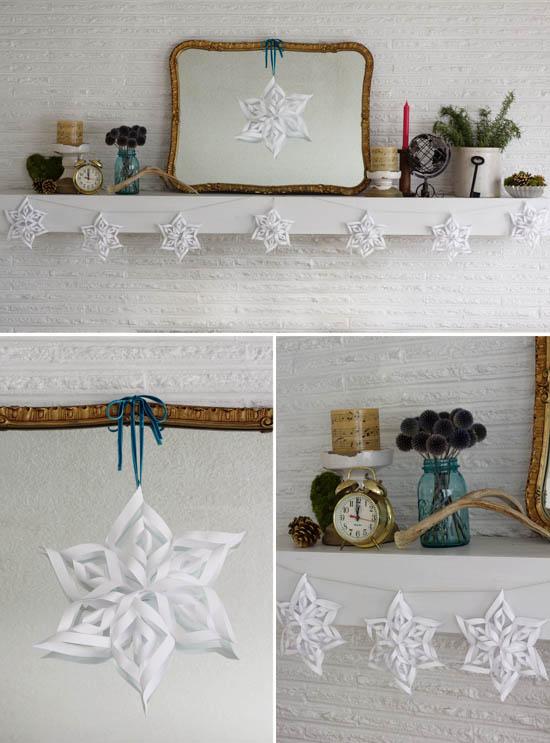
I know that seems like a lot of steps, but I promise once you get the hang of it, you can make a bunch of these really fast. I made this entire garland during half a movie.
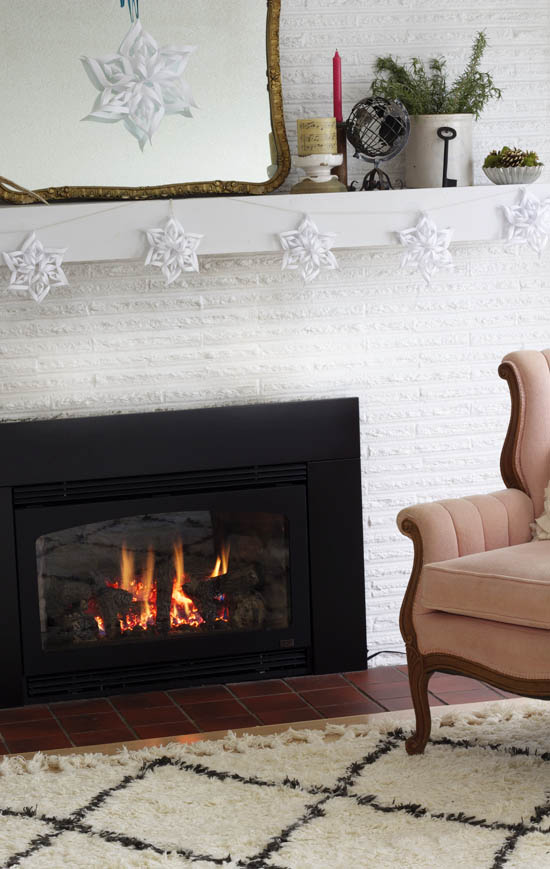
You can also see my new rug in the photo above. It finally came…and the living room is much cozier now!
Have you ever made 3D snowflakes? This would be a great project to do with kids, especially if they’re home and getting bored on winter break. And you won't even have to leave your house to gather the materials!
This post was written in partnership with Nine Lives Products.





LOVE THESE! We had snowflakes every year...on the first day of snow we had a snowflake "party", making them for our window. I have never seen these 3D flakes. Perfect! They look so lovely on your mantle. Your rug is also perfect! :)
Thank you, Debbie! A snowflake party sounds like a blast. I'm glad you like the rug too!
Cute Aileen! I think we need some of those. I'll put Leah right on it! : )
Let me know if you make them!! (or if Leah does)
These would be really pretty hung over the Christmas tree from the ceiling on fishing line. That way you don't see the string.
True! That's a great idea.
Beautiful craft project. Can't wait to try it!
This is perfect to make snowflakes for my 5 year old daughters room. We are doing it in Frozen and I just know that she will like this. They look simple and easy to make.
Thamks
Aww, yes! They will be perfect for a Frozen themed room!!
Thank You so much for showing me how to make the 3-D ornament. I loved these from the first time I saw one but with all my searching have never found one that explains the How To so nicely.
Thank you for sharing your talent with others, you have made my day.
Aww, thank you Elaine! I’m so glad you found the instructions easy to follow. Enjoy your ornaments!
Wonderful tutorial, thank you very much! :-)
Aww thank you, Vendula! I'm glad you found it useful.
I can not wait to make more. This was fun. My teacher had made some and then she had sowed use kids how to make it if we woned to leran how to.
Aww, so glad to hear that Evve!! xo
This was awesome
These are great
Aww, I'm glad you enjoyed making them!